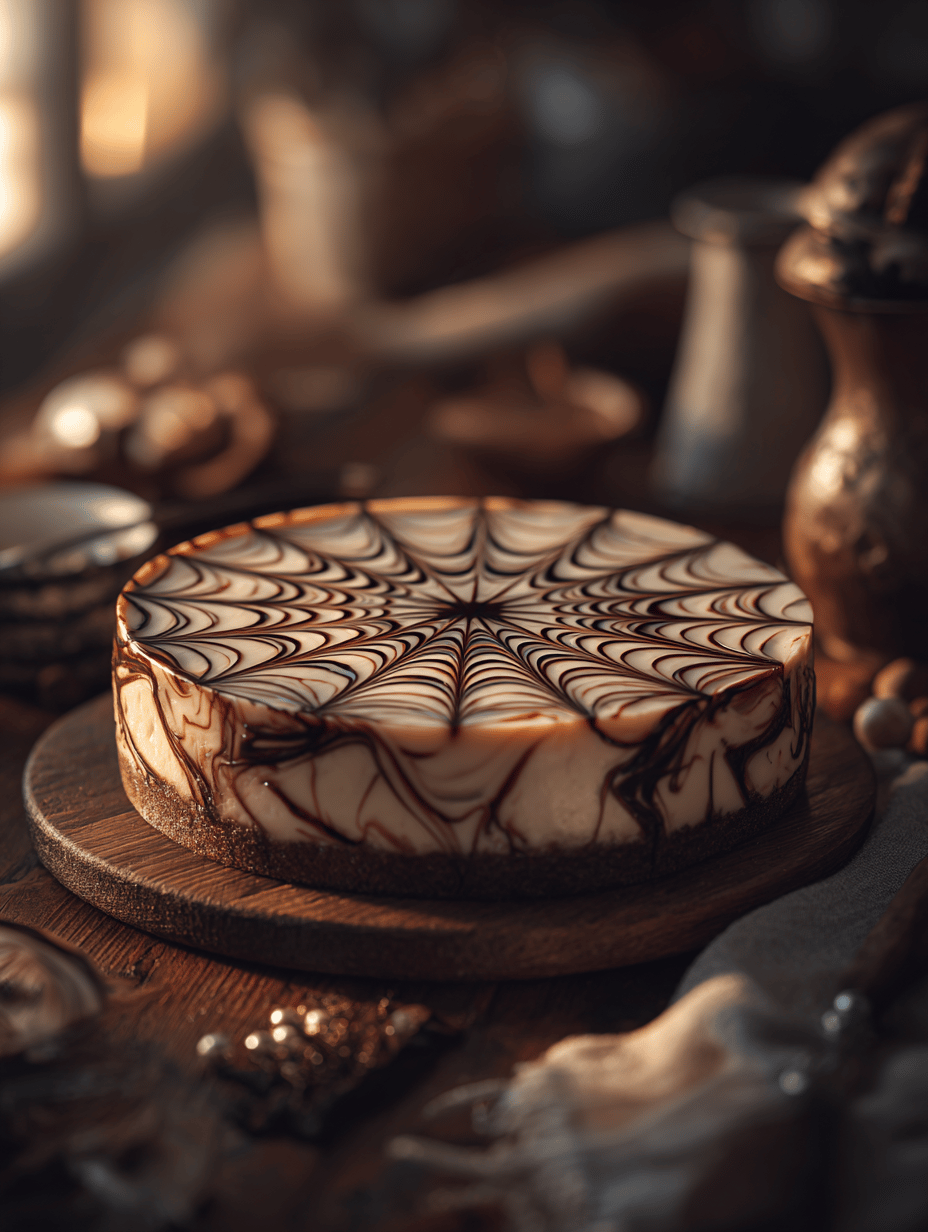
Baking a spiderweb cheesecake feels like a quiet act of rebellion—an intricate design that’s surprisingly forgiving. It’s perfect for when you want to impress without fussing over complicated decorations. The web pattern adds a touch of whimsy, making it great for casual gatherings or a spooky holiday treat. Plus, it’s a way to channel some creative chaos into the kitchen.
Why I Keep Baking This Cheesecake
It’s a reminder that even the simplest ingredients, when combined with patience and a splash of creativity, can create something unexpectedly charming. The web pattern is a slow, mindful process that feels soothing in chaos. Sharing it feels like giving a little piece of art, a tiny rebellion against the usual round desserts.
What’s in This Web of a Cheesecake?
- Digestive biscuits: Oaty, slightly sweet base that gives texture and a nutty flavor.
- Butter: Rich, melted butter binds the biscuit crumbs; skip if dairy-free.
- Cream cheese: The creamy core of the cheesecake, slightly tangy and smooth.
- Sugar: Sweetens the filling; can be adjusted for sweetness.
- Eggs: Bind everything together; room temperature helps.
- Sour cream: Adds tang and creaminess; substitute with Greek yogurt if desired.
- Chocolate sauce or sour cream for web: For the web pattern; opt for rich chocolate or tangy sour cream.
Tools That Make the Spiderweb Dream Real
- Springform pan: For easy removal and a clean edge.
- Mixing bowls: To beat and fold your ingredients smoothly.
- Electric mixer or whisk: To achieve a fluffy, fully combined filling.
- Piping bag or plastic sandwich bag: To pipe the web pattern neatly.
- Offset spatula or butter knife: To smooth the top and create patterns.
Step-by-step to Achieve the Perfect Spiderweb Design
Step 1: Preheat your oven to 170°C (340°F).
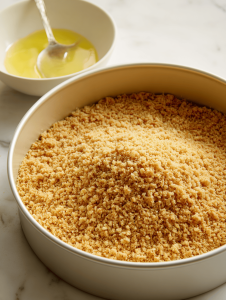
Step 2: Mix crushed digestive biscuits with melted butter until crumbly.
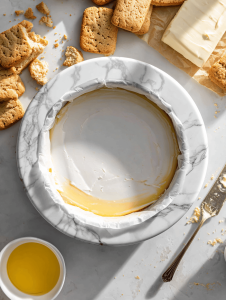
Step 3: Press the mixture into a 20cm (8-inch) springform pan to form the crust.
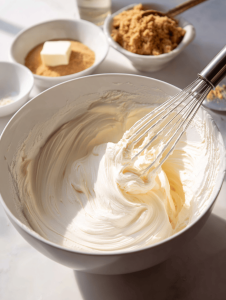
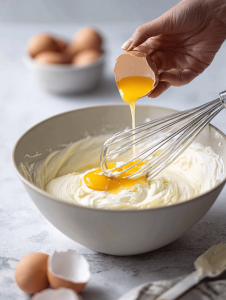
Step 4: In a bowl, beat softened cream cheese with sugar until smooth and fluffy.
Step 5: Add eggs one at a time, then fold in sour cream and vanilla.
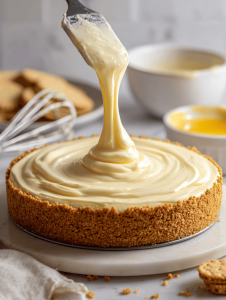
Step 6: Pour the filling over the crust and smooth the top.
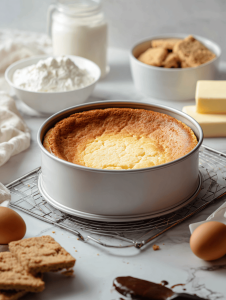
Step 7: Bake for about 50-55 minutes until the edges are set but the center jiggles slightly.
Step 8: Remove from oven and let cool completely in the pan.
Step 9: Chill in the fridge for at least 4 hours or overnight.
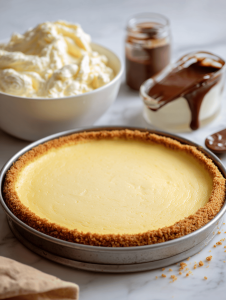
Step 10: Just before serving, create the spiderweb pattern with sour cream or chocolate sauce.
Cooking Tips & Tricks for a Flawless Spiderweb
- Ensure the cream cheese is softened for smooth mixing.
- Watch the cheesecake edges during baking; if they brown too quickly, cover with foil.
- The pattern works best when the cheesecake is fully chilled; patience pays off.
- Use a piping bag or a plastic sandwich bag with the tip cut off for precise web designs.
Avoid Common Pitfalls with These Fixes
- Lumpy filling.? Use softened cream cheese; cold cheese causes lumps.
- Over-baked edges.? Cover edges with foil if they brown too fast.
- Web pattern smudges.? Chill thoroughly before piping to prevent smudging.
- Uneven baking.? Pace your baking; don’t open the oven mid-way.
Spiderweb Cheesecake
Ingredients
Equipment
Method
- Preheat your oven to 170°C (340°F).
- Mix the crushed digestive biscuits with the melted butter until evenly coated and crumbly.

- Press the buttery biscuit mixture into the bottom of a 20cm (8-inch) springform pan, creating an even, firm crust.

- In a large bowl, beat the softened cream cheese with the sugar until smooth and fluffy, and you hear a gentle whir of the mixer.
- Add the eggs one at a time, mixing well after each addition, until the mixture is creamy and slightly thickened.
- Fold in the sour cream gently until just combined, maintaining the smooth texture of the filling.
- Pour the filling over the prepared crust in the springform pan and smooth the top with an offset spatula or butter knife.

- Bake the cheesecake in the oven for about 50-55 minutes, until the edges are set but the center still jiggles slightly when gently shaken.
- Remove the cheesecake from the oven and let it cool completely in the pan on a wire rack, which helps prevent cracking.
- Once cooled, chill the cheesecake in the fridge for at least 4 hours or overnight to set fully.
- Before serving, fill a piping bag or plastic sandwich bag with chocolate sauce or sour cream, and pipe concentric circles starting from the center outward on the chilled cheesecake.
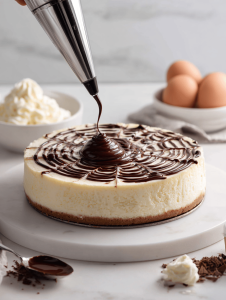
- Using a toothpick or skewer, draw lines from the center to the edges, creating a web pattern that resembles a spiderweb.
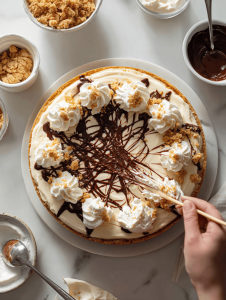
- Slice and serve this whimsical cheesecake, enjoying the creamy texture and artistic web decoration that makes it a perfect spooky treat.
Notes

Hi, I’m Grace Morgan, and welcome to my kitchen. This is a space shaped by family meals, curious hands reaching for snacks, paws under the table, and recipes that come together in the middle of real life. I’m a food blogger, a mother, and a passionate pet keeper. Most days, I’m cooking with one eye on the stove and the other on someone who needs me, whether that’s a child asking for a taste or a dog hoping something might fall.


