These no bake hazelnut bites take me straight back to childhood afternoons spent snacking on sweet, crunchy treats. There’s a nostalgic rush in the simplicity—just nuts, chocolate, and a touch of honey—but I’ve tweaked them to feel a little more grown-up, a little more health-conscious. It’s the kind of snack I keep in the fridge for when I need a quick hit of comfort without the fuss of baking.
Making these doesn’t require any special skills or fancy ingredients, just a little patience and a good eye for that perfect texture. They come together fast, which is a relief when I’m craving something sweet but don’t want to wait around for the oven to warm up. Plus, they’re so versatile—crunchy, fudgy, with that rich hazelnut aroma that fills the kitchen and makes everyone ask for more.
Focusing on the nostalgic comfort of childhood treats, but with a modern, health-conscious twist that makes these bites feel both indulgent and guilt-free.
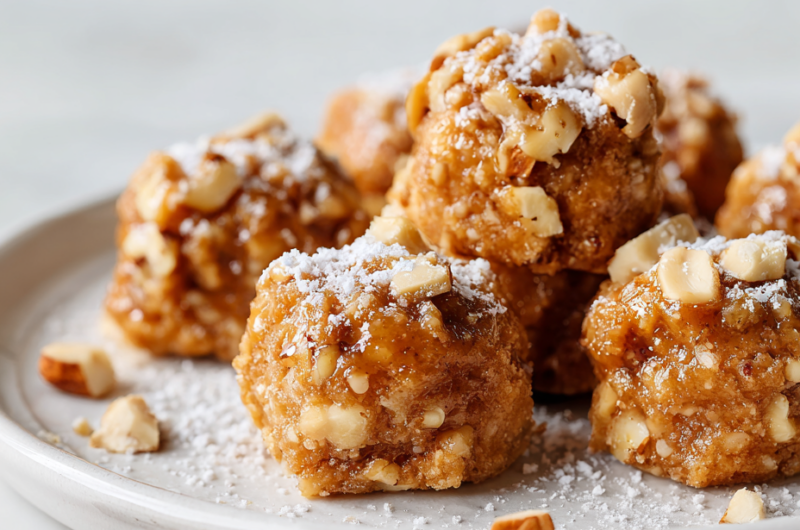
Nostalgic Nutty Bites
- These bites bring back childhood afternoons, simple and sweet, wrapped in a crunchy hazelnut shell.
- I love how quick and fuss-free they are—perfect for when I need a sweet fix without turning on the oven.
- Every time I make them, I feel a little proud of creating something so delicious with just a handful of ingredients.
- There’s a quiet joy in the rich, nutty aroma filling the kitchen as they set in the fridge.
- They remind me that sometimes, the best treats are the simplest ones, made with love and a bit of patience.
The story behind this recipe
This recipe was born out of a lazy afternoon when I wanted something sweet but didn’t want to mess with melting chocolate or turning on the oven. I remembered those childhood hazelnut treats I loved—crunchy, nutty, a little sweet—and thought, why not make a simpler, no-bake version? The first batch was a bit rough around the edges, but once I got the ratios right, they became my go-to quick fix. Now, I keep a stash in the fridge, especially during busy weeks when I need a little indulgence that’s honest and straightforward.
Trivia and Historical Roots
- These bites echo a 1980s trend of turning traditional chocolate-hazelnut spreads into quick, no-fuss snacks for busy households.
- They’re inspired by European pralines, simplified for home kitchens—crunchy, rich, and utterly addictive, without the fuss of tempering chocolate.
- The use of hazelnuts in snack bites surged in popularity with the rise of nut butters and health-conscious eating in the early 2000s.
Ingredient breakdown
- Hazelnuts: I love the roasted, smoky aroma they develop, which adds depth. Toast them lightly for extra crunch and flavor, then chop finely to keep the bites uniform.
- Dark chocolate: I prefer a bittersweet bar that melts smoothly, giving a rich, slightly bitter counterpoint to the nuts. Use good-quality chocolate for that glossy finish and deep cocoa flavor.
- Honey: It’s the glue that gives these bites a gentle sweetness and helps them set. If you want a milder taste, swap for maple syrup, but expect a slightly different aroma.
- Coconut oil: I use a tiny splash to help everything bind together and add a subtle richness. Keep it melted but not hot to avoid greasing the mixture too much.
- Salt: Just a pinch enhances the chocolate and nut flavors. For a caramelized note, sprinkle flaky sea salt on top before chilling.
- Optional add-ins: Dried fruits or seeds add texture, but I keep it simple to let the hazelnuts and chocolate shine.
- Alternative nuts: If hazelnuts aren’t available, almonds or cashews work well, though they’ll change the flavor profile slightly.
Spotlight on Key Ingredients
Hazelnuts:
- I love the roasted, smoky aroma they develop, which adds depth. Toast them lightly for extra crunch and flavor, then chop finely to keep the bites uniform.
- They bring a rich, nutty flavor and a crunchy texture that contrasts beautifully with the smooth chocolate. Keep an eye on their toasty aroma as a sign they’re ready.
Dark chocolate:
- I prefer a bittersweet bar that melts smoothly, giving a rich, slightly bitter counterpoint to the nuts. Use good-quality chocolate for that glossy finish and deep cocoa flavor.
- It adds a deep, cocoa-rich flavor and a silky texture when melted. Look for a bar with at least 70% cacao for the best balance of bitterness and sweetness.
Notes for ingredient swaps
- Dairy-Free: Swap regular chocolate for a dairy-free dark or vegan chocolate. Expect a slightly different melt and flavor profile, but still rich.
- Sweetener: Replace honey with maple syrup or agave nectar for a milder, less floral sweetness. Keep in mind they may alter the texture slightly.
- Nuts: If hazelnuts aren’t available, almonds or cashews work well. They change the flavor but keep the crunch satisfying.
- Oil: Coconut oil can be replaced with a neutral oil like avocado or light olive oil. It won’t impact flavor much but may affect firmness slightly.
- Add-ins: Dried fruits or seeds can be added for texture. Use sparingly if adding moist ingredients to prevent sogginess.
- Chocolate: For a lower cacao content, use semi-sweet or milk chocolate, but expect a sweeter, less intense cocoa flavor.
- Texture Boost: For extra crunch, toss in toasted coconut flakes or crispy rice cereal before forming the bites.
Equipment & Tools
- Mixing bowl: To combine ingredients and hold the mixture.
- Baking sheet: To set the bites in the fridge.
- Parchment paper: To prevent sticking and make cleanup easier.
- Small saucepan: For melting chocolate and honey gently.
- Spatula: For stirring and folding ingredients.
- Cookie scoop or spoon: For portioning out the mixture evenly.
Step-by-step guide to hazelnut bites
- Gather all equipment: a mixing bowl, a baking sheet, parchment paper, a small saucepan, and a spatula. The bowl is for mixing, the saucepan for melting, and the sheet for setting.
- Roast the hazelnuts at 180°C (350°F) for 10 minutes, shaking halfway through. They’ll smell smoky and nutty, and skins might loosen.
- Let hazelnuts cool slightly, then rub them in a tea towel to remove skins if preferred. Chop finely, aiming for a uniform texture.
- In the saucepan over low heat (about 50°C/122°F), melt the dark chocolate with a teaspoon of coconut oil. Stir until smooth and glossy, smelling rich and cocoa-y.
- Add honey and a tiny pinch of salt to the melted chocolate, stirring to combine. The mixture should be oozy and fragrant.
- Remove from heat, then fold in chopped hazelnuts until evenly coated. If mixture hardens, gently rewarm over low heat, stirring to loosen.
- Line the baking sheet with parchment paper. Using a spoon or small cookie scoop, portion out the hazelnut-chocolate mixture into small mounds.
- Press each mound gently to flatten slightly or shape into bites. Refrigerate for at least 30 minutes until firm and set.
- Once set, check the texture: they should be firm but still slightly chewy inside, with a shiny exterior. If too sticky, chill longer; if crumbly, rewarm slightly.
- Serve directly from the fridge. Keep in an airtight container for up to a week, or freeze for longer storage.
Chill the bites in the fridge for at least 30 minutes until firm. Serve directly from the fridge for best texture. Store in an airtight container, layering with parchment paper. Keep refrigerated for up to a week or freeze for longer storage. Let come to room temperature briefly before serving if chilled too hard.
How to Know It’s Done
- Chocolate is glossy and fully melted with no lumps.
- Hazelnuts are evenly coated and mixture holds shape when scooped.
- Bites are firm and set after refrigeration, with a shiny surface.
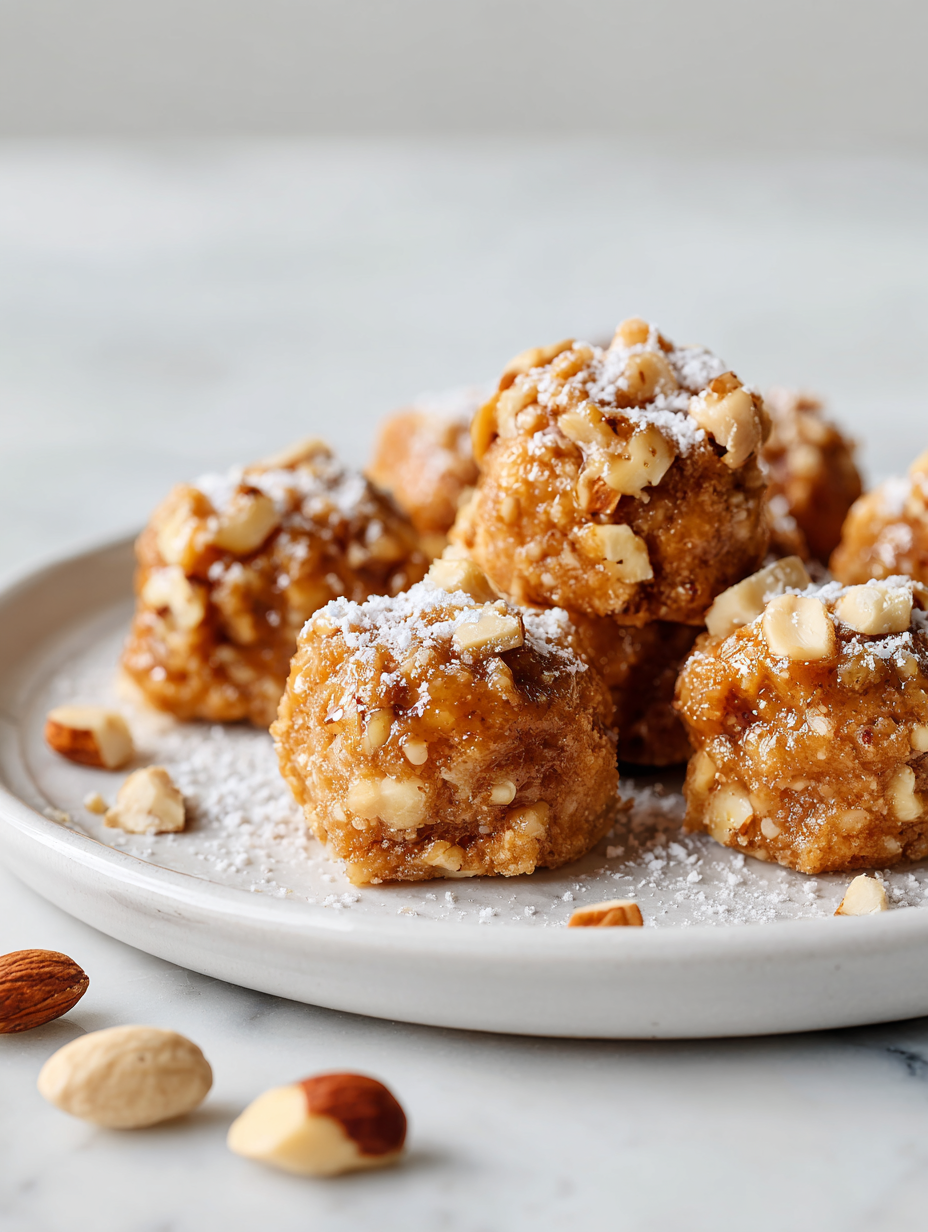
Nostalgic Nutty Bites
Ingredients
Equipment
Method
- Preheat your oven to 180°C (350°F). Spread the hazelnuts on a baking sheet and roast for about 10 minutes until fragrant and slightly browned, shaking the pan halfway through. Let them cool slightly, then rub in a tea towel to remove skins if desired, and chop finely.
- In a small saucepan over low heat, melt the dark chocolate with a teaspoon of coconut oil, stirring gently until smooth and glossy — this should take about 3-4 minutes. The chocolate will start to smell rich and cocoa-y.
- Add the honey (or maple syrup) and a pinch of salt into the melted chocolate, stirring until well combined. The mixture will become fragrant and slightly sticky.
- Remove the saucepan from heat. Fold in the chopped hazelnuts using a spatula, ensuring they are evenly coated with the chocolate mixture. If the mixture hardens, gently warm it again over low heat, stirring to loosen.
- Line a baking sheet with parchment paper. Using a cookie scoop or a spoon, portion out small mounds of the mixture onto the sheet. Gently press each mound to flatten slightly, shaping into bite-sized rounds.
- Place the tray in the refrigerator for at least 30 minutes until the bites are firm and set with a shiny exterior. The chocolate will harden, creating a satisfying crunch when bitten into.
- Once chilled and firm, sprinkle flaky sea salt on top of each bite for added flavor contrast. Serve directly from the fridge and enjoy the crunchy, fudgy texture with a rich hazelnut aroma.
Notes
Pro tips for perfect hazelnut bites
- Bolded mini-head: Use finely chopped hazelnuts for even distribution and a satisfying crunch in every bite.
- Bolded mini-head: Melt chocolate gently over low heat to retain glossy sheen and prevent seizing.
- Bolded mini-head: Chill mixture until firm; don’t rush the setting process for optimal texture and shine.
- Bolded mini-head: Incorporate a tiny splash of coconut oil to improve binding and add subtle richness.
- Bolded mini-head: Add a pinch of salt to enhance chocolate and nut flavors, balancing sweetness with savory depth.
- Bolded mini-head: Toast hazelnuts lightly for a smoky aroma that deepens flavor and enhances crunch.
- Bolded mini-head: Use a cookie scoop for uniform bites, ensuring consistent size and presentation.
Common mistakes and how to fix them
- FORGOT to toast hazelnuts → toast until fragrant and slightly browned for extra flavor.
- DUMPED in cold chocolate → melt slowly over low heat, stirring constantly to prevent seizing.
- OVER-TORCHED the chocolate → remove from heat immediately if it starts to smell burnt or crackle.
- MISSED chilling time → refrigerate until bites are firm and shiny, about 30 minutes or more.
Quick fixes and pantry swaps
- When mixture feels too sticky → Splash in a bit more honey or coconut oil.
- If bites aren’t setting → Patch with a quick chill in the freezer for 5 minutes.
- When chocolate seizes → DUMP in a teaspoon of hot milk, stir until smooth.
- If hazelnuts aren’t crunchy enough → Toast longer or sprinkle with flaky sea salt before chilling.
- When mixture is too crumbly → Shield with a tiny drizzle of melted chocolate and re-chill for a firmer texture.
Prep, store, and reheat tips
- Prepare the mixture ahead: toast and chop hazelnuts, melt chocolate, and combine ingredients. Keep the mixture covered in the fridge for up to 2 days, which allows flavors to meld and makes assembly faster.
- Store the bites in an airtight container in the fridge for 5–7 days. The cool temperature keeps them firm, but they may soften slightly over time, so serve chilled for best texture.
- For longer storage, freeze the bites in a single layer on a baking sheet, then transfer to a freezer-safe container. They will keep for up to 3 months and maintain their crunch when thawed briefly in the fridge.
- Reheat or soften from fridge: if bites become too firm, let them sit at room temperature for 5-10 minutes or gently warm in a low oven (around 80°C/176°F) for a few minutes. They should smell rich and chocolatey, with a slightly softer bite.
Top questions about hazelnut bites
1. Can I use other nuts instead of hazelnuts?
Yes, you can substitute with almonds or cashews, but the flavor will change slightly, and the texture may vary. Hazelnuts give a deep, smoky aroma that’s hard to replicate exactly.
2. Are dairy-free chocolates okay to use?
Absolutely. Use dairy-free dark chocolate or high-quality vegan chocolate. Expect a slightly different melt and flavor, but it still sets well and tastes rich.
3. Can I substitute honey with other sweeteners?
Yes, honey can be replaced with maple syrup or agave nectar. They’ll add a similar sweetness but might alter the final texture slightly.
4. My mixture is too sticky or dry, what do I do?
If the mixture feels too sticky, sprinkle in a little more chopped nuts or freeze it briefly before shaping. If it’s too dry, a tiny splash of melted chocolate or coconut oil helps.
5. How do I know when the bites are ready?
The bites are done when they’re firm to the touch, shiny on the surface, and hold their shape without cracking. They should have a chewy, fudgy interior.
6. How should I store these bites?
Store in an airtight container in the fridge for up to a week. For longer storage, freeze them; they’ll keep for about 3 months and stay crunchy when thawed briefly.
7. Do I need to toast the hazelnuts?
To enhance flavor, toast your hazelnuts until fragrant and slightly browned. For a smoky depth, don’t skip this step—they’ll smell warm and inviting.
8. How do I melt the chocolate properly?
Gently melt the chocolate over low heat, stirring constantly. It should be smooth, shiny, and fragrant with cocoa—avoid overheating or seizing.
9. Chocolate seizes during melting—what now?
If your chocolate seizes or hardens, add a teaspoon of hot milk or coconut oil and stir until smooth again. This quick fix restores gloss and flow.
10. Can I customize the ingredients?
Yes, you can add dried fruits or seeds for extra texture. Just keep the additions minimal so they don’t make the mixture too moist or crumbly.
These no bake hazelnut bites are more than just a quick treat—they’re a reminder that simple ingredients can create something unexpectedly rich and satisfying. Whenever I make them, I feel a little nostalgic for childhood snacks, but with a grown-up twist that makes them perfect for sharing now. They’re a genuine kitchen shortcut that doesn’t compromise on flavor or texture.
In the end, it’s all about those small moments—cracking the chocolate, toasting the nuts, catching that perfect set in the fridge. They’re honest, straightforward, and taste like a little reward you’ve earned, no fuss required. That’s what makes them a favorite for busy days and lazy weekends alike.

Hi, I’m Grace Morgan, and welcome to my kitchen. This is a space shaped by family meals, curious hands reaching for snacks, paws under the table, and recipes that come together in the middle of real life. I’m a food blogger, a mother, and a passionate pet keeper. Most days, I’m cooking with one eye on the stove and the other on someone who needs me, whether that’s a child asking for a taste or a dog hoping something might fall.


