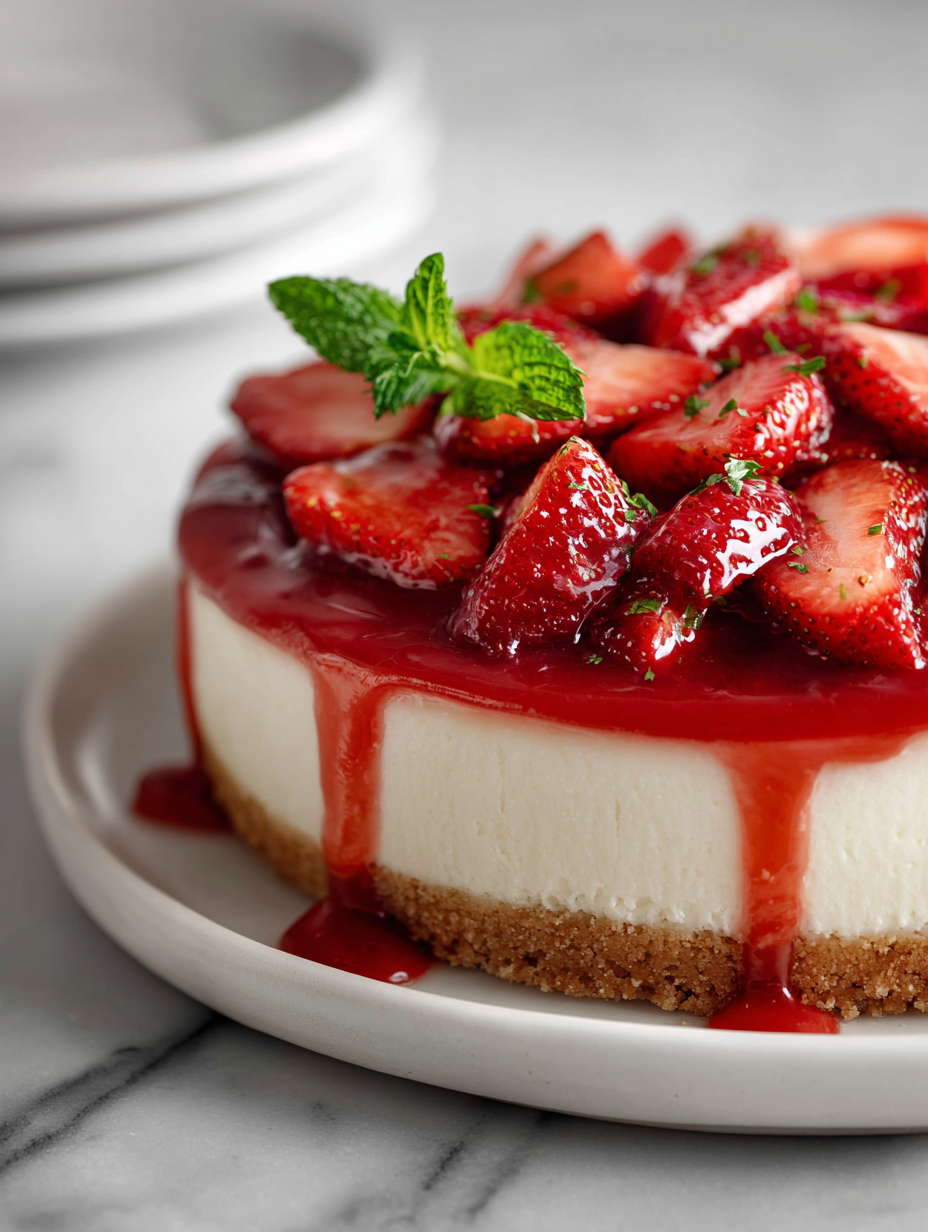
Sometimes, the best desserts are the ones that come together without turning on the oven. This no bake strawberry cheesecake is my go-to for those hot summer days or when I just can’t be bothered with extra heat. It’s fresh, tangy, and surprisingly quick to make, which makes it feel almost like cheating.
What I love most is how it captures that summer feeling—juicy strawberries, creamy filling, and a crumbly crust that’s just enough to hold everything together. No fuss, no fussing with water baths or waiting for layers to set. It’s honest, straightforward, and a little bit indulgent without the guilt or stress.
This recipe is inspired by those times when I need a sweet treat, but I’m too tired to turn on the oven. It’s about summery freshness and the joy of simplicity, using just a few ingredients that come together quickly. Plus, it’s perfect for when I want something impressive without the fuss.
Sweet Simplicity for Hot Days
- Making this dessert takes me back to childhood summer picnics, where strawberries tasted like bursts of sunshine.
- I love that I can whip this up after a long day and still serve something that feels special.
- There’s a quiet pride in pulling together a dessert that’s as beautiful as it is effortless.
- Sometimes, the chaotic kitchen moments lead to the most memorable bites, especially when strawberries are involved.
- It’s a relief to know I don’t need fancy equipment—just a few simple ingredients and a bit of patience.
The story behind this recipe
- This recipe was born out of a busy weekend when I needed something quick but still satisfying. I wanted the creamy tang of cheesecake, but without the fuss of baking or waiting hours for layers to set. It’s become my go-to when I want a dessert that’s effortless but still feels indulgent.
- One summer, I had a bunch of ripe strawberries that needed using, and I started experimenting with no-bake ideas. The result was this cheesecake—bright, fresh, and surprisingly rich considering the simplicity. It’s a recipe I keep coming back to, especially when I want something that feels like a little celebration without the effort.
- heading
- story_type
Unusual Origins of No Bake Cheesecake
- This recipe originated from a desire to enjoy cheesecake without turning on the oven, which started in my tiny kitchen with limited space and a summer heatwave.
- No bake desserts like this became popular in the 20th century, especially during times when oven use was scarce or energy-saving was a priority.
- Strawberries have long been paired with dairy in desserts, but the combination of fresh fruit and creamy filling really took off in the 1950s with the rise of instant gelatin-based desserts.
Key ingredients and tips
- Cream cheese: I prefer using full-fat cream cheese for that rich, velvety texture; you might skip some of the tang by lowering the fat content.
- Strawberries: Juicy, ripe strawberries make all the difference—look for ones that smell sweet and have a deep red hue, or opt for frozen if fresh aren’t in season.
- Graham cracker crust: I crush my graham crackers finely to avoid a gritty crust; if you like a crunchier texture, leave some larger crumbs for bite.
- Sweetener: I usually reach for honey or maple syrup for a subtle flavor boost, but powdered sugar works if you want a more classic sweetness.
- Lemon juice: Brightens the entire filling and balances the richness—don’t skimp, it’s the secret to that fresh, zesty kick.
- Heavy cream: Whipped to soft peaks, it lightens the filling—if you want a slightly fluffier texture, beat it just a tad longer until it’s airy.
- Gelatin (optional): I skip it most times, but a quick dissolve helps set the cheesecake if you need it extra firm—dissolve slowly to avoid clumps.
Spotlight on key ingredients
Cream cheese:
- I prefer using full-fat for that velvety richness; lower-fat versions can make the filling less smooth and slightly grainy.
- Strawberries: Juicy, ripe strawberries with a sweet aroma are essential; frozen ones are fine if you thaw and drain excess moisture, but fresh taste is brighter.
Graham cracker crust:
- Graham crackers: When finely crushed, they form a crisp, buttery crust that holds together well; coarser crumbs add more crunch and rustic charm.
- Strawberries (again): Their natural sweetness and bright flavor really shine in this dessert, especially if you select berries that smell like summer and are deeply red.
Notes for ingredient swaps
- Dairy-Free: Swap cream cheese for cashew-based cream cheese or coconut cream—will be slightly sweeter and less tangy.
- Gluten-Free: Use gluten-free graham cracker crumbs or crushed digestive biscuits—still buttery but with a different crumb texture.
- Sweetener: Replace sugar with agave syrup or coconut sugar—altering the sweetness profile and possibly affecting the texture slightly.
- Fresh Strawberries: Frozen berries work if fresh aren’t available—just thaw and drain excess moisture before folding in.
- Lemon Juice: Lime juice makes a nice twist—adds a different citrus note but still bright and zesty.
- Heavy Cream: Use coconut whipped cream for dairy-free—light and fluffy, with a subtle coconut flavor.
- Crust Base: Oats or crushed cookies instead of graham crackers—adds a different texture and flavor, more rustic and hearty.
Equipment & Tools
- Springform pan: To shape and hold the cheesecake while it sets.
- Food processor or zip bag and rolling pin: To crush graham crackers into fine crumbs.
- Mixing bowls: To combine and beat the cream cheese and whipped cream.
- Spatula: To evenly spread the crust and smooth the filling.
- Measuring cups and spoons: To measure ingredients precisely.
- Knife and cutting board: To slice strawberries for topping.
Step-by-step guide to no bake strawberry cheesecake
- Gather your equipment: a 20cm (8-inch) springform pan, a mixing bowl, a spatula, and a food processor or zip-top bag with a rolling pin for crushing graham crackers.
- Crush the graham crackers: Pulse in a food processor until fine, or place in a bag and crush with a rolling pin. Measure out about 1 1/2 cups of crumbs. Melt 60g (4 tbsp) butter and mix it with the crumbs until evenly coated.
- Press the crust: Transfer the crumb mixture to your springform pan. Use the back of a spoon or your fingers to press it evenly over the bottom and slightly up the sides. Chill in the fridge for 15 minutes while you prepare the filling.
- Make the filling: In a large bowl, beat 300g (about 10 oz) cream cheese with 1/3 cup sugar until smooth and creamy, about 2 minutes. Add 1 tbsp lemon juice and 1 tsp vanilla extract, mix briefly.
- Add strawberries: Hull and roughly chop 1 cup of fresh strawberries. Gently fold into the cream cheese mixture, leaving some chunks for texture. If using frozen, thaw and drain excess moisture.
- Whip the cream: In a separate bowl, beat 1/2 cup heavy cream until soft peaks form. Gently fold into the cream cheese mixture, being careful not to deflate the air.
- Assemble the cheesecake: Pour the filling over the chilled crust, smoothing the top with a spatula. Cover with plastic wrap and refrigerate for at least 4 hours, preferably overnight, to set.
- Finish with strawberries: Before serving, top with sliced strawberries for a vibrant, juicy finish. Optional: drizzle with a bit of honey or a splash of balsamic vinegar for extra flavor.
- Serve chilled: Remove from the fridge, release the springform pan, and transfer to a serving plate. Slice with a sharp knife, wiping it clean between cuts for neat slices.
Refrigerate the assembled cheesecake for at least 4 hours, or preferably overnight. Before serving, garnish with fresh strawberry slices. Slice with a sharp knife, wiping the blade between cuts for clean edges. Serve chilled for best texture.
How to Know It’s Done
- Crust should be firm and evenly pressed, with no crumbling edges.
- Filling should be smooth, with no lumps or streaks of cream cheese.
- Cheesecake should jiggle slightly in the center but hold its shape when moved.
No Bake Strawberry Cheesecake
Ingredients
Equipment
Method
- Start by crushing your graham crackers into fine crumbs using a food processor or by placing them in a zip-top bag and crushing with a rolling pin. Transfer the crumbs to a bowl and pour in the melted butter, mixing until evenly coated. Press this mixture firmly into the bottom of your springform pan, using the back of a spoon or your fingers to create an even crust. Chill in the fridge for 15 minutes to set.
- While the crust chills, beat the softened cream cheese and sugar together in a large bowl until smooth and creamy—this should take about 2 minutes and will smell slightly tangy and look fluffy. Add the lemon juice and vanilla, mixing just until combined, then gently fold in the chopped strawberries, leaving some chunks for texture and visual appeal.
- In a separate bowl, whip the chilled heavy cream until soft peaks form—listen for gentle swirls and see the cream hold its shape. Carefully fold the whipped cream into the cream cheese mixture, using a spatula to keep the filling light and airy.
- Pour the luscious filling over the chilled crust, smoothing the top with a spatula. Cover the springform pan with plastic wrap and refrigerate for at least 4 hours, or preferably overnight, until the filling is firm and set.
- Before serving, slice the remaining strawberries for topping and arrange them on the cheesecake's surface for a vibrant, juicy finish. Optionally, drizzle with honey or a balsamic glaze for extra flavor. Carefully remove the sides of the springform pan and transfer your beautiful cheesecake to a serving plate.
- Enjoy this creamy, fruity dessert chilled—slice with a sharp knife, wiping it clean between cuts for neat slices. It’s perfect for a summer gathering or a quick treat that looks as stunning as it tastes.
Pro tips for perfect cheesecake
- Bolded Mini-Head: Chill your crust thoroughly before adding the filling to prevent sogginess and ensure a crisp base.
- Bolded Mini-Head: Use cold heavy cream and beat it just until soft peaks form—over-beating can turn it grainy and butter-like.
- Bolded Mini-Head: Gently fold strawberries into the filling to keep the mixture light and prevent deflating the whipped cream.
- Bolded Mini-Head: When pressing the crust into the pan, use the back of a measuring cup for even pressure and a smooth surface.
- Bolded Mini-Head: For a brighter flavor, add a splash of lemon juice to the cream cheese mixture—don’t skimp on this fresh zing.
- Bolded Mini-Head: If the filling is too soft to spread, chill it for 15 minutes to firm up before smoothing the top.
- Bolded Mini-Head: Serve the cheesecake straight from the fridge—warm slices can become too soft and lose their structure.
Common mistakes and how to fix them
- FORGOT to chill crust? Freeze it for 10 minutes before filling.
- DUMPED too much liquid? Drain strawberries thoroughly or pat dry before folding.
- OVER-TORCHED crust edges? Cover edges with foil if they brown too quickly.
- MISSED the jiggle test? Slightly wobbling center means it’s still setting, wait longer.
Quick fixes and pantry swaps
- When strawberries are watery, splash a teaspoon of lemon juice before folding in.
- If crust crumbles, patch with a bit of melted butter and press again firmly.
- Splash a little vanilla or almond extract into the filling for extra depth.
- Patch cracks by smoothing with a warm spatula or reheating briefly to seal them.
- Shield edges with foil if they brown too quickly during chilling, avoiding over-torched crusts.
Prep, store, and reheat tips
- Prepare the crust and press it into the pan a day ahead; it firms up overnight for a sturdier base.
- Assemble the cheesecake filling and fold in strawberries up to 24 hours in advance—keep it covered in the fridge for fresh flavor and texture.
- The cheesecake keeps well for 2-3 days in the fridge; the flavors meld and the texture remains creamy and inviting.
- Refrigerate the assembled dessert covered tightly; let it sit at room temperature for 10 minutes before slicing for optimal softness and aroma.
- If serving leftovers, slice with a sharp knife, wiping it clean between cuts to prevent sticking and maintain neat edges.
Top questions about no bake strawberry cheesecake
1. Can I use frozen strawberries?
Use fully ripe strawberries for the best flavor and aroma. They should smell sweet and look deeply red.
2. Can I make this ahead of time?
Yes, just thaw and drain excess moisture before folding into the filling to avoid a watery texture.
3. How long does it last in the fridge?
Absolutely, the cheesecake benefits from chilling at least 4 hours, or overnight for the best set.
4. What if I don’t have cream cheese?
You can swap cream cheese for a dairy-free alternative like cashew-based cream cheese, but expect a slightly different texture and tang.
5. Can I make the crust gluten-free?
Use gluten-free graham crackers or digestive biscuits for a gluten-free crust, which might be slightly less buttery but still tasty.
6. What’s the best way to flavor the filling?
Adding a splash of lemon juice brightens the filling and balances the sweetness, making every bite refreshingly tangy.
7. How do I get the whipped cream right?
Be sure to whip the heavy cream just until soft peaks form—over-whipping can make it grainy and difficult to fold.
8. What if the filling is too runny?
If the filling is too soft to spread, chill it for 15 minutes to firm up before smoothing the top.
9. Why does my cheesecake crack?
To prevent cracks, don’t overmix the filling and avoid heating it after mixing. Chill it steadily in the fridge.
10. How should I serve it for the best taste?
Serve the cheesecake straight from the fridge. Let it sit at room temp for 10 minutes before slicing for the best texture.
This no bake strawberry cheesecake is a reminder that sometimes the simplest ingredients create the most memorable desserts. It’s perfect for summer gatherings or a quick treat when time is tight, and the fresh berries bring a burst of brightness every time.
Sharing this dessert feels like passing on a secret—something easy, honest, and a little indulgent. No matter the occasion, it’s a little reminder that great flavor doesn’t need fuss or oven heat, just a bit of good ingredients and patience.

Hi, I’m Grace Morgan, and welcome to my kitchen. This is a space shaped by family meals, curious hands reaching for snacks, paws under the table, and recipes that come together in the middle of real life. I’m a food blogger, a mother, and a passionate pet keeper. Most days, I’m cooking with one eye on the stove and the other on someone who needs me, whether that’s a child asking for a taste or a dog hoping something might fall.


