In a season where heavy desserts seem to take over every gathering, I find myself craving something lighter, something that still feels indulgent but doesn’t weigh me down. This no bake Greek yogurt cheesecake hits that sweet spot perfectly. It’s like a breath of fresh, tangy air after a holiday binge on sugary pies and dense puddings.
What I love most is how simple it is to whip up, especially when I’m short on time but still want to serve something impressive. The creamy tang of Greek yogurt paired with a buttery crust makes it feel fancy without fuss. Plus, no oven means fewer worries about timing or heat — just chill and wait. It’s become my go-to for when I want a dessert that’s both satisfying and refreshingly uncomplicated.
This cheesecake is a perfect antidote to the heavy, sugar-laden desserts that dominate holiday tables. Its light, tangy profile offers a refreshing twist, especially when you crave something creamy but not overly sweet. I love how the simplicity of Greek yogurt transforms into a dessert that feels indulgent yet healthy.
A Fresh Take on No-Bake Desserts
- This cheesecake reminds me of lazy summer afternoons at my grandma’s house, where tangy yogurt cooled us down after playing outside.
- I’ve always loved how a simple mixture can turn into something so satisfying, especially when I need a quick, light dessert after a heavy meal.
- There’s a quiet joy in knowing I can whip this up without heating up the kitchen — it feels like a small win every time.
- Sometimes, I crave that first spoonful — creamy, slightly tart, with that gentle crunch from the crust — and I forget about everything else.
- This recipe keeps me grounded; it’s honest, straightforward, and perfect for when I want something sweet without the fuss.
The inspiration behind this cheesecake
- This cheesecake was born out of a lazy Sunday craving for something cool and tangy, but I didn’t want to turn on the oven. I remember rummaging through my fridge, spotting that tub of Greek yogurt and thinking, why not? The idea of a simple, no-bake dessert that’s both satisfying and a little unexpected stuck with me.
- I love how it feels like a small act of rebellion — skipping heat, fuss, and still ending up with something creamy and fresh. It’s one of those recipes I keep coming back to, especially when I need to impress without stress. Sometimes, the simplest ideas turn out to be the most memorable.
- heading
- story_type
Trivia and Origins
- This recipe is inspired by Mediterranean traditions of using Greek yogurt as a creamy, tangy base for desserts.
- Greek yogurt’s popularity soared in the West during the early 2000s, transforming simple desserts into healthier, protein-packed treats.
- No bake desserts gained a resurgence during recent health-conscious trends, emphasizing freshness and ease.
- The idea of skipping heat in cheesecakes dates back to resourceful home cooks wanting quick, fuss-free sweets.
Key Ingredient Insights
- Greek Yogurt: I love the thick, tangy creaminess it adds, but if you want it richer, try full-fat for a silkier texture that coats your palate.
- Digestive Biscuits: Their buttery crunch makes the perfect crust; swap with graham crackers if you’re in a pinch, but expect a slightly sweeter base.
- Butter: I melt it until golden, smelling that nutty aroma; for a dairy-free version, coconut oil works but adds a subtle tropical note.
- Honey or Maple Syrup: I prefer a touch of honey for that floral sweetness, but maple syrup gives a deeper, caramel undertone that works well with the tang.
- Lemon Juice: Brightens everything up with a zing I love; skip if you prefer milder flavors, but be aware the cheesecake will be less lively.
- Gelatin Powder: I dissolve it carefully to avoid lumps, giving the cheesecake a gentle jiggle; for a vegetarian option, try agar-agar, but follow its specific instructions.
- Vanilla Extract: A splash adds warmth and depth; skip if you want a more neutral, tangy profile, but don’t skip the vanilla if you want that subtle aromatic layer.
Spotlight on key ingredients
Greek Yogurt:
- I love its thick, velvety texture and tangy flavor that really makes this cheesecake feel fresh. If you prefer a milder taste, try full-fat Greek yogurt for extra creaminess.
- Its oozy, slightly tart nature balances sweetness beautifully, giving each bite a lively zing that keeps the dessert light and satisfying.
Digestive Biscuits:
- Their buttery, crumbly texture creates a satisfying crunch that contrasts the creamy filling. Swap with graham crackers if needed, but expect a slightly sweeter crust with a different crumbly bite.
- When crushed, they release a nutty aroma that fills the kitchen; their gentle sweetness helps set a balanced flavor profile in the crust.
Notes for ingredient swaps
- Dairy-Free: Swap Greek yogurt for coconut or almond-based yogurt. It won’t be as tangy, but still creamy and satisfying.
- Gluten-Free: Use gluten-free digestive biscuits or graham crackers. Expect a slightly different texture but same buttery crunch.
- Sweetener: Replace honey with agave syrup or coconut nectar. The flavor will be a bit different but still sweet and smooth.
- Vegan: Use plant-based yogurt and a vegan gelatin substitute like agar-agar. The texture may be slightly softer, but just as luscious.
- Lemon Juice: Omit or replace with lime juice for a different citrus brightness that still wakes up the palate.
Equipment & Tools
- Springform pan: To shape and hold the cheesecake, easy removal after setting.
- Food processor or zip-top bag and rolling pin: To crush biscuits into fine crumbs efficiently.
- Small saucepan or microwave: To melt and dissolve the butter and gelatin smoothly.
- Spatula: To mix ingredients and evenly press the crust.
- Measuring spoons and cups: To ensure precise ingredient quantities.
- Plastic wrap: To cover the cheesecake during chilling.
Step-by-step guide to no-bake cheesecake
- Gather your equipment: a 20cm (8-inch) springform pan, a mixing bowl, a spatula, and a food processor or crush-proof bag with a rolling pin.
- Crush the digestive biscuits: place them in the food processor or bag, then pulse or bash until fine crumbs form. Measure about 1 1/2 cups of crumbs.
- Melt the butter: in a small saucepan over low heat or in short bursts in the microwave (about 20 seconds). Let it cool slightly but stay liquid.
- Combine crumbs and butter: pour the melted butter over the crumbs, then stir with the spatula until evenly coated and crumbly.
- Press the crust: transfer the mixture into the springform pan. Use the back of a spoon or your fingers to press it evenly across the bottom and slightly up the sides. Chill in the fridge for at least 15 minutes.
- Prepare the filling: in a large bowl, whisk the Greek yogurt until smooth. Add honey or maple syrup (about 2-3 tbsp), vanilla extract (1 tsp), and lemon juice (1 tbsp). Mix until well combined.
- Dissolve the gelatin: sprinkle 1 teaspoon of gelatin powder over 2 tablespoons of cold water. Let sit for 5 minutes, then gently heat until dissolved (about 10 seconds in the microwave). Add to the yogurt mixture and whisk thoroughly.
- Pour the filling: over the chilled crust, smoothing the top with your spatula. Cover lightly with plastic wrap.
- Chill the cheesecake: in the fridge for at least 4 hours, preferably overnight. The filling should be firm and slightly jiggly when ready.
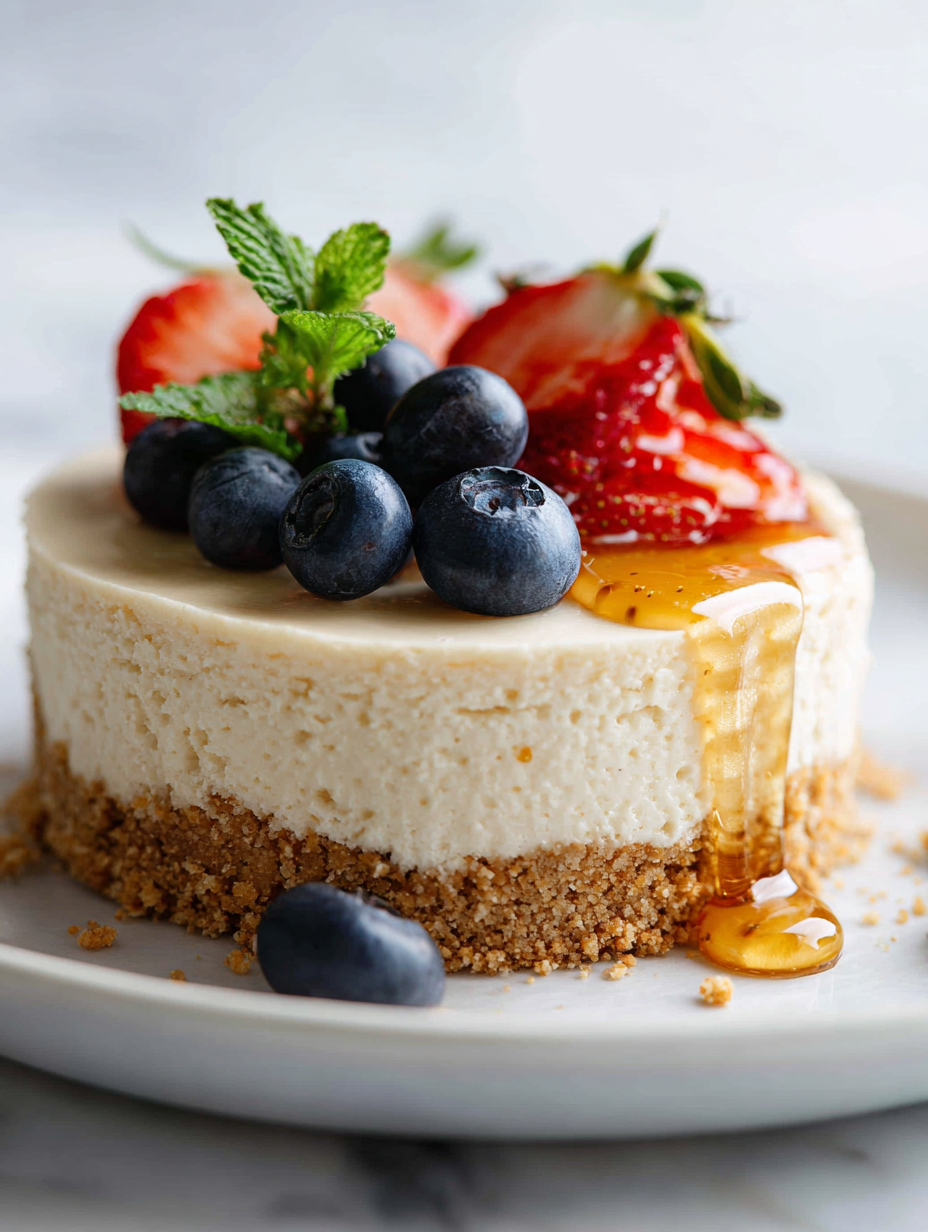
- Finish and serve: carefully remove the sides of the springform pan. Slice with a sharp knife, wiping it clean between cuts. Serve chilled, perhaps with fresh berries or a drizzle of honey.
Chill the cheesecake in the fridge for at least 4 hours, up to overnight. Once set, carefully loosen the sides of the springform pan. Slice with a sharp, warm knife for clean cuts. Serve directly or garnish with fresh berries or a squeeze of lemon for extra brightness.
How to Know It’s Done
- Crust is firm and evenly pressed before chilling.
- Filling is set with a gentle jiggle when fully chilled.
- Surface is smooth and free of cracks or bubbles.
No-Bake Greek Yogurt Cheesecake
Ingredients
Equipment
Method
- Place the digestive biscuits in a food processor or crush them in a plastic bag with a rolling pin until you have fine crumbs. Measure out about 1 1/2 cups of crumbs.
- Melt the butter in a small saucepan over low heat or in short bursts in the microwave until fragrant and golden. Let it cool slightly.
- Mix the biscuit crumbs with the melted butter using a spatula until evenly coated and crumbly.
- Press the crumb mixture into the bottom of a springform pan, spreading it evenly with the back of a spoon or your fingers. Chill in the fridge for at least 15 minutes to set.
- In a large bowl, whisk the Greek yogurt until smooth and creamy, breaking up any lumps.
- Add honey or maple syrup, vanilla extract, and lemon juice to the yogurt. Mix well until the mixture is fragrant and slightly thickened.
- Sprinkle the gelatin powder over the cold water and let it sit for 5 minutes to bloom. Then, gently heat it until dissolved, about 10 seconds in the microwave, and let it cool slightly.
- Pour the cooled gelatin into the yogurt mixture and whisk thoroughly to combine, ensuring the gelatin is evenly distributed.
- Pour the yogurt filling over the chilled crust, smoothing the top with a spatula. Cover with plastic wrap and refrigerate for at least 4 hours or overnight until set.
- Once set, carefully remove the sides of the springform pan. Slice with a warm, sharp knife for clean cuts, and serve chilled. Garnish with fresh berries or a drizzle of honey if desired.
Notes
Tips for Best Results
- Use room temperature ingredients to ensure a smooth, cohesive filling without lumps.
- Chill the crust thoroughly before adding the filling to prevent sliding or cracking.
- Dissolve gelatin completely and let it cool slightly before mixing to avoid clumping.
- Use a warm knife to slice the cheesecake for clean, neat cuts and minimal crumbling.
- Incorporate lemon juice gradually and taste test to balance tang and sweetness perfectly.
- Press the crust firmly and evenly to prevent cracks and ensure a sturdy base.
- Let the cheesecake set undisturbed for at least 4 hours; the texture improves with longer chilling.
Common mistakes and how to fix them
- FORGOT to evenly press the crust → Press firmly and evenly to prevent cracks.
- DUMPED hot gelatin into the mixture → Let gelatin cool slightly before mixing to avoid curdling.
- OVER-TORCHED the crust → Bake at 180°C (350°F) for a golden, crisp crust without burning.
- MISSED the chilling step → Chill for at least 4 hours for proper set and texture.
Quick fixes and pantry swaps
- If cheesecake cracks, gently rewarm the knife to smooth slices cleanly.
- When mixture is lumpy, ensure gelatin is fully dissolved and cooled before adding.
- Splash a little lemon juice if filling tastes dull or flat.
- Patch crust by pressing firmly if it feels loose or uneven.
- Shield the cheesecake with plastic wrap if it starts to develop condensation cracks.
Prep, store, and reheat tips
- Prepare the crust and press it into the pan a day ahead; it firms up nicely in the fridge, making assembly faster.
- The cheesecake can be made up to 24 hours in advance; keep it covered tightly in the fridge to preserve freshness and tang.
- It’s best to serve chilled — the flavors deepen overnight, and the texture becomes perfectly firm after several hours.
- Refrigerate for up to 2 days; the tang stays bright, but the crust might soften slightly if left too long.
- If reheating slices, let them sit at room temperature for 10 minutes; the filling is best enjoyed cold for that creamy, tangy bite.
Top questions about no bake cheesecake
1. Can I use regular yogurt instead of Greek yogurt?
Greek yogurt gives it a tangy, creamy texture, and is key for that fresh flavor. You can try full-fat for extra richness, but the tang might lessen.
2. Can I substitute regular yogurt for Greek yogurt?
Yes, but it will be less thick and creamy. Strain regular yogurt through cheesecloth overnight to mimic Greek yogurt’s consistency.
3. Is there a dairy-free option for Greek yogurt?
Absolutely. Use a dairy-free yogurt like coconut or almond-based. It might be a tad less tart and slightly thinner, but still tasty.
4. Can I use graham crackers instead of digestive biscuits?
Use digestive biscuits for that buttery crunch, but graham crackers work in a pinch — expect a sweeter crust with more graham flavor.
5. Can I make the crust vegan?
Yes. For a vegan crust, swap butter for coconut oil or vegan margarine. The crust may be slightly softer but still delicious.
6. How long should I chill the cheesecake?
Chill the cheesecake for at least 4 hours, preferably overnight. It should be firm, with a slight jiggle in the center, and no cracks.
7. How do I know when it’s ready to serve?
Look for a firm, set texture with a gentle jiggle when moved. The surface should be smooth, and slices cleanly with a warm knife.
8. What if my cheesecake cracks when I cut it?
If it cracks while slicing, warm your knife under hot water, wipe it dry, and slice slowly for clean cuts.
9. My crust is loose, what can I do?
To fix a leaky crust, press it more firmly into the pan and chill longer to help it set better before pouring the filling.
10. My filling is lumpy, how can I fix it?
If the filling is lumpy, make sure the gelatin is fully dissolved and cooled before adding. Whisk until smooth.
This cheesecake feels like a quiet triumph, especially when you want something satisfying but not heavy. Its tangy brightness and creamy texture make it a perfect finish for any meal. Plus, knowing it’s no-bake means less fuss and more time to enjoy the little moments.
In the end, it’s a reminder that simple ingredients, treated with care, can create something truly special. No matter the season or occasion, this dessert has a way of sneaking into your kitchen and staying there. It’s honest, straightforward, and just plain good.

Hi, I’m Grace Morgan, and welcome to my kitchen. This is a space shaped by family meals, curious hands reaching for snacks, paws under the table, and recipes that come together in the middle of real life. I’m a food blogger, a mother, and a passionate pet keeper. Most days, I’m cooking with one eye on the stove and the other on someone who needs me, whether that’s a child asking for a taste or a dog hoping something might fall.


