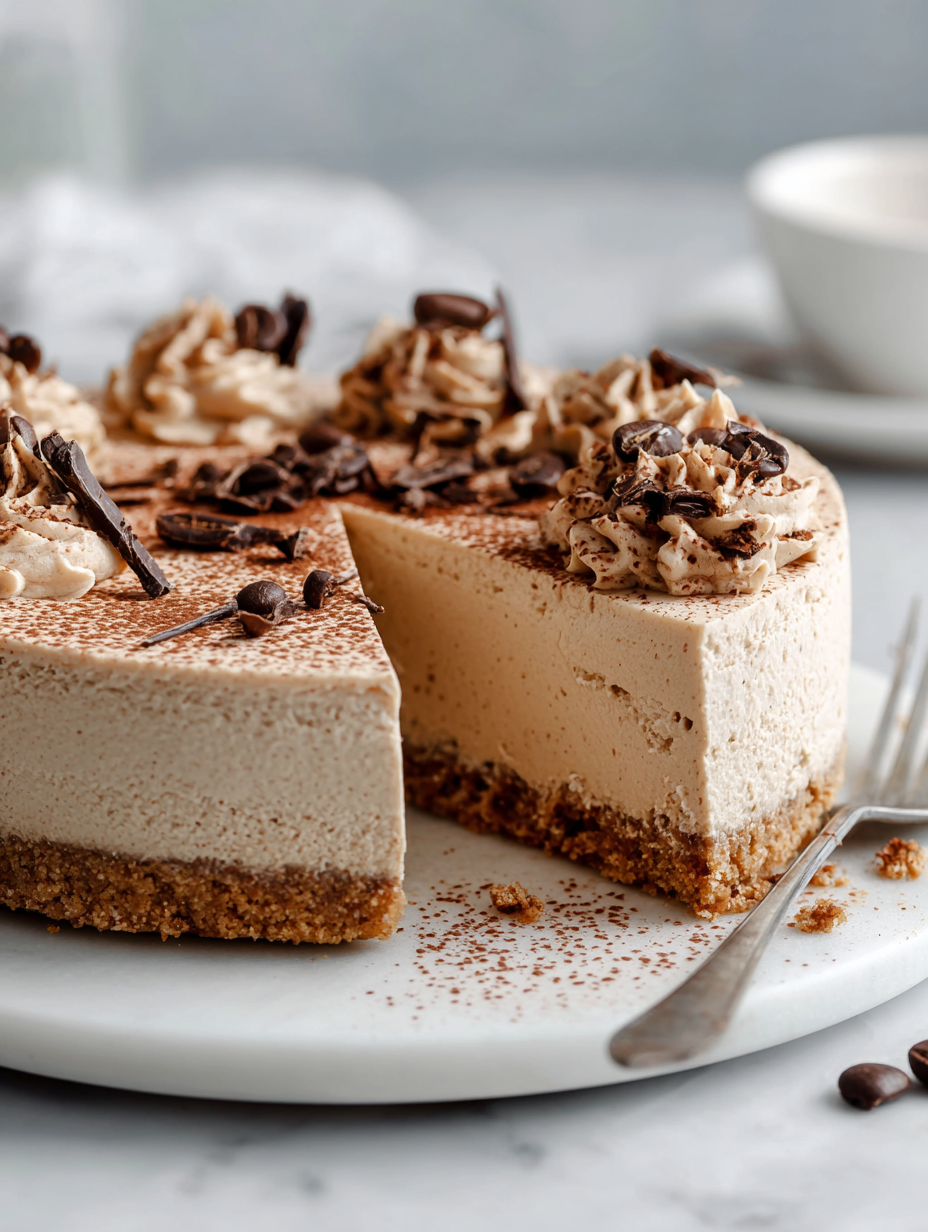
There’s something about mornings that calls for a coffee-infused treat, but sometimes turning on the oven feels like an extra step I don’t need. This no-bake coffee cheesecake is my cheat code for those days—rich, creamy, with just enough caffeine kick to jumpstart the day.
I love how simple it is to pull together, especially when I’m short on time or energy. The graham cracker crust provides a sturdy base, while the coffee and cream layer feels like a smooth, jolt of flavor in every bite. It’s the kind of dessert that feels indulgent without the fuss.
Plus, it’s perfect for making ahead. I can prepare it in the morning or the night before, and come dessert time, it’s ready to serve—no oven, no stress, just pure coffee goodness.
This recipe is inspired by those mornings when I need a caffeine kick but want something sweet, creamy, and easy to whip up without turning on the oven. It’s about capturing that perfect balance of bold coffee flavor and silky cheesecake texture, all in a chilled, no-fuss dessert.
Morning Coffee in Cheesecake Form
- This recipe became my go-to when I needed a quick coffee hit that also satisfies my sweet tooth.
- I still remember the first time I made it—smelled like fresh espresso filling the kitchen, instant motivation.
- There’s a nostalgic comfort in its creamy texture, reminding me of lazy weekend mornings with a strong brew in hand.
- It’s a little chaos in my kitchen—messy but worth every spoonful of the rich, coffee-infused goodness.
Morning Coffee in Cheesecake Form
This no-bake coffee cheesecake was born out of a late-night craving for something creamy and energizing, but with no desire to turn on the oven. I remember pulling together bits from my fridge after a long day—leftover coffee, cream cheese, and a stubborn craving for comfort. It’s become my secret weapon for when I want a quick, satisfying dessert that feels a little fancy but is truly fuss-free. Every time I make it, I think about how simple ingredients can come together into something unexpectedly indulgent, especially when I need that caffeine boost in dessert form.
Trivia and Historical Tidbits
- This recipe evolved from a craving for a coffee-flavored dessert that doesn’t require oven time, popular among busy home cooks in the 21st century.
- It draws inspiration from classic no-bake cheesecakes, which gained popularity in the early 1900s as quick, easy party desserts.
- The addition of coffee in desserts like this became trendy during the rise of specialty coffee culture in the 2000s, blending caffeine with comfort food.
- Originally, this type of cheesecake was often made with instant coffee powder, a budget-friendly way to intensify flavor without extra fuss.
Key Ingredients Breakdown
- Cream cheese: I like it softened so it blends smoothly, giving the filling a rich, velvety texture. If yours is cold, give it a minute to warm up or mash it first.
- Espresso powder: It’s the secret punch of coffee flavor. Use good-quality, dark roast for maximum depth. Skip if you prefer milder coffee notes.
- Graham cracker crumbs: They form that sturdy, slightly sweet crust. For a nuttier twist, swap in digestive biscuits or graham-style wafers.
- Heavy cream: Whips up into soft peaks that make the cheesecake airy. For a lighter feel, try mascarpone, but expect it to be less fluffy.
- Sugar: I use regular granulated, but honey or maple syrup can add a different sweet note. Adjust quantities slightly to keep the balance.
- Lemon juice: Just a splash brightens the flavor and cuts through the richness. Skip if you want a more pronounced coffee taste only.
- Chocolate (optional): Tiny shavings or a drizzle add a touch of decadence. Dark chocolate pairs best, but milk works if you want milder sweetness.
Spotlight on key ingredients
Cream cheese:
- I like it softened so it blends smoothly, giving the filling a rich, velvety texture. If yours is cold, give it a minute to warm up or mash it first.
- Espresso powder: It’s the secret punch of coffee flavor. Use good-quality, dark roast for maximum depth. Skip if you prefer milder coffee notes.
- Graham cracker crumbs: They form that sturdy, slightly sweet crust. For a nuttier twist, swap in digestive biscuits or graham-style wafers.
Graham cracker crumbs:
- Espresso powder: It’s the secret punch of coffee flavor. Use good-quality, dark roast for maximum depth. Skip if you prefer milder coffee notes.
- They form that sturdy, slightly sweet crust. For a nuttier twist, swap in digestive biscuits or graham-style wafers.
Notes for ingredient swaps
- Dairy-Free: Swap cream cheese for a cashew-based soft cheese or coconut cream. Flavor will be slightly nuttier and less tangy.
- Sugar Alternatives: Use honey, maple syrup, or agave nectar. Expect a different sweetness profile and slightly softer set.
- Crust Base: Replace graham crackers with digestive biscuits or almond cookies. Nuttier flavor and different texture, but still sturdy.
- Heavy Cream: Substitute with coconut cream or whipped aquafaba for vegan options. Keep in mind, texture may be a bit less rich and more airy.
- Coffee Strength: Use decaffeinated instant coffee for a milder flavor. Adjust the amount to match your preferred caffeine kick.
- Chocolate Topping: Add dark chocolate shavings or a drizzle of caramel instead of cocoa powder. For extra decadence, use melted chocolate.
- Lemon Juice: Substitute with a splash of vanilla extract or omit entirely for a more straightforward coffee flavor, less bright.
Equipment & Tools
- Springform pan: Holds the crust and filling, easy to remove the cheesecake.
- Mixing bowl: Blends the cream cheese and filling ingredients.
- Whisk: Incorporates air into the cream and dissolves powders smoothly.
- Spatula: Smooths the filling and crust surface.
- Parchment paper: Prevents sticking and makes removal easier.
Step-by-step guide to no bake coffee cheesecake
- Gather your equipment: a 20cm (8-inch) springform pan, a mixing bowl, a spatula, and a whisk. Line the bottom of the pan with parchment for easy removal.
- Crush the graham crackers: place them in a zip-top bag and gently bash with a rolling pin until fine. Measure out about 1 ½ cups of crumbs.
- Mix the crust: combine the graham cracker crumbs with ¼ cup of melted butter and a tablespoon of sugar in the bowl. Press firmly into the bottom of your prepared pan. Chill in the fridge for 15 minutes while you prepare the filling.
- In a large bowl, soften 250g (about 9 oz) cream cheese by letting it sit at room temperature for 10 minutes. Beat with a whisk until smooth and creamy.
- Dissolve 1 tablespoon of espresso powder in 2 tablespoons of hot water. Add this and ½ cup of heavy cream to the cream cheese. Whisk until well combined and slightly thickened, about 2 minutes. The mixture should be smooth, with a slight sheen.
- Add ½ cup of sugar and a splash of lemon juice. Whisk again until fully incorporated. The filling should be silky and slightly fluffy—if it’s gritty, scrape down the sides and beat again.
- Pour the filling over the chilled crust. Smooth the top with a spatula. Tap the pan gently on the counter to remove air bubbles.
- Refrigerate for at least 4 hours, preferably overnight. The cheesecake should be firm but still creamy when ready.
- Before serving, run a knife around the edge of the pan to loosen, then gently remove the springform. Optional: dust with cocoa powder or drizzle with melted chocolate for extra flair.
- Plate slices with a little whipped cream or a dusting of cocoa. Serve chilled, with a strong coffee on the side.
Let the cheesecake rest in the fridge for at least 4 hours, preferably overnight. Before serving, loosen the sides of the pan with a knife, then carefully remove the springform. Slice with a hot, damp knife for clean cuts. Dust with cocoa or serve as is, chilled.
How to Know It’s Done
- The filling feels firm when gently pressed and jiggles slightly in the center.
- The top surface is smooth, matte, and free of cracks or bubbles.
- The crust is golden and holds together when you cut a slice.
No-Bake Coffee Cheesecake
Ingredients
Equipment
Method
- Line the bottom of your springform pan with parchment paper to make removing the cheesecake easier later.
- Crush the graham crackers into fine crumbs using a zip-top bag and a rolling pin, then measure out about 1 ½ cups of crumbs.
- Mix the graham cracker crumbs with the melted butter and sugar in a bowl until evenly combined. Press this mixture firmly into the bottom of your prepared pan to create an even crust. Chill in the fridge for 15 minutes to set.
- In a large bowl, beat the softened cream cheese with a whisk until smooth and silky, with no lumps remaining.
- Dissolve the espresso powder in hot water, stirring until fully dissolved and the mixture is dark and glossy. Pour this into the cream cheese along with the heavy cream, then whisk until well combined and slightly thickened, about 2 minutes.
- Add the sugar and lemon juice to the mixture, whisking again until smooth. The filling should look creamy and glossy, with no graininess.
- Pour the filling over the chilled crust, smoothing the surface with a spatula. Gently tap the pan on the counter to release any trapped air bubbles.
- Refrigerate the cheesecake for at least 4 hours, preferably overnight, until it’s set and silky to the touch.
- Once set, run a knife around the edges of the pan and carefully remove the springform. Optionally, dust with cocoa powder or drizzle melted chocolate on top for extra flair.
- Slice with a hot, damp knife for clean cuts, and serve chilled with your favorite coffee or tea for a perfect, indulgent treat.
Notes
Pro tips for perfect cheesecake
- flavor: Dissolve espresso powder fully in hot water before adding to the mixture to avoid graininess and boost coffee intensity.
- Texture check: Whisk the cream cheese until silky and smooth; lumps mean it hasn’t fully softened, which can cause cracks.
- Crust firmness: Press the graham cracker mixture firmly into the pan; a dense crust prevents crumbling when slicing.
- Chill time: Let the cheesecake rest in the fridge for at least 4 hours, or ideally overnight, for the filling to set properly.
- Temperature tip: Keep the cheesecake cold when serving; warmth from your hands can cause it to soften and lose shape.
- Layer finesse: Smooth the top gently with a spatula, avoiding overworking the surface to keep it sleek and crack-free.
- Serving sharpness: Use a hot, damp knife to slice through chilled cheesecake for clean, professional-looking cuts.
Common mistakes and how to fix them
- FORGOT to chill crust? Repress firmly and refrigerate for quick firming.
- DUMPED the coffee mixture? Fold in gently, avoid overmixing to prevent cracks.
- OVER-TORCHED the crust? Lower heat or shorten baking time, watch for golden edges.
- MISSED the jiggle test? Slight wobble means it’s still setting; refrigerate longer if needed.
Quick fixes and pantry swaps
- When mixture is too runny, chill for 15 minutes to thicken.
- Splash a bit of hot water on the espresso powder for a richer coffee flavor.
- Patch a cracked cheesecake surface with a dollop of whipped cream or chocolate shavings.
- Shield the cheesecake with foil if edges start over-torching before the center sets.
- If you forget to pre-chill the crust, press it back into shape and refrigerate for quick firming.
Prep, store, and reheat tips
- Prepare the crust and press it into the pan a day ahead; it firms up better and saves time on serving day.
- The cheesecake can be made up to 24 hours in advance; keep it covered tightly in the fridge to prevent it from absorbing other odors.
- Its flavor deepens overnight as the coffee and cream meld, but it’s still best eaten within 2–3 days for optimal freshness.
- Reheat slices slightly in the fridge for 10-15 minutes or serve straight from cold—the texture remains silky and satisfying.
- For extra freshness, dust with cocoa or add toppings just before serving; the cheesecake keeps well covered for a few hours.
Top questions about no bake coffee cheesecake
1. Can I make this cheesecake decaffeinated?
Yes, using decaf coffee will give you the same rich flavor without the caffeine jolt, making it suitable for all times of day.
2. Can I use decaf coffee?
Absolutely. Just swap the espresso powder for decaf instant coffee dissolved in hot water; the flavor remains bold but caffeine-free.
3. Can I use mascarpone instead of cream cheese?
Yes, you can substitute mascarpone for cream cheese for a creamier, slightly sweeter texture, but it may be softer and less tangy.
4. Is it possible to make this dairy-free?
Definitely. Use dairy-free cream cheese alternatives like cashew-based soft cheeses or coconut cream, though expect a different tang or richness.
5. How long should I chill the cheesecake?
Refrigerate the cheesecake for at least 4 hours or overnight. It should feel firm and slightly wobbly in the center when ready.
6. Can I freeze this cheesecake?
Yes, you can freeze it for up to 2 months. Wrap it tightly in plastic wrap and thaw in the fridge overnight before serving.
7. Can I prepare the crust ahead of time?
Yes, the crust can be prepared a day ahead. Cover it and keep it in the fridge until you’re ready to add the filling.
8. How do I get clean slices?
Use a hot, damp knife to cut slices for clean edges. Wipe the blade between cuts for the best presentation.
9. What if my filling is too runny?
If the filling is too runny, chill it for 15 minutes or add a bit more cream cheese to thicken the mixture.
10. How do I know when it’s done?
When the top appears matte and smooth, and the edges are set with a slight jiggle in the center, it’s ready to serve.
This no-bake coffee cheesecake is a reminder that good things don’t always need oven time or fuss. The rich coffee aroma and silky texture make it a small, satisfying indulgence, perfect for any season or occasion. Sometimes, the simplest desserts are the most memorable—especially when they come together with just a few ingredients.
Once you get the hang of it, I bet it’ll become a go-to for busy nights or when you need a quick pick-me-up. It’s a humble, honest dessert that rewards patience and a little chill time. No matter the day, it always feels like a small victory to serve this creamy, caffeinated treat.

Hi, I’m Grace Morgan, and welcome to my kitchen. This is a space shaped by family meals, curious hands reaching for snacks, paws under the table, and recipes that come together in the middle of real life. I’m a food blogger, a mother, and a passionate pet keeper. Most days, I’m cooking with one eye on the stove and the other on someone who needs me, whether that’s a child asking for a taste or a dog hoping something might fall.


