There’s something so satisfying about a cheesecake that doesn’t require turning on the oven, especially during those hot summer days when the kitchen feels like a sauna. This no-bake version is a lifesaver—cool, creamy, and effortless to put together. It’s one of those recipes that feels fancy enough for guests but simple enough to make after a long day.
I’ve always loved how this cheesecake relies on the natural richness of cream cheese and the tang of fresh lemon to shine through. It’s a recipe that lets you adjust sweetness easily, making it perfect for personal tweaks or unexpected guests who pop in. Plus, it’s a relief to skip the baking step and still end up with something so luscious.
This recipe is about the unexpected comfort of a no-bake cheesecake, perfect for those sweltering summer days when turning on the oven feels like a crime. It’s also a reminder that sometimes, simplicity wins—no fuss, just creamy, tangy goodness that comes together faster than you can say ‘dessert.’ I love how it lets the ingredients shine—no heavy crust, just pure, chilled cheesecake magic.
The unexpected joy of no-bake cheesecake
- This recipe reminds me that sometimes simplicity is the best choice—no fuss, just pure, creamy comfort.
- I love how a no-bake cheesecake feels like a little victory—fast to make and still so indulgent.
- There’s a quiet satisfaction in trusting the ingredients to do all the work, especially on busy days.
- Sharing this dessert feels like giving a warm hug—creamy, tangy, and just right for any occasion.
- Nothing beats the cool, silken texture on a hot day when ovens are best left off.
The story behind this recipe
- This recipe came about one especially hot summer when I was craving something creamy but didn’t want to turn on the oven and heat up the house. I remembered a cheesecake I had at a small bakery once, where the crust was minimal, and the filling was so silky you could almost forget about the crust altogether. That moment of tasting that light, tangy sweetness stuck with me, and I started experimenting with no-bake versions that could be just as satisfying.
- It’s become my go-to for impromptu dinners or lazy weekends, when I want something impressive but don’t want the fuss of baking. The best part? Watching it set in the fridge, knowing I’ve created something that’s cool, luscious, and surprisingly easy to make. It’s a recipe that feels like a small victory—simple, honest, and deeply comforting.
- heading: ‘The inspiration behind this cheesecake’
History and trivia of no-bake cheesecake
- This no-bake cheesecake style gained popularity in the mid-20th century as a quick, fuss-free dessert option for busy households.
- Its roots trace back to European chilled desserts, adapted in America with cream cheese to suit local tastes and ingredients.
- During the 1970s, the no-bake version became a kitchen staple, partly due to the rise of convenience foods and refrigeration advancements.
- Interestingly, many classic recipes were developed out of necessity during wartime shortages, favoring simple, readily available ingredients.
- Today, it’s a nostalgic favorite, often associated with summer picnics, family gatherings, and effortless holiday treats.
Ingredient breakdown
- Cream Cheese: I love how it’s rich and velvety, giving the cheesecake that signature tang—make sure it’s softened for easy mixing, or you’ll end up with lumps that resist smoothness.
- Graham Cracker Crust: I prefer a slightly toasted, buttery base that adds depth—try pressing it firmly into the pan and chill before filling for a sturdy crust that doesn’t crumble.
- Heavy Cream: The key to that light, airy texture—whip until soft peaks form; over-whipping can turn it grainy, so keep an eye on it and stop when it shimmers.
- Lemon Juice: Brightens the whole thing with a zing—use fresh for the most lively aroma and flavor; bottled lemon can work in a pinch, but it’s less vibrant.
- Sugar: Balances the tang with sweetness—adjust according to your cheese’s tartness; a little extra can mellow out the acidity, making each bite smoother.
- Gelatin (optional): Just a touch helps set the cheesecake firmer if you prefer it less soft—dissolve carefully in warm water and don’t add too much, or it’ll be rubbery.
- Vanilla Extract: Adds a warm, aromatic depth—use good quality, and a little goes a long way to enhance every creamy bite.
Spotlight on key ingredients
Cream Cheese:
- I love how it’s rich and velvety, giving the cheesecake that signature tang—make sure it’s softened for easy mixing, or you’ll end up with lumps that resist smoothness.
- Graham Cracker Crust: I prefer a slightly toasted, buttery base that adds depth—try pressing it firmly into the pan and chill before filling for a sturdy crust that doesn’t crumble.
Heavy Cream & Lemon Juice:
- Heavy Cream: The key to that light, airy texture—whip until soft peaks form; over-whipping can turn it grainy, so keep an eye on it and stop when it shimmers.
- Lemon Juice: Brightens the whole thing with a zing—use fresh for the most lively aroma and flavor; bottled lemon can work in a pinch, but it’s less vibrant.
Notes for ingredient swaps
- Dairy-Free: Swap cream cheese for a cashew-based or coconut cream alternative. Expect a slightly sweeter, nuttier flavor with a softer texture.
- Gluten-Free: Use crushed gluten-free cookies or almond flour mixed with butter for the crust. Slightly less crunchy but equally satisfying.
- Sweetener Options: Replace sugar with honey or maple syrup. These will add a subtle flavor and may slightly alter the texture, making it a touch softer.
- Lemon Juice: Use bottled lemon or lime juice if fresh isn’t available. The flavor will be less bright but still tangy enough for balance.
- Heavy Cream: Substitute with coconut cream or a dairy-free whipping alternative. Keep in mind, it might not whip as stiff, so adjust expectations.
- Crust Base: Graham crackers can be replaced with digestive biscuits or vanilla wafers. Each adds its own subtly different sweetness and texture.
- Flavor Boost: Add a splash of vanilla extract or a pinch of cinnamon to customize the profile—just a small tweak to make it your own.
Equipment & Tools
- Springform pan: To hold the crust and filling, easy to release the cheesecake.
- Mixing bowls: For mixing the crust and filling ingredients separately.
- Spatula: To gently fold whipped cream into the cheese mixture.
- Hand mixer or whisk: To beat the cream cheese and whip the cream efficiently.
- Rolling pin or similar: To crush the graham crackers evenly.
Step-by-step guide to no-bake cheesecake
- Gather your equipment: a 9-inch springform pan, mixing bowls, spatula, hand mixer or whisk, and a small saucepan for melting butter if needed.
- Crush the graham crackers: place in a zip-top bag and crush with a rolling pin until fine crumbs. You need about 1 1/2 cups.
- Mix the crumbs with melted butter and a pinch of salt: stir until evenly coated and press firmly into the bottom of the springform pan. Chill in the fridge for 15 minutes.
- In a large bowl, soften the cream cheese: leave it at room temperature for about 30 minutes to avoid lumps.
- Beat the cream cheese: using a hand mixer or whisk, until smooth and fluffy, about 2-3 minutes.
- Add sugar, lemon juice, and vanilla: mix until well combined. The mixture should be creamy and slightly tangy.
- Whip the heavy cream: in a separate bowl, beat until soft peaks form, about 3-4 minutes. Be careful not to over-whip.
- Fold the whipped cream into the cream cheese mixture: gently combine with a spatula until no streaks remain, maintaining airy texture.
- Pour the filling over the prepared crust: smooth the top with a spatula or spoon.
- Chill the cheesecake: cover with plastic wrap and refrigerate for at least 4 hours or overnight. It should be set and firm.
- Before serving, run a knife around the edge of the pan and carefully release the springform. Garnish with fresh berries or fruit if desired.
- Rest and serve: slice with a warm, sharp knife for clean cuts. Serve chilled, enjoying the smooth, tangy, creamy bites.
After chilling, carefully run a knife around the edge before removing the springform. Slice with a warm knife for clean cuts. Garnish with fresh berries or a dusting of powdered sugar if desired. Serve chilled for the best texture and flavor.
How to Know It’s Done
- The filling is firm and slightly jiggles when gently shaken.
- The top is smooth and set, not runny or liquid.
- The crust is firm and holds together when sliced.
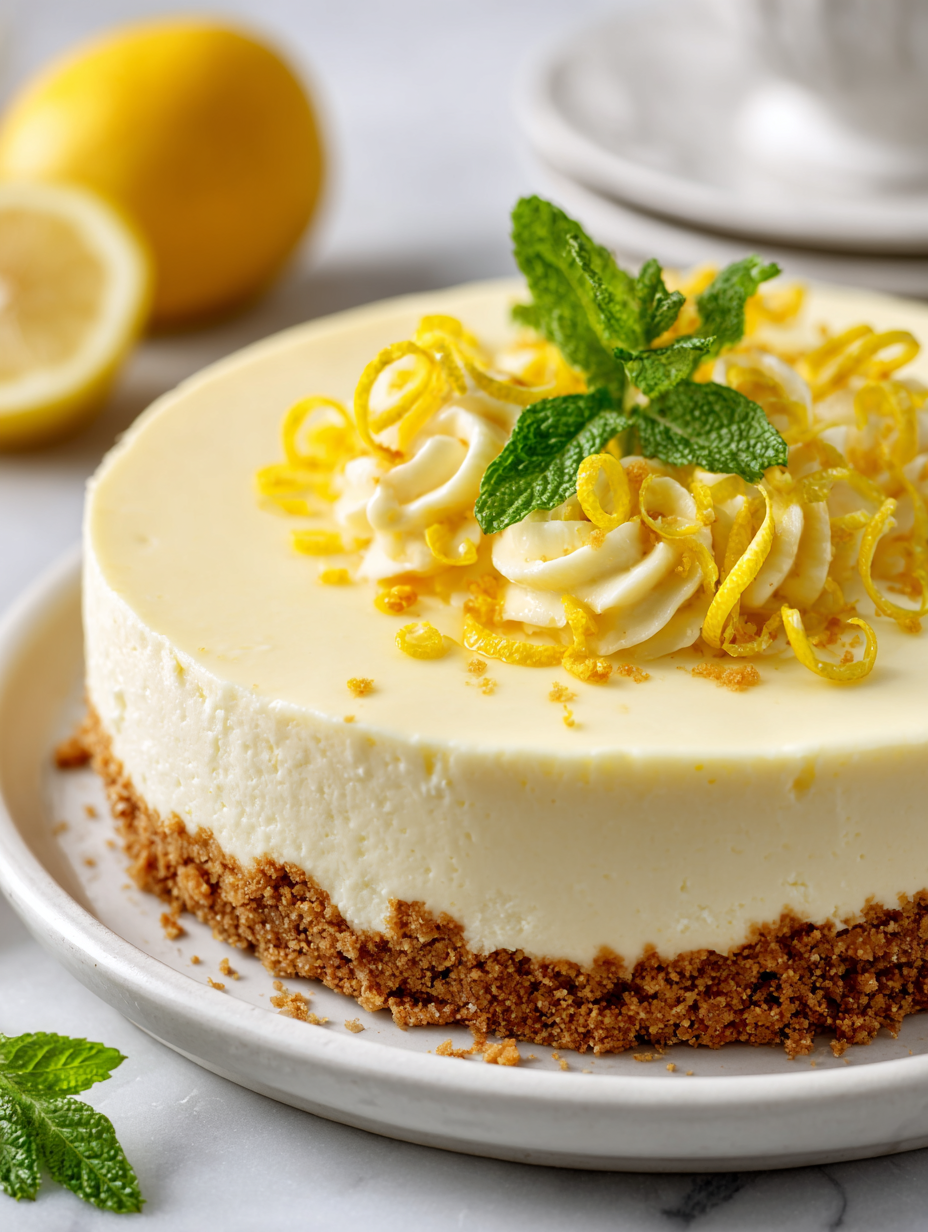
No-Bake Lemon Cheesecake
Ingredients
Equipment
Method
- Crush the graham crackers into fine crumbs using a rolling pin inside a plastic bag or a food processor, then transfer to a bowl.
- Mix the melted butter into the graham cracker crumbs until evenly coated, then press this mixture firmly into the bottom of a springform pan to form an even crust. Chill in the fridge for 15 minutes to set.
- In a large mixing bowl, beat the softened cream cheese with a hand mixer or whisk until smooth and creamy, about 2-3 minutes.
- Add the sugar, lemon juice, and vanilla extract to the cream cheese, and beat until fully combined and slightly fluffy.
- In a separate bowl, whip the cold heavy cream until soft peaks form, which should take about 3-4 minutes. The cream should shimmer and hold gentle peaks.
- Gently fold the whipped cream into the cream cheese mixture using a spatula, folding carefully until smooth and airy, without deflating the mixture.
- Pour the filling over the chilled crust, smoothing the top with a spatula for an even surface.
- Cover the springform pan with plastic wrap and refrigerate for at least 4 hours, or overnight, until the cheesecake is firm and set.
- Once set, run a warm knife around the edge of the cheesecake to loosen it, then carefully remove the sides of the springform pan.
- Garnish with fresh berries or lemon zest if desired, then slice with a warm knife for clean cuts and serve chilled.
Tips for Perfect Cheesecake Texture
- Chill the crust thoroughly before adding filling to prevent sliding or cracking.
- Whip the heavy cream just until soft peaks form—stiff peaks may turn grainy and lose volume.
- Gently fold whipped cream into the cheese mixture to keep it light and airy.
- Use a warm knife to slice the chilled cheesecake for clean, smooth cuts.
- If the filling is too soft, extend the chilling time; patience improves firmness and texture.
- Incorporate lemon juice gradually, tasting as you go, for the perfect tang without overpowering.
- For an extra smooth filling, beat cream cheese thoroughly to avoid lumps and ensure even mixing.
Common mistakes and how to fix them
- FORGOT to chill the crust? Re-crush and press firmly, then chill again.
- DUMPED the whipped cream? Gently fold in, avoiding deflation.
- OVER-TORCHED the edges? Cover with foil and lower oven temp next time.
- FAILED to soften cream cheese? Soften at room temp for smoother mixing.
Quick fixes and pantry swaps
- If the filling cracks, gently smooth with a warm spatula or knife before chilling.
- When the crust crumbles, re-melt a bit more butter, press firmly, and chill again.
- Splash a little lemon juice on cracks to hide imperfections and brighten the appearance.
- Patch a runny filling with a sprinkle of crushed graham crackers and refrigerate briefly.
- Shield the cheesecake from condensation by wrapping tightly, avoiding soggy crust or filling.
Prep, store, and reheat tips
- Prepare the crust and press into the pan at least 2 hours before serving; it firms up and becomes easier to slice.
- The cheesecake can be made a day ahead; keep it covered tightly in the fridge to prevent it from absorbing other odors.
- For the best texture, let the cheesecake sit at room temperature for 15-20 minutes before slicing—this softens it just enough.
- Shelf life is about 3-4 days in the fridge; the flavors deepen slightly, making each slice creamier and more harmonious.
- Reheating isn’t necessary; serve chilled or slightly softened for a smoother bite, ensuring it’s not too warm or runny.
Top Questions About No Bake Cheesecake
1. Can I use light cream cheese?
Yes, using full-fat cream cheese gives it that rich, velvety texture and tang. Light versions tend to be softer and less creamy.
2. Will low-fat cream cheese work?
Absolutely. Just note it might be less creamy and slightly less tangy, but it still works well chilled and set.
3. Can I use warm cream?
Yes, but make sure your cream is very cold before whipping. It helps achieve that light, fluffy texture without turning runny.
4. Can I use room-temperature cream?
You can, but it won’t whip as stiffly. Chill it thoroughly first, and expect a slightly denser filling.
5. Is bottled lemon juice okay?
Use fresh lemon juice for the brightest flavor and aroma. Bottled lemon works in a pinch but tends to be less vibrant.
6. Can I substitute lemon juice?
Yes, you can substitute it with lime juice for a different citrus note, or add a splash of orange liqueur for a subtle twist.
7. Can I change the crust ingredients?
Crushed graham crackers are traditional, but digestive biscuits or vanilla wafers are tasty swaps, adding their own unique flavor.
8. What if I use different cookies for the crust?
You can, but it may affect the texture and flavor. Using cookie crumbs with butter keeps it sturdy and tasty.
9. What if it cracks on top?
If the cheesecake cracks, gently smooth the surface with a warm knife or spatula before chilling. It helps hide imperfections.
10. My cheesecake isn’t firm enough, what now?
If it’s too soft after chilling, give it more time in the fridge—sometimes it needs an extra hour to set fully.
This no-bake cheesecake isn’t just a quick fix; it’s a reminder that simplicity can be stunning. I often find myself reaching for this recipe when I want something satisfying without the fuss of baking. Its cool, creamy texture and tangy flavor feel like a little celebration of how straightforward ingredients can come together beautifully.
In a world that’s often about instant gratification, this dessert offers a moment of calm—chilled, set, and perfect. It’s one of those recipes that’s become a staple in my kitchen, ready to serve whenever the craving strikes or unexpected guests arrive. And honestly, that’s what makes it special.

Hi, I’m Grace Morgan, and welcome to my kitchen. This is a space shaped by family meals, curious hands reaching for snacks, paws under the table, and recipes that come together in the middle of real life. I’m a food blogger, a mother, and a passionate pet keeper. Most days, I’m cooking with one eye on the stove and the other on someone who needs me, whether that’s a child asking for a taste or a dog hoping something might fall.


