This no-bake cheesecake bars recipe is my go-to when I want something rich and satisfying without firing up the oven. It’s a no-fuss way to get that creamy, tangy flavor of classic cheesecake, but in a form that’s easy to share and easier to make. Plus, on hot days, it’s a relief to skip the heat and just focus on chilling and tasting.
What I love most is how forgiving this recipe is. You can swap ingredients, adjust sweetness, or add your own twist, and it still comes together in no time. It’s a reminder that sometimes, the simplest desserts are the most memorable—no need for fancy techniques or long waits. Just good ingredients, a little patience, and a lot of flavor.
This recipe focuses on the simplicity and satisfaction of making a rich, creamy cheesecake bar without turning on the oven, perfect for hot days or busy schedules. It’s about reclaiming the joy of dessert with minimal fuss and maximum flavor, using ingredients you probably already have. The no-bake aspect isn’t just convenience — it’s a way to preserve the fresh, bright taste of cream cheese and citrus, without the risk of overcooking.
A No-Fuss Cheesecake Fix
- I love how these bars bring back summer picnics, with that tangy cream cheese melting on my tongue.
- There was a chaos moment when I dropped a whole spoonful of lemon zest into the mix—felt like a disaster, but it turned out perfect.
- Making these reminds me of lazy weekends at my grandma’s, where simplicity and good ingredients meant everything.
- The first time I got the texture just right—smooth, not too firm, not too soft—was a small victory I still celebrate.
The story behind this recipe
- This recipe came from a lazy summer afternoon in my tiny apartment. I wanted something sweet, cool, and quick, but didn’t want to turn on the oven or wait hours for a chilled dessert. It’s the kind of treat that feels like a small victory—simple ingredients, big flavor, no fuss. Plus, I love how it’s a little nostalgic, reminding me of childhood desserts but with a grown-up twist of tangy cream cheese and bright citrus.
- Some of my happiest moments in the kitchen happen when I’m experimenting with no-bake desserts—like the time I accidentally used too much lemon zest and thought I’d ruined everything. Turns out, that extra zing made the bars even more addictive. It’s a reminder that not every mistake is a mistake, especially when it leads to something unexpectedly better.
- heading: The story behind this recipe
Historical tidbits about no-bake cheesecake bars
- This recipe has roots in the mid-20th century when convenience foods gained popularity in American kitchens, emphasizing quick, no-bake desserts.
- Originally, no-bake cheesecakes were a practical way to enjoy rich, creamy dessert without the need for an oven, especially in warm climates.
- The concept of layered, refrigerated desserts like these bars gained momentum during the rise of modern refrigeration, making them a staple in every home cook’s repertoire.
Key ingredients breakdown
- Cream cheese: I love how it stays silky at room temp—makes mixing a breeze. If it’s too cold, it clumps; warm it slightly to smooth it out.
- Graham cracker crust: I prefer a slightly chunky texture, so I don’t over-process. You want a buttery crunch that melts on your tongue.
- Powdered sugar: Adds sweetness without graininess. If you prefer less sweetness, cut back a bit or substitute with honey for a richer flavor.
- Lemon juice: Brightens everything with its zesty, sharp aroma. Use fresh for that zing, or bottled if you’re in a pinch—just taste and adjust.
- Butter: I melt it until just shimmering, not browned, for that perfect crumbly base. Too hot, and it can make the crust greasy; let it cool slightly before mixing.
- Vanilla extract: A splash brings depth and warmth. Skip if you want a more neutral flavor, but I think it ties everything together beautifully.
- Optional toppings (berries/chocolate): Fresh berries add tartness and color; chocolate chips melt and ooze, making each bite richer and more decadent.
Spotlight on key ingredients
Cream cheese:
- I love how it stays silky at room temp—makes mixing a breeze. If it’s too cold, it clumps; warm it slightly to smooth it out.
- Graham cracker crust: I prefer a slightly chunky texture, so I don’t over-process. You want a buttery crunch that melts on your tongue.
- Powdered sugar: Adds sweetness without graininess. If you prefer less sweetness, cut back a bit or substitute with honey for a richer flavor.
Lemon juice and vanilla:
- Lemon juice: Brightens everything with its zesty, sharp aroma. Use fresh for that zing, or bottled if you’re in a pinch—just taste and adjust.
- Butter: I melt it until just shimmering, not browned, for that perfect crumbly base. Too hot, and it can make the crust greasy; let it cool slightly before mixing.
- Vanilla extract: A splash brings depth and warmth. Skip if you want a more neutral flavor, but I think it ties everything together beautifully.
Notes for ingredient swaps
- Dairy-Free: Swap cream cheese for coconut cream or cashew-based cream cheese. Expect a slightly sweeter, more coconut-y flavor and softer texture.
- Gluten-Free: Use gluten-free graham crackers or digestive biscuits. The base will be just as crisp, but a bit more neutral in flavor.
- Sweetener Alternatives: Substitute powdered sugar with honey or maple syrup. These add a richer sweetness but may alter the texture slightly.
- Lemon Juice: Use bottled lemon juice if fresh isn’t available—just taste and adjust to get that bright, citrusy punch.
- Crust Variations: Try crushed digestive biscuits, Oreo crumbs (without the filling for less sweetness), or even graham crackers for a different crunch and flavor profile.
- Butter: Use melted coconut oil or vegan butter for dairy-free options. The crust might be slightly more fragrant and coconut-forward.
- Toppings: Fresh berries, fruit compotes, or melted chocolate can replace or add to the toppings, giving each bar a new twist.
Equipment & Tools
- 20cm (8-inch) square baking dish: Holds the crust and filling, shaping the bars.
- Mixing bowl: Combines ingredients for crust and filling.
- Spatula: Spreads and smooths layers, mixes ingredients.
- Parchment paper: Makes removal easier and prevents sticking.
- Microwave or stove: Melts the butter efficiently.
- Hand mixer (optional): Ensures a fluffy, lump-free cream cheese mixture.
Step-by-step guide to cheesecake bars
- Gather your equipment: a 20cm (8-inch) square baking dish, a mixing bowl, a spatula, and a parchment paper liner for easy removal.
- Crush the graham crackers: Place them in a zip-top bag and use a rolling pin to crush until fine, about 1-2 minutes. You want a crumbly texture that holds together when pressed.
- Melt the butter: In a small saucepan or microwave-safe bowl, melt the butter until just shimmering, about 30 seconds in the microwave or 1 minute on the stove. Let it cool slightly so it doesn’t melt the crust too much.
- Mix the crust: In the mixing bowl, combine the crushed graham crackers and melted butter. Stir until evenly coated and resembles damp sand. Press this mixture firmly into the bottom of your prepared baking dish, using the back of a spatula or your fingers to smooth it out evenly. Chill in the fridge for 15 minutes to set.
- Prepare the filling: In a large bowl, beat the softened cream cheese with a hand mixer or sturdy spatula until smooth and fluffy, about 2-3 minutes. Add the powdered sugar and vanilla extract, mix well. Then, pour in the lemon juice and continue mixing until fully incorporated. The mixture should be creamy and bright in aroma.
- Assemble the bars: Spread the cream cheese mixture evenly over the chilled crust. Use a spatula to smooth the top. Cover with plastic wrap or foil and refrigerate for at least 4 hours, or preferably overnight, to allow the flavors to meld and the filling to firm up.
- Final chill & set: Before serving, ensure the bars are fully chilled and set. The filling should be firm to the touch and slightly jiggle when gently shaken. If not firm, give it more time in the fridge.
- Serve and enjoy: Lift the bars out using the parchment paper, cut into squares, and plate. Optionally, garnish with fresh berries or a drizzle of chocolate before serving.
Let the bars chill in the fridge for at least 4 hours, ideally overnight. Once set, lift the entire block out using parchment paper, cut into squares with a sharp knife, and serve chilled. Garnish as desired with berries or chocolate for extra flair.
How to Know It’s Done
- The crust is golden and firm when pressed; no crumbling or sticking.
- The filling is smooth, with no lumps, and has a bright, tangy aroma.
- The bars are well chilled and hold shape with a slight jiggle in the center.
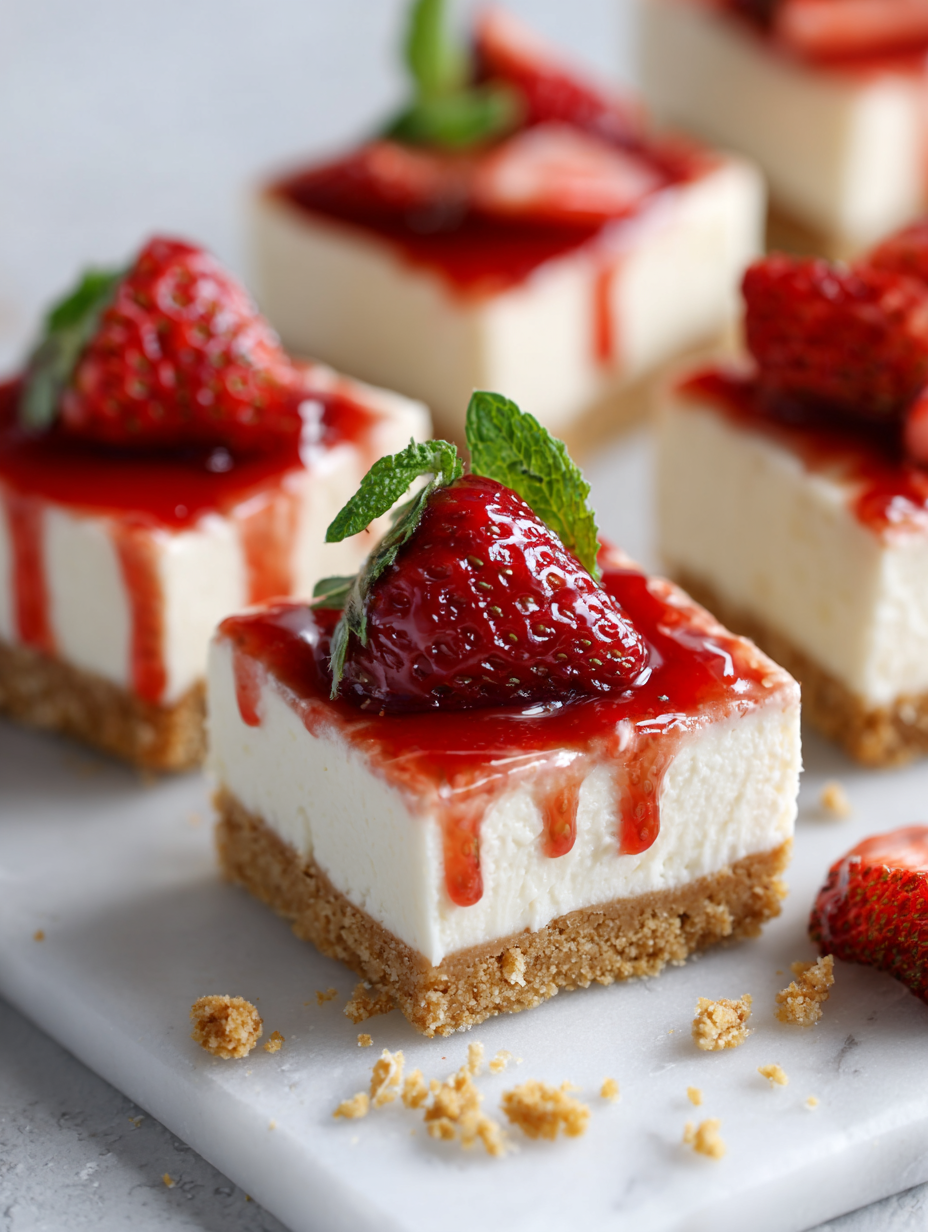
No-Bake Cheesecake Bars
Ingredients
Equipment
Method
- Place the graham crackers in a zip-top bag and crush them with a rolling pin until fine crumbs form, about 1-2 minutes.
- Transfer the crumbs to a mixing bowl and stir in the melted butter until the mixture resembles damp sand.
- Press this crumb mixture firmly into the bottom of your prepared baking dish, creating an even, compact layer. Chill in the fridge for 15 minutes to set.
- In a large bowl, beat the softened cream cheese until smooth and fluffy, about 2-3 minutes.
- Add the powdered sugar and vanilla extract to the cream cheese and mix until well combined and creamy.
- Pour in the lemon juice and mix again, just until incorporated. The mixture should be bright and smooth, with a slight aroma of citrus.
- Spread the cream cheese filling evenly over the chilled crust, smoothing the top with a spatula.
- Cover the dish with plastic wrap or foil and refrigerate for at least 4 hours or overnight to allow the filling to set firm and flavors to meld.
- Once fully chilled and set, lift the bars out using parchment paper, cut into squares, and serve chilled, garnished with berries or a drizzle of chocolate if desired.
Pro tips for perfect cheesecake bars
- Bolded mini-head: Use room temperature cream cheese for smooth mixing and a creamier filling.
- Bolded mini-head: Chill the crust thoroughly to prevent it from crumbling when spreading the filling.
- Bolded mini-head: Gently fold in lemon juice to avoid deflating the airy texture of the filling.
- Bolded mini-head: Use a hot knife to cut clean edges through chilled bars, avoiding jagged pieces.
- Bolded mini-head: If the filling cracks or separates, give it a quick re-whip to restore smoothness.
- Bolded mini-head: For extra shine, lightly brush the top with a thin layer of warmed jam or glaze before serving.
- Bolded mini-head: Keep the bars refrigerated until just before serving to preserve that creamy, firm texture.
Common mistakes and how to fix them
- FORGOT to chill crust: Fix by refrigerating for 15 minutes before adding filling.
- DUMPED too much lemon: Use the recommended 1-2 tablespoons for balanced brightness.
- OVER-TORCHED crust edges: Cover with foil if edges brown too quickly during fridge chill.
- MISSED filling consistency: If too runny, refrigerate longer or add a bit more cream cheese.
Quick fixes and pantry swaps
- If the crust cracks, splash a little extra melted butter and press again gently.
- When filling is too runny, dump it back in the fridge for 20 minutes to firm up.
- Patch cracks by smoothing with a hot knife; shimmer means perfect set.
- Shield edges with foil if they brown too quickly during chilling.
- Splash a few drops of lemon juice if filling lacks brightness—shimmer and zing will follow.
Prep, store, and reheat tips
- Prepare the crust and press it into the pan a day ahead; it firms up better and saves time on serving day.
- The assembled bars can be kept covered in the fridge for up to 3 days; the filling stays creamy and fresh.
- For longer storage, freeze the bars wrapped tightly in plastic wrap and foil; they keep well for up to a month.
- Refrigerate the bars for at least 2 hours before serving to ensure the filling is firm and the flavors meld.
- To reheat, let the bars thaw slightly at room temperature for about 10 minutes—texture remains creamy, aroma bright.
Top questions about no bake cheesecake bars
1. Can I use cold cream cheese?
Use softened cream cheese for smooth mixing. Cold cheese clumps; warm it slightly to make it silky.
2. How long should I chill the bars?
Refrigerate the bars for at least 4 hours, preferably overnight, until the filling is firm and set.
3. Can I change the crust ingredients?
Yes, you can swap graham crackers for digestive biscuits or Oreo crumbs for different flavors and textures.
4. Can I substitute lemon juice?
Use fresh lemon juice for a bright, zesty flavor. Bottled works in a pinch but may lack vibrancy.
5. Are there dairy-free options?
For a dairy-free version, try coconut cream or cashew-based cheese. Expect a slightly different, creamier taste.
6. How do I prevent the crust from breaking apart?
Ensure the crust is pressed firmly and chilled before adding the filling. This prevents crumbling and keeps the layers distinct.
7. How do I avoid a grainy texture?
Overmixing can incorporate too much air, making the filling airy and less creamy. Mix until just combined.
8. How can I get clean cuts?
Use a hot knife to cut through chilled bars for clean edges. Warming the knife slightly helps slices slide smoothly.
9. How long can I keep the bars?
Store leftovers in an airtight container in the fridge for up to 3 days. For longer, freeze wrapped bars for up to a month.
10. What if the filling is too soft?
If the filling is too runny, refrigerate for 20 minutes to firm up before serving. It helps maintain shape.
These no-bake cheesecake bars are a reminder that some of the best desserts come together with minimal fuss. They’re perfect for hot days or when you need something sweet, creamy, and satisfying without heating up the kitchen. The combination of tangy cream cheese and bright citrus makes each bite feel refreshingly indulgent.
Once you get the hang of the simple steps, they become a go-to treat for spontaneous gatherings or quiet evenings. The best part is how flexible they are—swap ingredients, add your favorite toppings, or make them ahead of time. No matter what, they’ll always feel like a little win.

Hi, I’m Grace Morgan, and welcome to my kitchen. This is a space shaped by family meals, curious hands reaching for snacks, paws under the table, and recipes that come together in the middle of real life. I’m a food blogger, a mother, and a passionate pet keeper. Most days, I’m cooking with one eye on the stove and the other on someone who needs me, whether that’s a child asking for a taste or a dog hoping something might fall.


