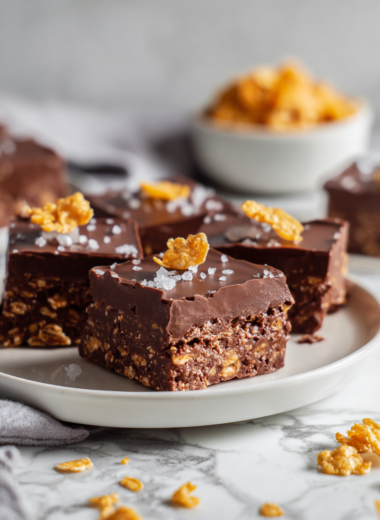
Category: Desserts

  • Candy Corn Fudge: A Nostalgic Fall Twist with a Modern Bite

    Candy Corn Fudge: A Nostalgic Fall Twist with a Modern Bite

    Candy corn fudge is a reminder of all the chaos and charm of fall holidays. Its bright colors and sweet, buttery aroma make it irresistible, especially when you’re craving a nostalgic treat but want to elevate it with a bit of homemade craft. It’s one of those recipes that feels both precise and forgiving, with room for your own tweaks and flavors.

    Why I Keep Coming Back to This Recipe

    It captures that fleeting childhood joy, the chaos of fall, and the simple pleasure of homemade sweets. Every batch feels like a small victory, a messy but rewarding project. Plus, it’s quick, forgiving, and endlessly customizable — a perfect way to make a holiday feel special without fuss.

    Deep Dive into the Ingredients

    • Candy corn: Provides a sweet, chewy texture with a festive orange and yellow pop. Swap for autumnal sprinkles or chopped nuts for variety.
    • Marshmallow fluff: Adds fluffiness and a melt-in-your-mouth quality, balancing the richness of butter.
    • Sweetened condensed milk: Creamy and sweet, it binds everything together; for less sweetness, try evaporated milk, but you’ll lose some gooeyness.
    • Butter: Gives the fudge its tender, buttery base; salted butter enhances flavor, but unsalted works just fine.
    • Vanilla extract: A splash brightens the sweetness; omit if you prefer a more intense candy corn flavor.
    • Salt: A pinch heightens the sweetness and balances flavors; sea salt flakes add a nice crunch.
    • Optional add-ins (nuts, sprinkles): For texture contrast and visual flair — don’t skip if you’re feeling fancy.

    Tools of the Trade for Perfect Fudge

    • Heavy-bottomed saucepan: Ensures even heat distribution and prevents scorching.
    • Silicone spatula: For stirring smoothly and scraping down the sides.
    • Candy thermometer: To monitor the fudge’s temperature accurately.
    • Parchment paper: Eases removal and clean-up of the set fudge.
    • Sharp knife: To cut clean slices once set.

    Step-by-Step: Making Candy Corn Fudge

    Step 1: Gather your ingredients and equipment before starting — nothing worse than digging for a spoon mid-melt.

    Step 2: Line a square pan (20×20 cm or 8×8 inches) with parchment paper, leaving some overhang for easy lifting.

    Step 3: In a heavy-bottomed saucepan, melt butter over low heat until shiny and smooth, about 2 minutes.

    Step 4: Add marshmallow fluff and stir until fully melted and integrated. This smells like childhood.

    Step 5: Pour in sweetened condensed milk, stirring constantly until the mixture is creamy and just begins to bubble.

    Step 6: Drop in candy corn, stirring gently so they don’t all sink. Watch for the oozy, bright orange color to meld into the buttery base.

    Step 7: Cook on low, stirring, until the mixture reaches 115°C (240°F) on a candy thermometer or thickens slightly. It should be glossy and smooth.

    Step 8: Pour the hot fudge into your prepared pan, smoothing the top with a spatula. Let it set at room temperature for about an hour.

    Step 9: Once firm, lift out the fudge using the parchment overhang. Slice into squares or rectangles.

    Step 10: Let the pieces cool completely before serving. They should be firm but still chewy, with a bit of a sticky bite.

    Cooking Checkpoints and Tips

    • Ensure your candy thermometer is accurate for perfect temperature control.
    • Stir constantly when adding condensed milk to prevent burning or sticking.
    • Watch for the fudge to reach a glossy, slightly thickened stage — that’s when it’s ready to pour.
    • If the fudge crystallizes or becomes grainy, gently reheat and stir in a splash of milk to smooth it out.

    Common Mistakes and How to Fix Them

    • Incorrect temperature readings can lead to under- or over-cooked fudge.? Use a fresh candy thermometer to avoid inaccurate readings.
    • High heat or infrequent stirring can scorch the mixture.? Stir continuously and keep heat low to prevent burning.
    • Fudge becoming grainy or hard from overcooking.? Reheat gently if mixture firms up before pouring.
    • Crystallization or graininess in the fudge.? Add a splash of milk if fudge crystallizes during stirring.

    Candy Corn Fudge

    Candy corn fudge is a vibrant, sweet treat that combines chewy candy corn with a creamy, buttery base. Made by melting marshmallow fluff, sweetened condensed milk, and butter, then mixing in candy corn and allowing the mixture to set, it results in a colorful, chewy square with a glossy finish and festive appearance.
    Prep Time 10 minutes
    Cook Time 15 minutes
    Total Time 25 minutes
    Servings: 16
    Course: Main Course
    Cuisine: American
    Calories: 180

    Ingredients
      

    • 2 cups candy corn bright orange and yellow pop
    • 1 cup marshmallow fluff adds fluffiness and melt-in-your-mouth texture
    • 1 can (14 oz) sweetened condensed milk binds ingredients and adds sweetness
    • 1/2 cup butter salted or unsalted
    • 1 teaspoon vanilla extract brightens the flavor
    • a pinch salt enhances sweetness

    Equipment

    • Heavy-bottomed saucepan
    • Silicone spatula
    • Candy thermometer
    • Parchment paper
    • Square pan (20×20 cm or 8×8 inches)
    • Sharp knife

    Method
     

    1. Line your square pan with parchment paper, leaving some overhang for easy removal. Set aside.
    2. Melt the butter in a heavy-bottomed saucepan over low heat until shiny and smooth, about 2 minutes. Use a silicone spatula to stir gently, releasing a warm, buttery aroma.
    3. Add marshmallow fluff to the melted butter and stir constantly until completely melted and integrated. The mixture will become thick, shiny, and fragrant, resembling a fluffy, golden paste.
    4. Pour in the sweetened condensed milk and continue stirring rapidly until the mixture is creamy, bubbling gently, and smooth. This creates a rich, gooey base.
    5. Gently fold in the candy corn, stirring carefully so they don’t sink completely. Watch as the bright orange and yellow colors begin to meld into the mixture, creating a colorful swirl.
    6. Continue to cook on low heat, stirring constantly, until the mixture reaches 115°C (240°F) on a candy thermometer or thickens slightly and becomes glossy. It should feel thick and smooth when stirred.
    7. Immediately pour the hot fudge into your prepared pan, smoothing the top with a spatula. The mixture will spread and settle into an even layer. Let it cool at room temperature for about an hour until set and firm.
    8. Once the fudge is firm and glossy, lift it out of the pan using the parchment overhang. Place it on a cutting board and cut into squares or rectangles with a sharp knife, revealing the vibrant colors and chewy texture.
    9. Enjoy your colorful candy corn fudge! Serve at room temperature for the perfect chewy, buttery bite with a festive look.

    Notes

    Ensure your candy thermometer is accurate for perfect temperature control. Stir constantly when adding condensed milk to prevent burning. Watch for the fudge to reach a glossy, slightly thickened stage before pouring. If fudge becomes grainy, gently reheat and stir in a splash of milk to smooth it out.
    This fudge isn’t just a treat; it’s a little piece of fall in every bite. The candy corn adds a nostalgic crunch, balanced by the rich, buttery sweetness of the fudge. Feel free to swap out candy for seasonal sprinkles or chopped nuts for variety. Making this pulls me right back to childhood Halloweens, and it’s perfect for sharing with friends or just savoring solo.

  • Spiderweb Donuts: Embracing the Art of Messy Elegance in Your Kitchen

    Spiderweb Donuts: Embracing the Art of Messy Elegance in Your Kitchen

    Spiderweb donuts are more than just a treat; they’re a playful dance with dough and sugar. I stumbled into this recipe after a messy baking session led to some leftover dough and a craving for something visually fun. The web shape makes them feel like tiny edible art pieces, perfect for when you want to impress without too much fuss. Plus, the process is surprisingly forgiving, which is a relief when you’re juggling a busy kitchen.

    Why I Keep Coming Back to These Donuts

    They’re imperfect but beautiful, messy but satisfying. The web pattern sparks childhood memories of sticky spider webs in the garden, now transformed into something sweet and edible. Making them is a chance to slow down, focus, and enjoy the tactile pleasure of piping delicate threads. Plus, they’re a conversation starter, a treat that invites admiration and a little bit of chaos in the kitchen.

    The Building Blocks of Spiderweb Donuts

    • Flour: All-purpose flour gives the dough structure and a neutral base. Swap with gluten-free flour if needed.
    • Yeast: Activates the dough, making it airy. Fresh yeast gives a more robust rise than dry, but dry works fine.
    • Sugar: Adds sweetness and helps the dough brown. Honey can replace sugar for a richer flavor.
    • Milk: Keeps the dough moist and tender. Almond milk makes it dairy-free.
    • Vegetable oil: Frying fat that makes the donuts crispy. Coconut oil adds a subtle aroma.
    • Vanilla extract: Adds warmth and depth. Use almond or lemon extract for a different twist.
    • Powdered sugar & cocoa powder (for decoration): Optional toppings to enhance the web effect and flavor.

    Tools of the Trade for Spiderweb Donuts

    • Mixing bowls: Combine ingredients without fuss.
    • Deep-fryer or heavy-bottomed pot: Maintain steady oil temperature for frying.
    • Piping bag with fine round tip: Create delicate web patterns.
    • Cooling rack: Drain excess oil and cool quickly.
    • Kitchen thermometer: Monitor oil temperature precisely.

    Crafting the Perfect Spiderweb Doughnuts: A Step-by-Step Guide

    Step 1: Mix the dough ingredients in a big bowl until just combined. Cover and let rest for 30 minutes.

    Cooking Checkpoints & Tips to Keep You on Track

    • Dough should be soft but not sticky, like slightly tacky cookie dough.
    • Frying oil must be around 180°C (356°F) for crisp, golden donuts.
    • Web design should be visible but not stiff—keep the dough flexible.
    • Listen for a consistent crackling sound when frying for even cooking.

    Common Mistakes & How to Fix Them

    • Oil too hot, donuts burn quickly.? Use a thermometer to keep oil at 180°C (356°F); avoid overheating.
    • Dough is sticky and hard to pipe.? Chill the dough if it’s too sticky to handle easily.
    • Web pattern breaks or looks uneven.? Ensure web piping is gentle and steady to prevent tearing.
    • Donuts are greasy or unevenly cooked.? Don’t overcrowd the pan; fry in batches for even cooking.

    Spiderweb Donuts

    Spiderweb donuts are playful fried treats crafted from a soft yeast dough, shaped into round donuts and decorated with intricate web patterns made from piping sugar threads. The use of yeast creates a light, airy interior, while frying gives them a crispy exterior. Their web design makes them a charming, edible art piece perfect for impressing guests or adding fun to any occasion.
    Prep Time 45 minutes
    Cook Time 10 minutes
    Total Time 55 minutes
    Servings: 8
    Course: Main Course
    Cuisine: American
    Calories: 250

    Ingredients
      

    • 2 1/4 teaspoons active dry yeast or instant yeast
    • 1/4 cup warm milk about 110°F/43°C
    • 3 cups all-purpose flour
    • 1/4 cup granulated sugar
    • 1/4 cup vegetable oil plus extra for frying
    • 1 large egg
    • 1 teaspoon vanilla extract
    • 1 cup powdered sugar for web decoration
    • 1 tablespoon water for making piping sugar
    • 1 teaspoon lemon juice optional, for consistency

    Equipment

    • Mixing bowls
    • Deep-fryer or heavy-bottomed pot
    • Piping bag with fine round tip
    • Cooling rack
    • Kitchen thermometer

    Method
     

    1. In a small bowl, sprinkle the yeast over warm milk and let it sit for 5 minutes until bubbly, signaling active fermentation.
    2. In a large mixing bowl, combine flour, sugar, and a pinch of salt. Add the activated yeast mixture, egg, vanilla extract, and vegetable oil.
    3. Mix everything together until a soft, slightly tacky dough forms. Knead gently for about 5 minutes until smooth and elastic.
    4. Cover the bowl with a damp cloth and let the dough rise in a warm spot for about 30 minutes, or until doubled in size.
    5. Once risen, punch down the dough and roll it out on a floured surface to about 1/2 inch thickness. Use a round cutter to cut out donut shapes.
    6. Heat vegetable oil in a deep-fryer or heavy-bottomed pot to 180°C (356°F). Carefully fry the donuts in batches until golden brown, about 2-3 minutes per side.
    7. Remove the donuts with a slotted spoon and drain on a cooling rack. Repeat until all donuts are fried and cooled slightly.
    8. Prepare the web piping sugar by mixing powdered sugar with water and lemon juice until smooth, adding more water if needed to achieve a piping consistency.
    9. Fill a piping bag fitted with a fine round tip with the piping sugar. Pipe delicate web patterns onto each donut, starting from the center and working outward in concentric circles, then add radiating lines to mimic a spiderweb.
    10. Allow the web decoration to set for a few minutes until firm. Serve the donuts fresh, showcasing their intricate web designs.

    Notes

    For an extra touch, sprinkle with cocoa powder or powdered sugar before piping the web for added contrast and detail.
    Making these spiderweb donuts isn’t just about the end result, but about embracing the chaos of the process. There’s a certain joy in creating something that looks intricate and delicate but is actually forgiving to make. Take your time, enjoy the messy fun, and don’t stress if the webs aren’t perfect—each one is a little piece of edible art. Now, go ahead, get your hands floury, and turn your kitchen into a web of sweet, flaky goodness.

  • Mummy Brownies: A Nostalgic Twist on Classic Comforts

    Mummy Brownies: A Nostalgic Twist on Classic Comforts

    Mummy Brownies might sound like a Halloween gimmick, but they’re really just a love letter to those intensely chocolatey, chewy treats we all grew up sneaking from the oven. The twist? Adding a touch of smoky cocoa and slightly bittersweet dark chocolate makes them feel both familiar and new. These aren’t your typical brownies—each bite is a small, dense piece of comfort, wrapped in a nostalgic haze.

    Why I keep baking these brownies again and again

    They’re a quick fix of nostalgia, and each batch reminds me of my childhood kitchen. The balance of bitter chocolate and sweet sugar feels just right for a rainy afternoon. Plus, they’re forgiving—no fancy techniques needed, just good ingredients and patience. Every time I bake them, I find a little piece of calm amid chaos.

    Deep dive into the ingredients that make these brownies special

    • Butter:: Rich, gives a tender crumb, smells like toasted nuts. Swap with coconut oil for a tropical twist.
    • Dark chocolate:: Vivid, smoky aroma, melts into the batter creating a gooey, luscious texture. Use milk chocolate for milder sweetness.
    • Cocoa powder:: Deep, slightly bitter, adds that intense chocolate punch. Dutch-processed smooths out acidity.
    • Sugar:: Sweetens and helps create the crackly top. Brown sugar adds a caramel note, white keeps it sharp.
    • Eggs:: Bind everything together, yolks add richness. Flax eggs can substitute for a vegan version.
    • Flour:: Keeps the structure, just a touch for that dense bite. Almond flour adds nutty flavor.
    • Vanilla extract:: Brightens the chocolate, adds a whisper of floral aroma. Almond extract can be a bold swap.

    Tools and Equipment for Baking Mummy Brownies

    • 20cm (8-inch) square pan: To bake the brownies evenly and give them a nice, manageable size.
    • Parchment paper: Prevents sticking and makes removing the brownies easier.
    • Saucepan: To melt the butter gently on the stove.
    • Whisk: To blend eggs, sugar, and liquids smoothly.
    • Rubber spatula: To fold in dry ingredients without overmixing.
    • Wire rack: To cool the brownies evenly.

    Step-by-step guide to baking Mummy Brownies

    Step 1: Preheat your oven to 175°C (350°F).

    Step 2: Line a 20cm (8-inch) square pan with parchment paper.

    Step 3: Melt 150g of butter in a saucepan over low heat, then let it cool slightly.

    Step 4: In a bowl, whisk together 2 eggs and 150g of sugar until smooth.

    Step 5: Add 1 teaspoon of vanilla extract and the melted butter, stir well.

    Step 6: Fold in 50g of cocoa powder, 100g of chopped dark chocolate, and 120g of flour.

    Step 7: Pour the batter into your prepared pan, smoothing the top.

    Step 8: Bake for 25-30 minutes, until a toothpick inserted in the center comes out with moist crumbs.

    Step 9: Let the brownies cool in the pan for 10 minutes, then transfer to a wire rack to cool completely.

    Step 10: Cut into squares and serve, maybe with a dusting of powdered sugar.

    Cooking checkpoints and tips for perfect Mummy Brownies

    • The batter should be glossy and thick, not runny.
    • The edges will start to pull away from the pan when done.
    • The top should crack slightly, indicating a chewy crust.
    • A toothpick inserted in the center should come out with moist crumbs, not wet batter.

    Common mistakes and how to fix them

    • Overmixing develops gluten, leading to dense brownies.? OVER-MIXED THE BATTER? Fold gently to keep brownies tender.
    • Overbaking makes brownies dry and crumbly.? BAKED TOO LONG? Check at 25 minutes for a fudgier center.
    • Too much fat can cause sinking or greasy bites.? USED TOO MUCH BUTTER? Cut back to avoid greasy texture.
    • Lack of salt dulls the chocolate flavor.? UNDERSALTED THE BATTER? Add a pinch of sea salt for depth.

    Mummy Brownies

    Mummy Brownies are rich, dense chocolate treats with a chewy texture and a glossy, crackly top. Made with smoky cocoa, dark chocolate, butter, and eggs, they deliver a nostalgic, fudgy bite that’s both comforting and indulgent. The final appearance is a deep, chocolatey square with a slightly cracked crust, perfect for Halloween or any chocolate craving.
    Prep Time 15 minutes
    Cook Time 30 minutes
    Total Time 45 minutes
    Servings: 16
    Course: Main Course
    Cuisine: American
    Calories: 250

    Ingredients
      

    • 150 g butter unsalted, melted and cooled slightly
    • 2 eggs large
    • 150 g sugar
    • 1 tsp vanilla extract
    • 50 g cocoa powder Dutch-processed for smoothness
    • 100 g dark chocolate chopped
    • 120 g flour

    Equipment

    • 20cm (8-inch) square pan
    • Parchment paper
    • Saucepan
    • Whisk
    • Rubber spatula
    • Wire rack

    Method
     

    1. Preheat your oven to 175°C (350°F) and line the 20cm (8-inch) square pan with parchment paper, leaving some overhang for easy removal.
    2. Melt the butter in a saucepan over low heat, just until it’s melted and begins to bubble gently. Remove from heat and let it cool slightly, filling your kitchen with a toasty, nutty aroma.
    3. In a mixing bowl, whisk together the eggs and sugar until the mixture is smooth, slightly thickened, and has a glossy appearance—this takes about 2 minutes and fills the air with a sweet, inviting smell.
    4. Add the vanilla extract and the melted butter to the egg mixture, stirring until well combined and the mixture looks velvety and shiny.
    5. Sift the cocoa powder into the batter, then fold it gently with a spatula until the color deepens and the mixture becomes thick and glossy.
    6. Stir in the chopped dark chocolate, allowing it to melt slightly into the batter, creating luscious pockets of chocolate goodness.
    7. Finally, fold in the flour just until incorporated—be careful not to overmix, as this keeps the brownies tender and fudgy.
    8. Pour the batter into your prepared pan, spreading it out evenly with a spatula to ensure a smooth, level surface.
    9. Bake in the preheated oven for 25–30 minutes, or until a toothpick inserted into the center comes out with moist crumbs—this indicates a fudgy, chewy texture inside.
    10. Remove the pan from the oven and let the brownies cool in the pan for about 10 minutes, then transfer to a wire rack to cool completely—this helps develop that crackly top and dense crumb.
    11. Once cooled, lift the brownies out of the pan using the parchment overhang, cut into squares, and enjoy the dense, chocolatey bites—perfect for a nostalgic treat or Halloween celebration.

    Notes

    For an extra smoky flavor, sprinkle a pinch of smoked sea salt on top before baking. Store in an airtight container for up to 3 days for maximum fudginess.
    Once cooled, these brownies hold a chewy, fudgy center with a crackly top that’s almost caramelized. They’re just slightly bittersweet, with a rich chocolate aroma that fills the kitchen. Enjoy them still warm or at room temperature, maybe with a glass of cold milk. Each bite is a nostalgic reminder of childhood treats, but with a homemade edge that makes them special.

  • Spooky Cupcakes: A Dark & Delightful Halloween Treat

    Spooky Cupcakes: A Dark & Delightful Halloween Treat

    Spooky cupcakes are a Halloween staple, but I love how they turn a simple chocolate cake into something a little more mischievous. There’s a thrill in mixing that dark, smoky cocoa with a touch of food coloring, making the batter look like night itself. It’s a fun project, especially when you want to surprise friends or kids with something a little wicked.

    Why I keep coming back to these spells

    They’re unexpectedly simple but look so hauntingly good. I love how a little food coloring transforms a basic cupcake into a spooky centerpiece. Plus, decorating them is a playful chaos that always results in something uniquely creepy.

    Dark secrets — ingredient insights

    • Cocoa powder: Gives that deep, smoky flavor, makes the cupcakes dark as night. Swap with dark chocolate for a richer taste.
    • Black food coloring: Adds the spooky black hue. Use gel for intensity, liquid can thin out your batter.
    • Buttermilk: Keeps cupcakes moist and tender. Substitute with yogurt or milk + a splash of lemon.
    • Dark chocolate ganache: Rich, shiny, perfect for that glossy, creepy finish. Use semi-sweet if you prefer less bitterness.
    • Decorative toppers: Spiders, bats, or ghosts—whatever makes your heart race. Edible markers work great for details.

    Tools of the dark arts

    • Mixing bowls: For combining your ingredients, large enough to hold plenty of batter.
    • Electric mixer: To beat butter and sugar into a light, fluffy mixture.
    • Muffin tin and paper liners: To shape your cupcakes and ensure even baking.
    • Cooling rack: To cool the cupcakes quickly and prevent sogginess.
    • Toothpick or cake tester: To check doneness of baked cupcakes.

    Step-by-step for your dark delights

    Step 1: Preheat your oven to 180°C (350°F).

    Step 2: Line a muffin tin with dark paper liners—think black or deep purple.

    Step 3: Mix your dry ingredients: flour, cocoa powder, baking soda, and a pinch of salt.

    Step 4: In a separate bowl, beat butter and sugar until fluffy, then add eggs one at a time.

    Step 5: Stir in vanilla extract and a splash of black food coloring for that eerie shade.

    Step 6: Gradually add dry ingredients to wet, alternating with buttermilk, until the batter is smooth.

    Step 7: Pour batter into liners, filling each about 2/3 full.

    Step 8: Bake for 18-20 minutes, until a toothpick comes out clean.

    Step 9: Let cupcakes cool in the tin for 10 minutes, then transfer to a wire rack.

    Step 10: Once cooled, frost with dark chocolate ganache, and decorate with spooky toppers.

    Creepy checkpoints for perfect cupcakes

    • Ensure your oven is fully preheated before baking.
    • The batter should be glossy and smooth, not lumpy or separated.
    • Cupcakes are done when they spring back softly when pressed lightly.
    • Chocolate ganache should be shiny and thick enough to hold its shape.
    • Decorations should be firmly attached, not sliding off or sagging.

    Beware the dark pitfalls — fixes for common mistakes

    • Cupcakes are raw in the center.? UNDERSCORED, add a minute or two to baking time and check with a toothpick.
    • Heavy, chewy cupcakes.? Too dense, sift dry ingredients thoroughly and don’t overmix batter.
    • Over-torched edges.? Burned edges? Lower oven temperature by 10°C and bake on middle rack.
    • Frosting slipping.? Frosting sliding off? Chill cupcakes before decorating.

    Spooky Black Halloween Cupcakes

    Dark, moody cupcakes with a rich chocolate flavor are colored with black food coloring and topped with glossy dark ganache. The batter is mixed until smooth, baked to a moist, tender crumb, then decorated with spooky toppers for a hauntingly beautiful treat. These cupcakes combine simple baking techniques with playful decoration for a perfect Halloween centerpiece.
    Prep Time 20 minutes
    Cook Time 20 minutes
    Total Time 40 minutes
    Servings: 12
    Course: Main Course
    Cuisine: Halloween
    Calories: 250

    Ingredients
      

    • 1 1/2 cups all-purpose flour
    • 1/2 cup cocoa powder preferably unsweetened
    • 1 teaspoon baking soda
    • 1/4 teaspoon salt
    • 1/2 cup unsalted butter softened
    • 1 cup granulated sugar
    • 2 large eggs
    • 1 tablespoon vanilla extract
    • 2 drops black gel food coloring or as needed for deep color
    • 3/4 cup buttermilk or substitute with yogurt or milk + lemon
    • 1 cup dark chocolate ganache for frosting

    Equipment

    • Mixing bowls
    • Electric mixer
    • Muffin tin and paper liners
    • Cooling rack

    Method
     

    1. Preheat your oven to 180°C (350°F) and line a muffin tin with dark paper liners to set the spooky mood.
    2. In a large bowl, sift together the flour, cocoa powder, baking soda, and salt until well combined. This creates a smooth, uniform dry mixture.
    3. In a separate bowl, beat the softened butter and sugar together with an electric mixer until the mixture is light, fluffy, and slightly pale, about 3-4 minutes.
    4. Add eggs one at a time, beating well after each addition, until the batter is creamy and smooth. Stir in vanilla extract.
    5. Mix in the black gel food coloring drops until the batter has a deep, eerie black hue—this helps set the spooky tone.
    6. Alternately add the dry ingredients and buttermilk to the wet mixture, starting and ending with the dry, mixing gently but thoroughly after each addition until the batter is smooth and glossy.
    7. Pour the batter into the prepared liners, filling each about two-thirds full to allow room for rising.
    8. Bake for 18-20 minutes, or until a toothpick inserted into the center comes out clean. The cupcakes will be moist and spring back when lightly pressed.
    9. Remove the cupcakes from the oven and let them cool in the tin for 10 minutes, then transfer to a wire rack to cool completely. The aroma of chocolate will fill your kitchen.
    10. Once cooled, spread a generous layer of dark chocolate ganache over each cupcake for a glossy, creepy finish.
    11. Decorate with spooky toppers like edible spiders, bats, or ghosts—use edible markers for creepy details. Arrange your haunted treats on a platter and prepare to wow your friends.

    Notes

    For an extra spooky effect, tint the ganache with a few drops of black food coloring before spreading. Use themed toppers for added creepiness.
    These spooky cupcakes aren’t just for Halloween—they’re a little bit sinister, a little bit sweet, and perfect for making any gathering feel a little more mysterious. The rich chocolate combined with the deep black hue makes them stand out on any dessert table. Personalize with creepy toppers or leave them simple for a more understated effect. Whatever you do, enjoy the process and the ghoulish smiles they bring.

  • Halloween Trifle: A Spooky Layered Delight with a Twist

    Halloween Trifle: A Spooky Layered Delight with a Twist

    Halloween is the one night I let my creativity run wild in the kitchen, and this trifle is my favorite project. It’s a little chaotic, a lot fun, and always surprisingly delicious. The idea is to combine familiar flavors with a spooky aesthetic, so every spoonful feels like a mini Halloween celebration.

    Why I Keep Coming Back to This Halloween Trifle

    The playful chaos of assembling it, the vivid colors, and the instant nostalgia make me crave this every October. It’s forgiving, fun, and always a little messy — just like Halloween itself. Plus, it’s a no-fuss way to bring a little spooky magic to the table without a ton of effort.

    Halloween Trifle: Ingredient Breakdown

    • Heavy cream: Whipped until fluffy, it forms a rich, creamy layer. Skip if dairy-free.
    • Halloween-colored fruit (oranges, berries, purple grapes): Adds vibrant color and fresh sweetness; a visual punch.
    • Crumbled cookies or sponge cake: Provides crunch and structure; use ginger snaps for spice.
    • Pumpkin or sweet potato puree: Adds a smooth, earthy sweetness; swap with mashed banana if needed.
    • Edible glitter or black sprinkles: For that spooky shimmer; use sparingly for effect.
    • Caramel or chocolate syrup: Drizzle for extra richness; opt for sugar-free if preferred.
    • Gelatin or pudding layers: Create jiggly, creepy layers; can substitute with agar-agar for vegan.

    Tools of the Spooky Trade

    • Large mixing bowls: Mix and layer ingredients smoothly.
    • Sharp knife: Cut fruit and layer components precisely.
    • Whisk or electric mixer: Whip creams and set smooth layers.
    • Glass trifle dish or large clear bowl: Show off the colorful layers.
    • Spatula or large spoon: Spread and layer ingredients neatly.

    Crafting the Perfect Haunted Layers

    Step 1: Gather your ingredients and equipment before starting. It’s easier to stay organized when everything’s at hand.

    Step 2: Layer the spooky elements carefully; each one adds to the creepy, festive vibe.

    Step 3: Chill the assembled trifle for at least 2 hours. It helps the flavors meld and the layers set perfectly.

    Step 4: Serve with a drizzle of caramel or a sprinkle of edible glitter for that extra haunting glow.

    Halloween Trifle: Key Moments to Watch

    • Ensure each layer is even and visible for a striking visual effect.
    • Check the fridge after 2 hours; the layers should be firm but not frozen.
    • Watch the color of fruit toppings; they should look vibrant and fresh, not dull or soggy.

    Halloween Trifle: Common Pitfalls and Fixes

    • Layers become mixed and muddy.? Use a gentle hand when layering; pressing too hard can squish delicate layers.
    • Layers slide or collapse.? Chill the fruit and cream before assembling; warm ingredients melt layers.
    • Layers become cloying.? Watch the sugar content in syrups; too sweet can overpower.
    • Cream doesn’t hold its shape.? If the cream is too runny, whip it longer or add a touch of mascarpone.

    Halloween Trifle

    This playful Halloween trifle layers vibrant fruit, creamy whipped cream, crumbled cookies, and spooky gelatin or pudding layers in a clear dish, creating a colorful and textured dessert. The assembly involves gentle layering, chilling to set, and finishing with edible glitter or caramel for a festive touch. The final look is a jiggly, gooey, and visually striking treat perfect for October celebrations.
    Prep Time 20 minutes
    Cook Time 10 minutes
    Total Time 2 hours 10 minutes
    Servings: 8
    Course: Main Course
    Cuisine: Halloween
    Calories: 250

    Ingredients
      

    • 1 cup heavy cream chilled
    • 2 cups Halloween-colored fruit mixed oranges, berries, purple grapes
    • 1 cup crumbled cookies or sponge cake ginger snaps for spice
    • 1/2 cup pumpkin or sweet potato puree or mashed banana
    • to taste edible glitter or black sprinkles for shimmer
    • 2 tablespoons caramel or chocolate syrup for drizzling
    • 1 packet gelatin or pudding layers can substitute with agar-agar for vegan

    Equipment

    • Large mixing bowls
    • Sharp knife
    • Whisk or electric mixer
    • Glass trifle dish or large clear bowl
    • Spatula or large spoon

    Method
     

    1. Begin by whipping the chilled heavy cream in a large bowl using a whisk or electric mixer until soft peaks form, creating a fluffy, creamy layer.
    2. Chop the Halloween-colored fruit into bite-sized pieces, ensuring vibrant colors are visible for a festive look.
    3. Crumble the cookies or sponge cake into small, crunchy pieces, ready to add texture to the layers.
    4. In a large mixing bowl, gently fold together the whipped cream, fruit, crumbled cookies, and pumpkin or sweet potato puree, creating a colorful, marbled mixture.
    5. Pour a layer of the mixture into the bottom of your glass trifle dish, spreading it evenly with a spatula.
    6. Prepare the gelatin or pudding layer according to package instructions, then pour it over the first layer, ensuring it spreads evenly and begins to set.
    7. Add another layer of the fruit and cookie mixture on top of the set gelatin, pressing lightly to create distinct layers.
    8. Repeat pouring the gelatin layer and then adding the remaining fruit mixture, creating multiple colorful layers.
    9. Finish by smoothing the top layer and drizzling with caramel or chocolate syrup for extra richness and visual appeal.
    10. Sprinkle a light dusting of edible glitter or black sprinkles over the top for a spooky shimmer.
    11. Chill the assembled trifle in the refrigerator for at least 2 hours, allowing the layers to set and flavors to meld.
    12. Once chilled, serve your spooky Halloween trifle in clear bowls, reveling in its vibrant colors and fun, jiggly texture.

    Notes

    For an extra spooky effect, add gummy worms or candy eyeballs on top before serving.
    This Halloween trifle isn’t just a treat; it’s a story in every spoonful. The mix of creamy, fruity, and crunchy textures makes each bite a surprise. Feel free to tweak the colors and flavors to match your spooky theme or personal favorites. The messy, joyful process is part of the fun, and the result is always a crowd-pleaser.

  • Spiderweb Cheesecake: An Unusual Dessert with a Delicate Twist

    Spiderweb Cheesecake: An Unusual Dessert with a Delicate Twist

    Baking a spiderweb cheesecake feels like a quiet act of rebellion—an intricate design that’s surprisingly forgiving. It’s perfect for when you want to impress without fussing over complicated decorations. The web pattern adds a touch of whimsy, making it great for casual gatherings or a spooky holiday treat. Plus, it’s a way to channel some creative chaos into the kitchen.

    Why I Keep Baking This Cheesecake

    It’s a reminder that even the simplest ingredients, when combined with patience and a splash of creativity, can create something unexpectedly charming. The web pattern is a slow, mindful process that feels soothing in chaos. Sharing it feels like giving a little piece of art, a tiny rebellion against the usual round desserts.

    What’s in This Web of a Cheesecake?

    • Digestive biscuits: Oaty, slightly sweet base that gives texture and a nutty flavor.
    • Butter: Rich, melted butter binds the biscuit crumbs; skip if dairy-free.
    • Cream cheese: The creamy core of the cheesecake, slightly tangy and smooth.
    • Sugar: Sweetens the filling; can be adjusted for sweetness.
    • Eggs: Bind everything together; room temperature helps.
    • Sour cream: Adds tang and creaminess; substitute with Greek yogurt if desired.
    • Chocolate sauce or sour cream for web: For the web pattern; opt for rich chocolate or tangy sour cream.

    Tools That Make the Spiderweb Dream Real

    • Springform pan: For easy removal and a clean edge.
    • Mixing bowls: To beat and fold your ingredients smoothly.
    • Electric mixer or whisk: To achieve a fluffy, fully combined filling.
    • Piping bag or plastic sandwich bag: To pipe the web pattern neatly.
    • Offset spatula or butter knife: To smooth the top and create patterns.

    Step-by-step to Achieve the Perfect Spiderweb Design

    Step 1: Preheat your oven to 170°C (340°F).

    Step 2: Mix crushed digestive biscuits with melted butter until crumbly.

    Step 3: Press the mixture into a 20cm (8-inch) springform pan to form the crust.

    Step 4: In a bowl, beat softened cream cheese with sugar until smooth and fluffy.

    Step 5: Add eggs one at a time, then fold in sour cream and vanilla.

    Step 6: Pour the filling over the crust and smooth the top.

    Step 7: Bake for about 50-55 minutes until the edges are set but the center jiggles slightly.

    Step 8: Remove from oven and let cool completely in the pan.

    Step 9: Chill in the fridge for at least 4 hours or overnight.

    Step 10: Just before serving, create the spiderweb pattern with sour cream or chocolate sauce.

    Cooking Tips & Tricks for a Flawless Spiderweb

    • Ensure the cream cheese is softened for smooth mixing.
    • Watch the cheesecake edges during baking; if they brown too quickly, cover with foil.
    • The pattern works best when the cheesecake is fully chilled; patience pays off.
    • Use a piping bag or a plastic sandwich bag with the tip cut off for precise web designs.

    Avoid Common Pitfalls with These Fixes

    • Lumpy filling.? Use softened cream cheese; cold cheese causes lumps.
    • Over-baked edges.? Cover edges with foil if they brown too fast.
    • Web pattern smudges.? Chill thoroughly before piping to prevent smudging.
    • Uneven baking.? Pace your baking; don’t open the oven mid-way.

    Spiderweb Cheesecake

    This spiderweb cheesecake features a creamy, tangy filling atop a crunchy digestive biscuit crust, decorated with a web pattern made from chocolate or sour cream. The process involves baking a smooth cheesecake, chilling it to set, and then piping intricate web designs for a whimsical, spooky presentation. The final dessert boasts a silky texture with a charming, artistic topping that’s perfect for casual gatherings or holiday treats.
    Prep Time 20 minutes
    Cook Time 55 minutes
    Total Time 7 hours 55 minutes
    Servings: 8
    Course: Main Course
    Cuisine: American
    Calories: 430

    Ingredients
      

    • 200 g digestive biscuits crushed into fine crumbs
    • 100 g butter melted
    • 600 g cream cheese softened
    • 150 g sugar adjust to taste
    • 3 large eggs room temperature
    • 150 g sour cream or Greek yogurt
    • 100 g chocolate sauce or sour cream for web pattern

    Equipment

    • Springform pan
    • Mixing bowls
    • electric mixer or whisk
    • Piping bag or plastic sandwich bag
    • Offset spatula or butter knife

    Method
     

    1. Preheat your oven to 170°C (340°F).
    2. Mix the crushed digestive biscuits with the melted butter until evenly coated and crumbly.
    3. Press the buttery biscuit mixture into the bottom of a 20cm (8-inch) springform pan, creating an even, firm crust.
    4. In a large bowl, beat the softened cream cheese with the sugar until smooth and fluffy, and you hear a gentle whir of the mixer.
    5. Add the eggs one at a time, mixing well after each addition, until the mixture is creamy and slightly thickened.
    6. Fold in the sour cream gently until just combined, maintaining the smooth texture of the filling.
    7. Pour the filling over the prepared crust in the springform pan and smooth the top with an offset spatula or butter knife.
    8. Bake the cheesecake in the oven for about 50-55 minutes, until the edges are set but the center still jiggles slightly when gently shaken.
    9. Remove the cheesecake from the oven and let it cool completely in the pan on a wire rack, which helps prevent cracking.
    10. Once cooled, chill the cheesecake in the fridge for at least 4 hours or overnight to set fully.
    11. Before serving, fill a piping bag or plastic sandwich bag with chocolate sauce or sour cream, and pipe concentric circles starting from the center outward on the chilled cheesecake.
    12. Using a toothpick or skewer, draw lines from the center to the edges, creating a web pattern that resembles a spiderweb.
    13. Slice and serve this whimsical cheesecake, enjoying the creamy texture and artistic web decoration that makes it a perfect spooky treat.

    Notes

    Ensure the cheesecake is thoroughly chilled before piping the web pattern to prevent smudging. Use a steady hand for piping and drawing the web lines for a clean, attractive finish.
    This spiderweb cheesecake isn’t just about looks; it’s about the tiny moments of patience and detail that turn a simple dessert into something special. It’s a little chaotic to get the pattern just right, but every crack and swirl adds character. Enjoy it with a cup of coffee or a splash of berry compote for contrast. No matter how it turns out, it’s a treat worth the effort, especially when shared.

  • Ghost Meringues: Whisper-Light Treats with a Haunted Charm

    Ghost Meringues: Whisper-Light Treats with a Haunted Charm

    There’s something haunting about meringues—those whisper-thin, cloud-like bites that seem to vanish upon contact. I love how they turn out so fragile, so light, yet hold a whisper of sweetness that lingers. It’s almost like capturing a ghost: fleeting, mysterious, and a little bit magical. Making them feels like a ritual—one that rewards patience and a gentle touch.

    Why I Keep Returning to Ghost Meringues

    They’re a reminder that beauty often comes from fragility. I like how they crackle softly when you bite in, revealing a whisper of sweetness. Perfect for quiet moments, they feel like small, edible ghosts that vanish just as quickly as they appear in my kitchen.

    Ingredients that Summon the Ghosts

    • Egg whites: Pure, fresh egg whites whip up into airy, cloud-like peaks—no yolk or oil.
    • Superfine sugar: Fuses with egg whites to create a glossy, crisp shell—less gritty, more whisper.
    • Vanilla extract (optional): Adds a subtle depth—just a hint of warmth to your ghostly bites.
    • A pinch of salt: Enhances the sweetness—brings out the flavors in a quiet, balanced way.
    • Lemon zest or a drop of lemon juice (optional): Brightens the flavor with a smoky, citrus shimmer—skip if you want pure ghostly sweetness.

    Tools of the Trade for Spooky Meringues

    • Electric mixer: Whips the egg whites to airy perfection.
    • Baking sheet: Supports the meringues during baking.
    • Parchment paper: Prevents sticking and makes cleanup ghostly easy.
    • Piping bag (optional): Gives you ghostly shapes with precision.

    Step-by-Step to Spooky, Ethereal Meringues

    Step 1: Preheat your oven to 90°C (195°F). Line a baking sheet with parchment paper.

    Step 2: In a clean, dry bowl, beat 3 egg whites on medium speed until soft peaks form, about 2-3 minutes.

    Step 3: Gradually add 150g (¾ cup) superfine sugar, a tablespoon at a time, beating until the meringue is glossy and holds stiff peaks, about 5-7 minutes.

    Step 4: Using a spoon or piping bag, dollop or pipe the meringue into ghostly shapes on the prepared baking sheet.

    Step 5: Bake for 1 hour, then turn off the oven and leave the meringues inside to dry out and develop that ghostly crackle, about 2 hours.

    Ghostly Tips & Tricks for Perfect Meringues

    • Ensure all equipment is grease-free; even a tiny oil spot can prevent stiff peaks.
    • Beat the egg whites until they’re glossy and hold a firm peak; don’t rush this step.
    • Bake at a low temperature to dry out the meringue without browning—patience matters.
    • If your meringues crack excessively, reduce oven temperature slightly and extend baking time.

    Beware the Haunted Kitchen: Meringue Mistakes & Fixes

    • Egg whites won’t stiffen properly.? Ensure all utensils are grease-free; grease ruins the peaks.
    • Meringues crack excessively.? Add sugar gradually and beat until glossy; don’t rush this step.
    • Meringues turn brown or brownish.? Bake at a lower temp and dry longer to prevent cracking.
    • Too sticky or soft meringues.? Reduce oven temperature and extend drying time to keep ghosts pale.

    Ghost Meringues

    Ghost meringues are delicate, cloud-like treats made from whipped egg whites and superfine sugar, baked until crisp and fragile. Their whisper-thin shells crackle softly when bitten, revealing a sweet, airy interior with a ghostly white appearance. Perfect for quiet moments or spooky celebrations, they evoke a sense of fleeting, mystical beauty.
    Prep Time 15 minutes
    Cook Time 1 minute
    Total Time 3 minutes
    Servings: 8
    Course: Main Course
    Cuisine: dessert
    Calories: 50

    Ingredients
      

    • 3 large egg whites fresh and at room temperature
    • 150 g superfine sugar helps create a glossy, crisp shell
    • 1 tsp vanilla extract optional, adds subtle flavor
    • pinch salt enhances sweetness
    • 1 tsp lemon juice or zest optional, brightens flavor

    Equipment

    • Electric mixer
    • Baking sheet

    Method
     

    1. Preheat your oven to 90°C (195°F) and line a baking sheet with parchment paper.
    2. Place egg whites in a clean, dry bowl and beat with an electric mixer on medium speed until soft peaks form, about 2-3 minutes. You should see gentle ripples and a bit of volume.
    3. Gradually add superfine sugar a tablespoon at a time, beating continuously. Continue until the mixture becomes glossy and holds stiff peaks when you lift the beaters, about 5-7 minutes.
    4. If using, gently fold in vanilla extract, salt, and lemon zest or juice for extra flavor.
    5. Using a spoon or piping bag, dollop or pipe ghost-shaped meringues onto the prepared baking sheet. Try to make them with pointed tops and rounded bottoms for a spooky effect.
    6. Bake in the preheated oven for 1 hour. The meringues will turn crisp and dry, with a slight crackle when gently pressed.
    7. Once baked, turn off the oven and leave the meringues inside to dry out and develop their ghostly crackle for about 2 hours or until completely crisp.
    8. Remove the meringues carefully from the parchment paper and allow them to cool completely before serving. They should be light, fragile, and crackle softly when you bite into them.

    Notes

    For extra spooky effects, use a piping bag to create ghost shapes or small faces on each meringue with melted chocolate or edible markers.
    These ghost meringues are a bit of a kitchen ghost story themselves—delicate, fleeting, and a little mysterious. They’re perfect for a spooky season or whenever you crave a whisper of sweetness that dissolves into a smoky crunch. No matter how you shape or flavor them, each bite offers a fleeting, airy sweetness that feels like a secret from the past. Enjoy haunting your taste buds with these fragile, ghostly treats.

  • Pumpkin Spice Cookies: An Unexpected Twist on a Fall Classic

    Pumpkin Spice Cookies: An Unexpected Twist on a Fall Classic

    I’ve found that pumpkin spice cookies are unexpectedly versatile. They’re not just for fall; they bring a warm, spicy hug any time of year. The trick is balancing the moisture from pumpkin with the right amount of spice and butter so they stay tender without spreading too much.

    Why I Keep Coming Back to This Recipe

    The smell of baking spices and pumpkin in the oven sparks a cozy feeling I can’t replicate with anything else. It’s imperfect but forgiving, perfect for lazy weekends or quick treats. Every batch feels like a little celebration, especially when the first bite reveals that perfect balance of spice, moisture, and crunch.

    Breaking Down the Key Ingredients

    • Pumpkin Puree: Adds moisture and subtle sweetness, keeping cookies tender. Swap with sweet potato for a different flavor.
    • Spices (cinnamon, ginger, cloves): Create that warm, nostalgic aroma. Adjust amounts for more punch or subtlety.
    • Brown Sugar: Provides rich, molasses undertones; swap with coconut sugar for a caramel note.
    • All-purpose Flour: Gives structure and chew; whole wheat works for heartier cookies.
    • Butter: Creates richness and tender crumb. Use salted or unsalted based on your preference.
    • Egg: Acts as a binder and adds moisture. Flax eggs work well for vegan versions.
    • Chopped nuts (optional): Add crunch and contrast; walnuts or pecans are classic.

    Tools & Equipment for Baking Pumpkin Spice Cookies

    • Mixing bowls: For combining wet and dry ingredients comfortably.
    • Electric mixer or whisk: Creaming butter and sugar smoothly.
    • Baking sheet: Providing a flat, even surface for baking.
    • Parchment paper: Preventing sticking and easy cleanup.
    • Cookie scoop or tablespoon: Ensuring uniform cookie sizes.

    Step-by-Step on Crafting Pumpkin Spice Cookies

    Step 1: Preheat your oven to 180°C (350°F).

    Step 2: Line a baking sheet with parchment paper; set aside.

    Step 3: In a large bowl, cream together 1/2 cup softened butter and 3/4 cup brown sugar until fluffy, about 2 minutes.

    Step 4: Add 1 large egg and 1 teaspoon vanilla extract, mix well.

    Step 5: In a separate bowl, whisk together 1 1/2 cups all-purpose flour, 1 teaspoon baking soda, 1/2 teaspoon salt, 1 teaspoon ground cinnamon, 1/2 teaspoon ground ginger, and 1/4 teaspoon ground cloves.

    Step 6: Gradually add dry ingredients to wet, mixing just until combined.

    Step 7: Fold in 1/2 cup canned pumpkin puree and 1/2 cup chopped pecans or walnuts if using.

    Step 8: Scoop dough onto prepared baking sheet, about 1 tablespoon per cookie, spacing them 2 inches apart.

    Step 9: Bake for 10-12 minutes, until edges are golden and cookies are set.

    Step 10: Let cookies cool on the baking sheet for 5 minutes, then transfer to a wire rack to cool completely.

    Cooking Checkpoints & Tips for Perfect Cookies

    • Look for a light golden edge; that’s your sign they’re done.
    • The dough should be soft but hold its shape when scooped.
    • Smell the warm spices as they bake for a cozy aroma filling your kitchen.

    Common Mistakes & How to Fix Them

    • Creamed butter and sugar are too runny.? Use cold butter instead of softened; it will take longer to cream.
    • Cookies flatten out and lose shape.? Add a touch more flour if cookies spread too much.
    • Over-baked cookies become dry and crumbly.? Bake a minute less if edges brown too quickly.
    • Spots of plain dough or uneven spice flavor.? Ensure pumpkin is well mixed; uneven distribution can cause texture issues.

    Pumpkin Spice Cookies

    These pumpkin spice cookies are soft, tender treats infused with warm spices and pumpkin puree, resulting in a moist crumb with a hint of sweetness and a lightly crispy edge. The recipe balances moisture, spice, and richness for a comforting, fall-inspired cookie that’s perfect any time of year.
    Prep Time 15 minutes
    Cook Time 12 minutes
    Total Time 27 minutes
    Servings: 12
    Course: Main Course
    Cuisine: American
    Calories: 150

    Ingredients
      

    • 1/2 cup unsalted butter softened
    • 3/4 cup brown sugar
    • 1 large egg
    • 1 teaspoon vanilla extract
    • 1 1/2 cups all-purpose flour
    • 1 teaspoon baking soda
    • 1/2 teaspoon salt
    • 1 teaspoon ground cinnamon
    • 1/2 teaspoon ground ginger
    • 1/4 teaspoon ground cloves
    • 1/2 cup canned pumpkin puree
    • 1/2 cup chopped pecans or walnuts optional

    Equipment

    • Mixing bowls
    • electric mixer or whisk
    • Baking sheet
    • Parchment paper
    • Cookie scoop or tablespoon

    Method
     

    1. Preheat your oven to 180°C (350°F) and line a baking sheet with parchment paper.
    2. In a large mixing bowl, cream together the softened butter and brown sugar using an electric mixer or whisk until the mixture is light and fluffy, about 2 minutes. You’ll notice the color lightening and the texture becoming smooth and airy.
    3. Add the large egg and vanilla extract to the creamed mixture and beat until well combined. The mixture should look slightly thicker and glossy.
    4. In a separate bowl, whisk together the all-purpose flour, baking soda, salt, cinnamon, ginger, and cloves. The dry ingredients should be evenly distributed, with no clumps.
    5. Gradually add the dry ingredients to the wet mixture, mixing just until the flour is incorporated. The dough will begin to come together and feel slightly sticky.
    6. Fold in the canned pumpkin puree and chopped nuts, if using. The dough will be moist and slightly sticky but manageable.
    7. Using a cookie scoop or tablespoon, portion the dough onto the prepared baking sheet, spacing each about 2 inches apart. The dough should be rounded and slightly mounded.
    8. Bake the cookies in the preheated oven for 10-12 minutes, or until the edges are golden brown and the centers look set. Your kitchen will fill with warm spice aroma as they bake.
    9. Remove the baking sheet from the oven and let the cookies cool for about 5 minutes on the sheet. They will be soft but firm enough to transfer.
    10. Transfer the cookies to a wire rack and allow them to cool completely. The cookies will firm up and develop a tender, moist crumb with a lightly crisp edge.
    11. Enjoy these cozy pumpkin spice cookies with a glass of milk or a warm cup of tea. They’re perfect for sharing or enjoying as a comforting treat any time of year!
    These cookies are a reminder that fall’s flavors can surprise you in the most delightful ways. The pumpkin keeps them moist and tender, while the spice blend offers warmth in every bite. Feel free to tweak the spices or add a drizzle of cream cheese frosting for extra indulgence. Baking them is about embracing the imperfect, messy joy of making something cozy and sweet.

  • Pumpkin Spice Cookies: An Unexpected Twist on a Fall Classic

    Pumpkin Spice Cookies: An Unexpected Twist on a Fall Classic

    I’ve found that pumpkin spice cookies are unexpectedly versatile. They’re not just for fall; they bring a warm, spicy hug any time of year. The trick is balancing the moisture from pumpkin with the right amount of spice and butter so they stay tender without spreading too much.

    Why I Keep Coming Back to This Recipe

    The smell of baking spices and pumpkin in the oven sparks a cozy feeling I can’t replicate with anything else. It’s imperfect but forgiving, perfect for lazy weekends or quick treats. Every batch feels like a little celebration, especially when the first bite reveals that perfect balance of spice, moisture, and crunch.

    Breaking Down the Key Ingredients

    • Pumpkin Puree: Adds moisture and subtle sweetness, keeping cookies tender. Swap with sweet potato for a different flavor.
    • Spices (cinnamon, ginger, cloves): Create that warm, nostalgic aroma. Adjust amounts for more punch or subtlety.
    • Brown Sugar: Provides rich, molasses undertones; swap with coconut sugar for a caramel note.
    • All-purpose Flour: Gives structure and chew; whole wheat works for heartier cookies.
    • Butter: Creates richness and tender crumb. Use salted or unsalted based on your preference.
    • Egg: Acts as a binder and adds moisture. Flax eggs work well for vegan versions.
    • Chopped nuts (optional): Add crunch and contrast; walnuts or pecans are classic.

    Tools & Equipment for Baking Pumpkin Spice Cookies

    • Mixing bowls: For combining wet and dry ingredients comfortably.
    • Electric mixer or whisk: Creaming butter and sugar smoothly.
    • Baking sheet: Providing a flat, even surface for baking.
    • Parchment paper: Preventing sticking and easy cleanup.
    • Cookie scoop or tablespoon: Ensuring uniform cookie sizes.

    Step-by-Step on Crafting Pumpkin Spice Cookies

    Step 1: Preheat your oven to 180°C (350°F).

    Step 2: Line a baking sheet with parchment paper; set aside.

    Step 3: In a large bowl, cream together 1/2 cup softened butter and 3/4 cup brown sugar until fluffy, about 2 minutes.

    Step 4: Add 1 large egg and 1 teaspoon vanilla extract, mix well.

    Step 5: In a separate bowl, whisk together 1 1/2 cups all-purpose flour, 1 teaspoon baking soda, 1/2 teaspoon salt, 1 teaspoon ground cinnamon, 1/2 teaspoon ground ginger, and 1/4 teaspoon ground cloves.

    Step 6: Gradually add dry ingredients to wet, mixing just until combined.

    Step 7: Fold in 1/2 cup canned pumpkin puree and 1/2 cup chopped pecans or walnuts if using.

    Step 8: Scoop dough onto prepared baking sheet, about 1 tablespoon per cookie, spacing them 2 inches apart.

    Step 9: Bake for 10-12 minutes, until edges are golden and cookies are set.

    Step 10: Let cookies cool on the baking sheet for 5 minutes, then transfer to a wire rack to cool completely.

    Cooking Checkpoints & Tips for Perfect Cookies

    • Look for a light golden edge; that’s your sign they’re done.
    • The dough should be soft but hold its shape when scooped.
    • Smell the warm spices as they bake for a cozy aroma filling your kitchen.

    Common Mistakes & How to Fix Them

    • Creamed butter and sugar are too runny.? Use cold butter instead of softened; it will take longer to cream.
    • Cookies flatten out and lose shape.? Add a touch more flour if cookies spread too much.
    • Over-baked cookies become dry and crumbly.? Bake a minute less if edges brown too quickly.
    • Spots of plain dough or uneven spice flavor.? Ensure pumpkin is well mixed; uneven distribution can cause texture issues.

    Pumpkin Spice Cookies

    These pumpkin spice cookies are soft, tender treats infused with warm spices and pumpkin puree, perfect for any time of year. The dough combines moisture from pumpkin with the richness of butter, resulting in cookies that are both flavorful and delightfully chewy with a hint of crunch on the edges. Baked to a golden finish, they have a cozy aroma that fills your kitchen with autumnal comfort.
    Prep Time 15 minutes
    Cook Time 12 minutes
    Total Time 27 minutes
    Servings: 12
    Course: Main Course
    Cuisine: American
    Calories: 150

    Ingredients
      

    • 1/2 cup unsalted butter softened
    • 3/4 cup brown sugar packed
    • 1 large egg
    • 1 teaspoon vanilla extract
    • 1 1/2 cups all-purpose flour
    • 1 teaspoon baking soda
    • 1/2 teaspoon salt
    • 1 teaspoon ground cinnamon
    • 1/2 teaspoon ground ginger
    • 1/4 teaspoon ground cloves
    • 1/2 cup canned pumpkin puree
    • 1/2 cup chopped nuts optional, e.g., pecans or walnuts

    Equipment

    • Mixing bowls
    • electric mixer or whisk
    • Baking sheet
    • Parchment paper
    • Cookie scoop or tablespoon

    Method
     

    1. Preheat your oven to 180°C (350°F). Line a baking sheet with parchment paper to prevent sticking.
    2. In a large bowl, cream together softened butter and brown sugar using an electric mixer or whisk until the mixture is light and fluffy, about 2 minutes. You’ll notice the color brighten and the texture become smooth.
    3. Add the egg and vanilla extract to the creamed mixture, beating well until fully incorporated. The mixture should become slightly thicker and more uniform in appearance.
    4. In a separate bowl, whisk together the flour, baking soda, salt, cinnamon, ginger, and cloves to evenly distribute the spices and leavening agents.
    5. Gradually add the dry ingredients into the wet mixture, mixing just until combined. The dough will start to come together and feel slightly sticky.
    6. Stir in the pumpkin puree until evenly mixed, then fold in chopped nuts if you’re using them. The dough should be soft and moist but hold its shape when scooped.
    7. Scoop about one tablespoon of dough per cookie onto the prepared baking sheet, spacing each about 2 inches apart to give them room to spread.
    8. Bake in the preheated oven for 10–12 minutes, until the edges are golden brown and the cookies look set but still soft in the center. The aroma of spices will fill your kitchen as they bake.
    9. Remove the baking sheet from the oven and let the cookies cool on it for 5 minutes. They will firm up slightly as they cool, making them easier to transfer.
    10. Transfer the cookies to a wire rack and allow them to cool completely. Once cooled, enjoy their tender, spiced, and slightly chewy texture with a hint of crunch on the edges.

    Notes

    For softer cookies, slightly underbake by a minute. Store in an airtight container for up to 3 days or freeze for longer storage.
    These cookies are a reminder that fall’s flavors can surprise you in the most delightful ways. The pumpkin keeps them moist and tender, while the spice blend offers warmth in every bite. Feel free to tweak the spices or add a drizzle of cream cheese frosting for extra indulgence. Baking them is about embracing the imperfect, messy joy of making something cozy and sweet.

  • Halloween Cake Pops: A Spooky Twist on a Classic Treat

    Halloween Cake Pops: A Spooky Twist on a Classic Treat

    Cake pops are a staple for any celebration, but Halloween makes them feel extra special. It’s the perfect blend of sweet, spooky, and fun—an edible craft project that’s almost as satisfying as eating it. Plus, they’re versatile—turn them into tiny monsters, ghosts, or witches with just a few tweaks.

    Why These Cake Pops Keep Calling My Name

    They’re unpredictable—every batch has its own personality. There’s chaos in the melting chocolate, pride in the tiny faces, and relief when everything turns out adorable. Plus, they’re a no-fuss way to bring a little joy and spooky charm to any gathering, especially in October. No matter how many times I make them, each one feels like a small, delicious victory.

    Inside the Candy-Coated World

    • Cake (store-bought or homemade): The base that’s soft, moist, and perfect for crumbling into tiny bits.
    • Cream cheese or buttercream: Adds richness and helps bind the crumbs without making the mixture greasy.
    • Chocolate melts or candy coating: Gives that glossy, firm shell—smooth, sweet, and a little nostalgic.
    • Lollipop sticks or skewers: Hold your pops steady while you dip and decorate.
    • Food coloring and decorating gels: Turn your pops into ghosts, pumpkins, or monsters—whatever screams Halloween.
    • Sprinkles, edible glitter, or candy eyes: Finish with fun, spooky details that make each pop unique.

    Tools of the Spooky Trade

    • Baking sheet with parchment paper: To lay out the cake balls for chilling and setting.
    • Candy or chocolate melts: To coat and decorate the cake pops with a smooth, glossy finish.
    • Lollipop sticks or skewers: To hold the cake pops and make dipping easier.
    • Small bowls for melting chocolate: To melt and hold coating for easy dipping.
    • Decorating tools or toothpicks: For adding spooky details and finishing touches.

    Crafting Your Creepy-Cute Cake Pops

    Step 1: Start by gathering all your ingredients and tools. Preheat your oven to 180°C (350°F).

    Step 2: Bake your cake as usual, then let it cool completely. Crumble it into fine crumbs in a large bowl.

    Step 3: Mix in a generous spoonful of cream cheese or buttercream to bind the crumbs without making the mixture sticky.

    Step 4: Shape the mixture into small, even balls—about the size of a walnut—and chill them in the fridge for at least 30 minutes.

    Cooking Tips and Trick Checks

    • Ensure the cake crumbs are moist but not sticky; if too dry, add a splash of milk.
    • When dipping in chocolate, lift and rotate slowly to avoid cracks.
    • If the chocolate cools too quickly, add a little vegetable oil to loosen it.
    • Watch for the coating to set; if it’s sticky, chill the pops again before decorating.

    Avoid These Common Cake Pop Pitfalls

    • Thick, lumpy chocolate coating.? DUMPED too much chocolate; add a little vegetable oil to loosen coating.
    • Cake balls falling off sticks while dipping.? FORGOT to chill the cake balls; pop them back in the fridge for 15 minutes.
    • Chocolate burned and smoky.? OVER-TORCHED the chocolate; lower heat or switch to microwave in short bursts.
    • Bare, unadorned cake pops.? NOT enough decorating; keep extra chocolate and supplies handy.

    Halloween Cake Pops

    These Halloween cake pops are bite-sized treats made by crumbling baked cake and mixing it with cream cheese or buttercream, then shaping into balls and coating with glossy chocolate melts. Decorated with spooky colors and fun details, they have a soft interior and a crisp, sweet shell—perfect for adding a festive touch to any celebration.
    Prep Time 30 minutes
    Cook Time 30 minutes
    Total Time 1 hour
    Servings: 12
    Course: Main Course
    Cuisine: Halloween
    Calories: 150

    Ingredients
      

    • 1 package store-bought or homemade cake baked and cooled
    • 4 oz cream cheese or buttercream softened for mixing
    • 12 oz chocolate melts or candy coating for coating and decorating
    • 12 pieces lollipop sticks or skewers
    • assorted food coloring and decorating gels for spooky decorations
    • as needed sprinkles, edible glitter, or candy eyes for finishing touches

    Equipment

    • Baking sheet with parchment paper
    • Small bowls for melting chocolate
    • Lollipop sticks or skewers
    • Mixing bowls
    • Spatula or spoon
    • Decorating tools or toothpicks

    Method
     

    1. Crumble the cooled cake into fine crumbs in a large bowl, creating a soft, sandy texture that smells sweet and inviting.
    2. Mix in the softened cream cheese or buttercream until well combined, forming a moist dough that holds together when pressed.
    3. Shape the mixture into small, even balls about the size of a walnut, then place them on a parchment-lined baking sheet and chill for at least 30 minutes until firm.
    4. Melt the chocolate melts in a small bowl over low heat or in short bursts in the microwave, stirring until smooth and glossy, with a gentle bubbling sound.
    5. Insert a lollipop stick into each chilled cake ball, pressing it about halfway through to make a sturdy handle, and return to the fridge if needed.
    6. Dip each cake pop into the melted chocolate, slowly rotating to fully coat, then gently tap off excess coating for a smooth, shiny shell.
    7. Decorate the coated pops with spooky colors, sprinkles, or edible details using gels and decorating tools, adding eyes or glitter for fun effects.
    8. Place the decorated cake pops upright on a parchment-lined tray to set completely, which takes about 15-20 minutes.
    9. Once set, enjoy these adorable, festive treats that feature a soft interior and a crisp, chocolate coating—perfect for spooky celebrations!
    These cake pops are more than just a festive project; they’re a chance to get a little messy, a little creative, and a lot proud. Tweak the colors, faces, or add edible glitter to match your spooky vibe. No matter how they turn out, they’re bound to be a hit—partly because of the effort, partly because they taste damn good. Just have fun with it and enjoy every playful bite.