Category: Beverages

  • Chill with a Twist: The Ultimate Coffee Slushie Recipe

    Chill with a Twist: The Ultimate Coffee Slushie Recipe

    Imagine a scorching summer day when you crave something frosty but want the rich kick of coffee. This coffee slushie is not just your average icy drink—it’s a playful twist that transforms your usual brew into a refreshing frozen treat. The blend of robust coffee and icy crunch makes every sip feel like a tiny celebration.

    What makes this recipe stand out is its simplicity and versatility. Whether you need a quick pick-me-up or a nostalgic afternoon snack, this slushie hits the mark. Plus, it’s easily customizable with your favorite add-ins, making each batch uniquely yours.

    ## WHY I LOVE THIS RECIPE?
    – It combines my love for coffee with my obsession with cold desserts.
    – There’s joy in blending ice and coffee until perfect, like a mini ice cream shop in my apartment.
    – It’s chaos-free, requiring just a blender and a handful of ingredients.
    – I can make it ahead and enjoy a chilled sip anytime, even during busy mornings.
    – Nostalgic memories of summer camp treats flood back every time I sip this.

    ## AVOID MY DISASTER (You’re Welcome)
    – FORGOT to chill the coffee? Reheat and cool it down before blending.
    – DUMPED too much ice? Add more coffee or milk to balance the texture.
    – OVER-TORCHED the sugar syrup? Use honey or agave instead, no smoke involved.
    – BURNED the milk accidentally? Rinse and start fresh, the coffee still needs to shine.

    ## QUICK FIXES THAT SAVE YOUR DAY
    – If the slushie is too watery, blend in more frozen coffee cubes.
    – Splash in a little vanilla extract for extra aroma.
    – Patch bland flavor with a dash of cinnamon or cocoa powder.
    – Shield from heat by serving immediately after blending.
    – When in doubt, pop the mix into the freezer for 10 minutes for a firmer texture.

    The joy of this coffee slushie lies in its chilled simplicity. It’s perfect for beating the heat and satisfying that coffee craving at once. As the weather warms, this icy treat becomes a go-to comfort without the heaviness of traditional coffee drinks.

    Whether you’re lounging with friends or enjoying a solo break, this recipe offers a delightful way to cool down. The slight bitterness of coffee contrasted with the sweet, icy crunch makes each sip a moment of refreshment. Plus, it’s just fun to make and even more fun to drink, once you get the hang of it.

    Coffee Slushie

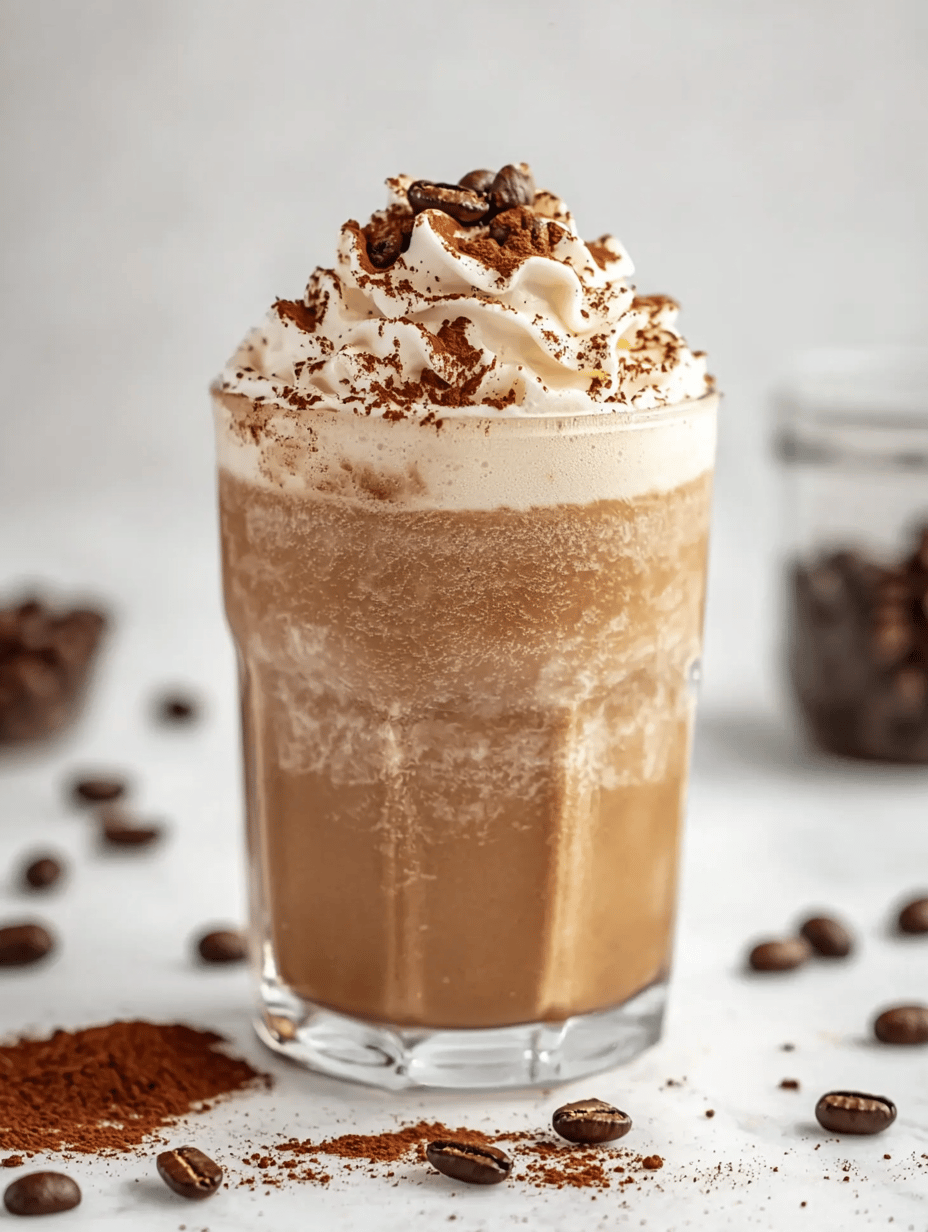
    A coffee slushie is a frozen beverage that combines brewed coffee with ice, blended into a creamy, icy texture. The result is a refreshing, semi-frozen drink with a robust coffee flavor and a crunchy, slushy consistency. It’s served cold and visually appealing with a frosty surface and a smooth, slushy interior.
    Prep Time 5 minutes
    Total Time 5 minutes
    Servings: 2
    Course: Main Course
    Cuisine: Summer
    Calories: 80

    Ingredients
      

    • 1 cup freshly brewed coffee cooled completely before blending
    • 1 cup ice cubes preferably frozen coffee cubes for extra flavor
    • 2 tablespoons simple syrup or sweetener adjust to taste

    Equipment

    • Blender
    • Measuring cups or spoons

    Method
     

    1. Measure out the cooled brewed coffee and pour it into your blender.
    2. Add the ice cubes to the blender, distributing them evenly over the coffee.
    3. Pour in the sweetener, such as simple syrup or honey, for added sweetness and flavor.
    4. Secure the lid of the blender and start blending on low speed, gradually increasing to high.
    5. Continue blending until the mixture becomes thick, slushy, and smooth, with a frosty surface forming on top.
    6. Stop the blender and check the consistency; if it’s too watery, add a few more ice cubes and blend again for a few seconds.
    7. Pour the coffee slushie into glasses, allowing some of the icy texture to be visible and inviting.
    8. Garnish with optional toppings like whipped cream, chocolate shavings, or a dusting of cocoa powder if desired.
    9. Serve immediately and enjoy the refreshing, crunchy texture of this chilled coffee treat.

    Notes

    For an even richer flavor, try using cold brew coffee or add a splash of milk before blending. Adjust sweetness to your preference. If the slushie becomes too thick, stir in a little cold milk or water to loosen it up.
    As summer stretches on, a cold coffee slushie is more than just a treat—it’s a small rebellion against the heat. Its crisp, invigorating flavor keeps the season feeling lively and cool.

    This recipe is a little reminder that sometimes, the simplest pleasures come from mixing a few familiar ingredients and embracing a little chaos. A frozen mug of coffee has a way of making any warm day stand out, one icy sip at a time.

  • The Secret Ingredient to the Perfect Mango Slushie: A Tantalizing Twist

    The Secret Ingredient to the Perfect Mango Slushie: A Tantalizing Twist

    Imagine a summer day when the heat is relentless, but you find refuge in a frosty glass of mango slushie. This recipe isn’t just about blending fruit; it’s about elevating your favorite summer refreshment with a dash of unexpected spice. I stumbled upon this twist during a lazy Sunday experiment, and it turned my usual mango slush into a symphony of flavors.

    Using ripe mangoes is obvious, but what makes this recipe shine is a hint of fresh ginger and a squeeze of lime, creating a dance of zesty brightness that cuts through the sweetness. It’s perfect for those who love their cold treats a little more lively, a little more special. Just one sip, and you’ll feel transported to a breezy island without leaving your kitchen.

    This slushie is a depiction of joyful chaos—messy, vibrant, and utterly satisfying. It’s a reminder that simplicity combined with a tiny twist can reinvent a classic. Whether you’re hosting friends or craving a solo escape, this drink will surprise and delight at every turn.

    Spicy Mango Ginger Slushie

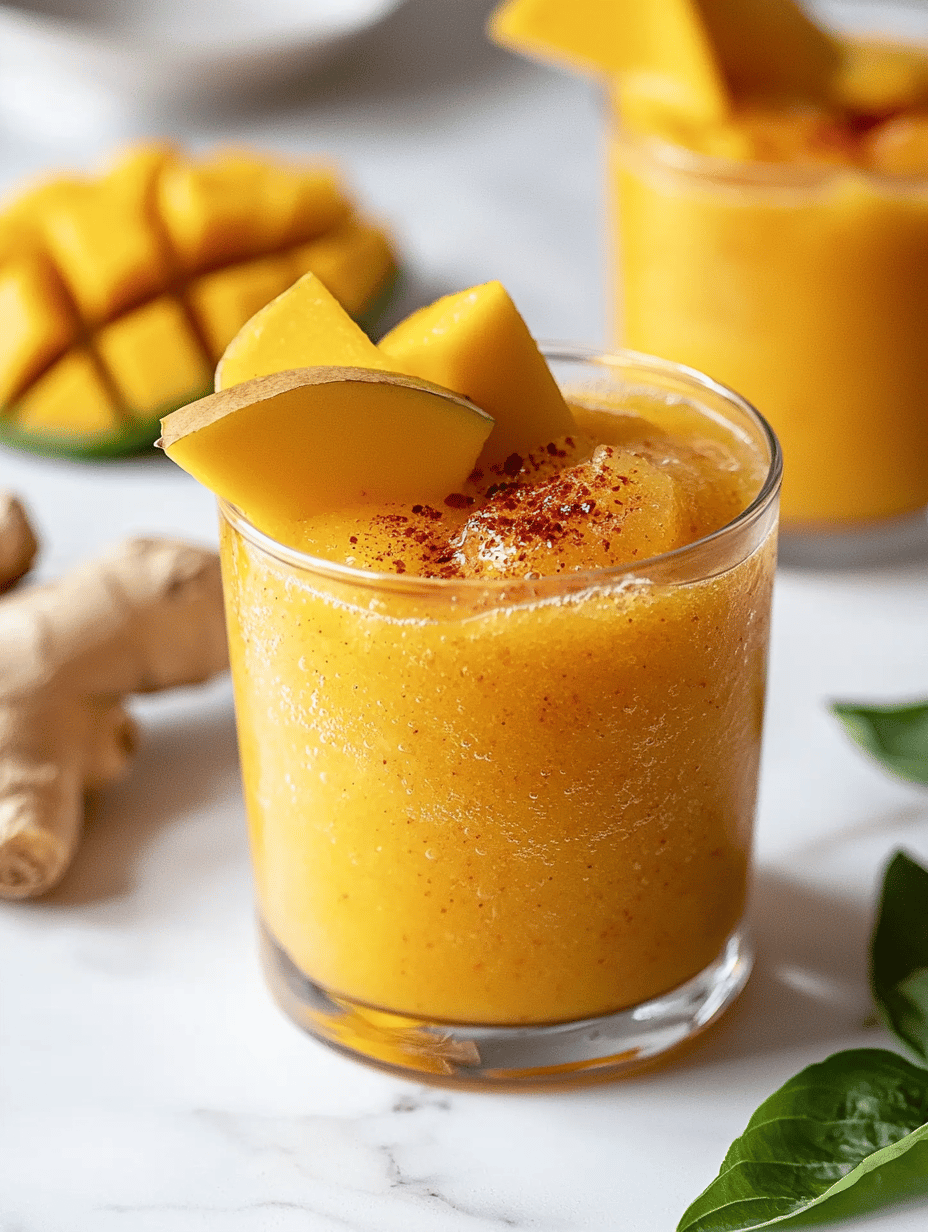
    This mango slushie is a frozen beverage made by blending ripe mangoes with fresh ginger and lime juice, resulting in a chilled, smooth, and slightly icy drink. The addition of ginger and lime provides a zesty brightness that complements the natural sweetness of the fruit, creating a vibrant and lively texture with a hint of spice.
    Prep Time 10 minutes
    Total Time 10 minutes
    Servings: 2
    Course: Main Course
    Cuisine: Tropical
    Calories: 120

    Ingredients
      

    • 2 cups ripe mango chunks frozen for best texture
    • 1 inch fresh ginger peeled and minced
    • 2 tablespoons lime juice freshly squeezed
    • 1 cup water chilled
    • 2 teaspoons honey optional, for added sweetness

    Equipment

    • Blender
    • Measuring cups and spoons
    • Knife
    • Cutting board

    Method
     

    1. Measure out the frozen mango chunks and place them into your blender.
    2. Add the peeled and minced ginger to the blender, along with freshly squeezed lime juice.
    3. Pour in chilled water and, if desired, add honey for extra sweetness.
    4. Blend everything on high speed until the mixture is smooth and icy, approximately 30-45 seconds.
    5. Stop the blender and taste the slushie; adjust sweetness if needed by blending in a little more honey.
    6. Pour the vibrant mango ginger slushie into glasses and serve immediately, garnished with a slice of lime or a sprig of mint if desired.

    Notes

    For a creamier texture, try adding a splash of coconut milk before blending. Adjust the ginger amount for more or less spice according to your preference.
    So next time you crave something cool and invigorating, remember this little secret. The combination of ripe mango, a zing of ginger, and a splash of lime keeps things exciting, even on the hottest days.

    This recipe isn’t just about quenching thirst; it’s about creating a moment of joy, a burst of tropical sunshine right there in your glass. Enjoy the vibrant colors and the refreshing chill—each sip a mini adventure. Cheers to more flavorful experiments in your kitchen.

  • The Surprising Charm of Spicy Pineapple Slushie

    The Surprising Charm of Spicy Pineapple Slushie

    Imagine a summer day where the only thing cooler than the breeze is a vibrant, icy drink bursting with tropical sweetness and a hint of fiery spice. That’s what makes this pineapple slushie a standout — it’s not just a cool refreshment, but a small adventure in every glass.

    This recipe flips the usual script; instead of just sweet, it combines spicy jalapeños or chili powder to awaken the flavor palate. The result is a harmonious blend of heat and chill, reminiscent of exotic markets and balmy evenings. It’s perfect for those seeking a refreshing twist with a kick.

    Spicy Pineapple Slushie

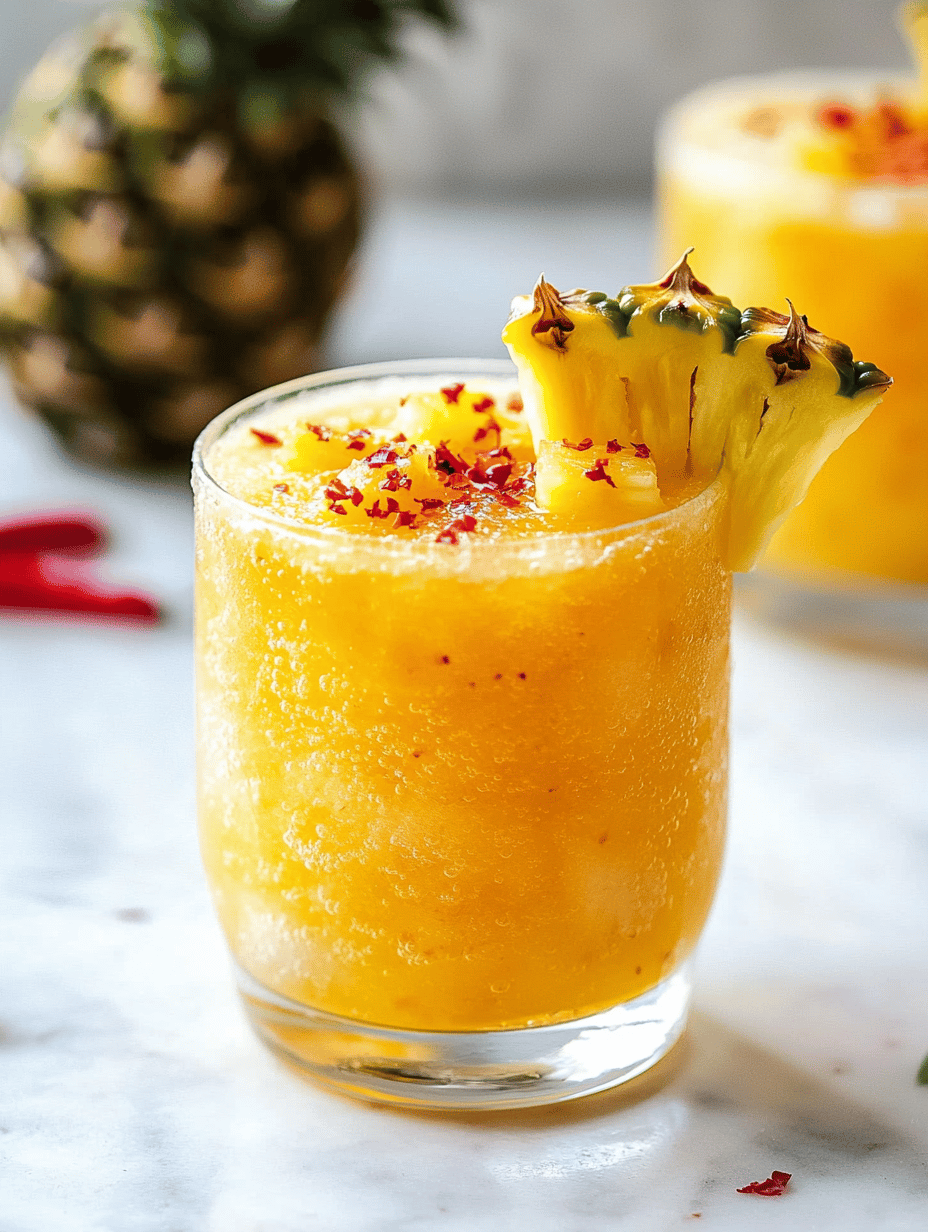
    This pineapple slushie combines fresh pineapple chunks blended with ice and a touch of chili powder or chopped jalapeños, resulting in a vibrant, frozen beverage with a refreshing balance of sweetness and heat. Its smooth, icy texture makes it a perfect cold treat on hot days, with a lively appearance showcasing bright yellow and red flecks of spice.
    Prep Time 10 minutes
    Total Time 10 minutes
    Servings: 2
    Course: Main Course
    Cuisine: Tropical
    Calories: 120

    Ingredients
      

    • 2 cups fresh pineapple chunks peeled and cored
    • 1 cup ice cubes or more, for desired texture
    • 1/2 teaspoon chili powder or adjust to taste
    • 1 tablespoon honey or agave syrup optional, for extra sweetness

    Equipment

    • Blender
    • Measuring cups and spoons

    Method
     

    1. Place the pineapple chunks, ice cubes, chili powder, and honey into a blender.
    2. Blend on high speed until the mixture is smooth and evenly combined, with a slightly thick and icy texture.
    3. Stop the blender and check the consistency; add more ice if a thicker, frostier slush is desired and blend again briefly.
    4. Pour the vibrant green-yellow mixture into chilled glasses, allowing the icy slush to mound slightly above the rim.
    5. Garnish with small slices of jalapeño or a sprinkle of chili powder on top for extra spice and visual appeal.
    6. Serve immediately with a straw, enjoying the refreshing and spicy flavor combination.
    Creating this pineapple slushie is more than just making a drink — it’s about capturing a moment of tropical joy in a glass, no matter where you are. Its vivid flavors and unexpected spice make it a memorable refreshment for any warm day.

    As the ice shatters and the aromas fill your kitchen, you’ll be reminded of sun-drenched beaches and carefree laughs. This recipe is a reminder that sometimes, the most ordinary ingredients can turn into an extraordinary experience. Cheers to cool, spicy adventures in a glass.

  • The Magic of Oreo Slushies: A Nostalgic Chilldown

    The Magic of Oreo Slushies: A Nostalgic Chilldown

    Imagine a frozen treat that captures the sweet chaos of childhood snack time. The Oreo slushie isn’t just a drink; it’s a trip down memory lane with every icy sip. It’s perfect for those scorching afternoons when your freezer calls out to break the routine.

    This recipe flips the classic cookie dunk into a frosty adventure, blending creamy milk with crushed Oreos into a textured, ice-cold delight. It’s a spontaneous dessert that’s as quick to make as it is to devour, perfect for impromptu gatherings or solo moments of indulgence.

    WHY I LOVE THIS RECIPE?

    • I love how it transforms a simple cookie into a vibrant, ice-cold treat.
    • The nostalgia kicks in with every spoonful, reminding me of summer days at grandma’s house.
    • It’s chaos in a glass — cookies crumbled, milk swirling, a perfect messy delight.
    • The quick blend makes it feel like a small victory in a busy day.
    • I take pride in turning basic ingredients into a show-stopping refreshment.

    AVOID MY DISASTER (You’re Welcome)

    • FORGOT to chill the milk; it turned the slushie into a watery mess. Freeze it first next time.
    • DUMPED too many Oreos; the mixture was too thick. Use a standard handful for perfect texture.
    • OVER‑TORCHED the whipped cream topping; it smelled burnt. Keep the heat low or skip it altogether.
    • REACHED for a regular blender; it couldn’t handle the ice. Use a high-speed blender for smooth crushing.

    QUICK FIXES THAT SAVE YOUR DAY

    • When the mixture is too thin, ADD more crushed Oreos or freeze briefly to firm up.
    • Splash in a little vanilla extract to enhance the flavor profile instantly.
    • Patch a runny texture by freezing the blender jar for 10 minutes, then blend briefly again.
    • Shield your toppings from melting by serving immediately or keeping in the freezer.
    • When the ice is too coarse, crack it with a quick pulse in your blender for finer uniformity.

    The Oreo slushie is more than just a dessert; it’s a quick escape from the ordinary. Its cool, gritty texture satisfies that craving for something sweet and crisp in the same bite. Now, with this recipe, you can whip one up anytime the mood strikes, no matter the season.

    In a world of endless dessert options, sometimes all you need is a simple, nostalgic twist. This treat celebrates the imperfect joy of combining what we love into something refreshingly different. It’s a reminder that good ingredients and a little bit of chaos can lead to moments worth savoring.

    Oreo Slushie

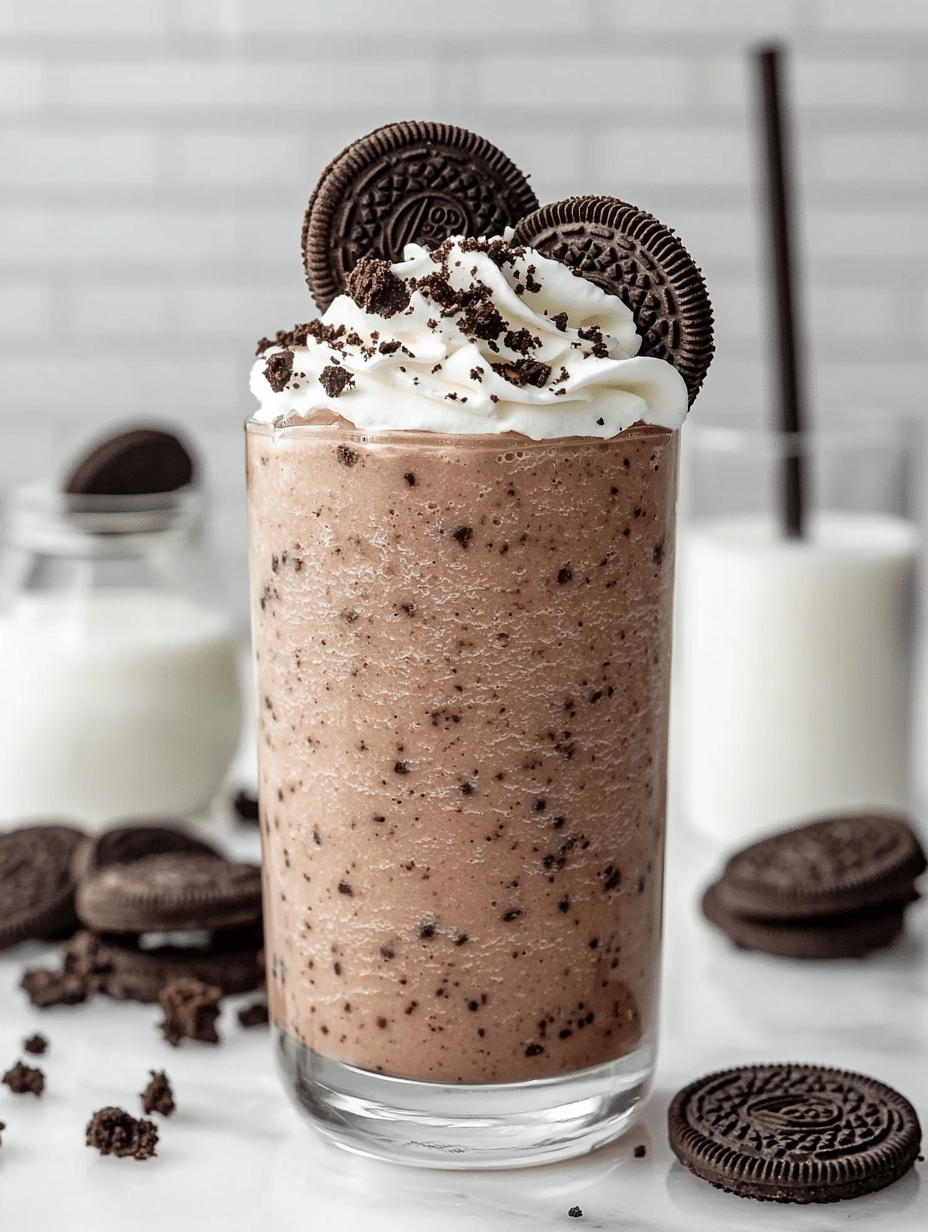
    The Oreo slushie is an icy frozen beverage made by blending crushed Oreo cookies with milk and ice until it reaches a textured, slushy consistency. It has a creamy, gritty texture with a visually appealing dark and white swirl from the cookies, resembling a frosty dessert in a glass.
    Prep Time 5 minutes
    Total Time 5 minutes
    Servings: 2
    Course: Main Course
    Cuisine: Any
    Calories: 200

    Ingredients
      

    • 1 1/2 cups milk chilled
    • 1 cup crushed Oreo cookies about 4-5 cookies crushed
    • 1 cup ice cubes preferably crushed or small pieces

    Equipment

    • High-speed blender
    • Measuring cups and spoons

    Method
     

    1. Add the chilled milk, crushed Oreos, and ice cubes to your high-speed blender.
    2. Secure the lid on the blender and blend on high for about 30-45 seconds until the mixture is smooth, thick, and icy with a gritty texture from the Oreos.
    3. Stop the blender and check the consistency—if it’s too thick, add a splash of milk, then blend briefly to loosen it up; if too thin, add a few more crushed Oreos and pulse a few seconds.
    4. Pour the slushie into chilled glasses, observing the swirling dark and creamy layers that form from the Oreos.
    5. Serve immediately with a straw or spoon, enjoying the cold, gritty texture and rich Oreo flavor.

    Next time you find yourself craving a cool treat, remember how easy it is to turn ordinary ingredients into something special. The Oreo slushie sings the perfect tune of childhood and summer, no fancy gadgets required.

    So gather your ingredients, embrace the chaos, and enjoy the messy, icy goodness. It’s a simple joy that never gets old, especially when the heat is on and you just want a moment of pure, frozen delight.

  • The Secret Spark: Why Sprite Slushies Are the Summer Surge You Didn’t See Coming

    The Secret Spark: Why Sprite Slushies Are the Summer Surge You Didn’t See Coming

    As temperatures soar, most of us reach for plain ice or sugary popsicles. But what if I told you that a seemingly simple Sprite can become a life-changing summer treat? I recently stumbled upon this idea when hunting for a quick chill in the dead of a heatwave. Now, it’s become my go-to, transforming ordinary days into icy adventures.

    This isn’t just about quenching thirst; it’s about capturing that fizzy, lemon-lime zing in every sip. The method is so straightforward that anyone can master it with a few household staples. It’s a refreshing twist that carries nostalgia and chaos, all in one frosty glass.

    Fizzy Lemon-Lime Popsicles

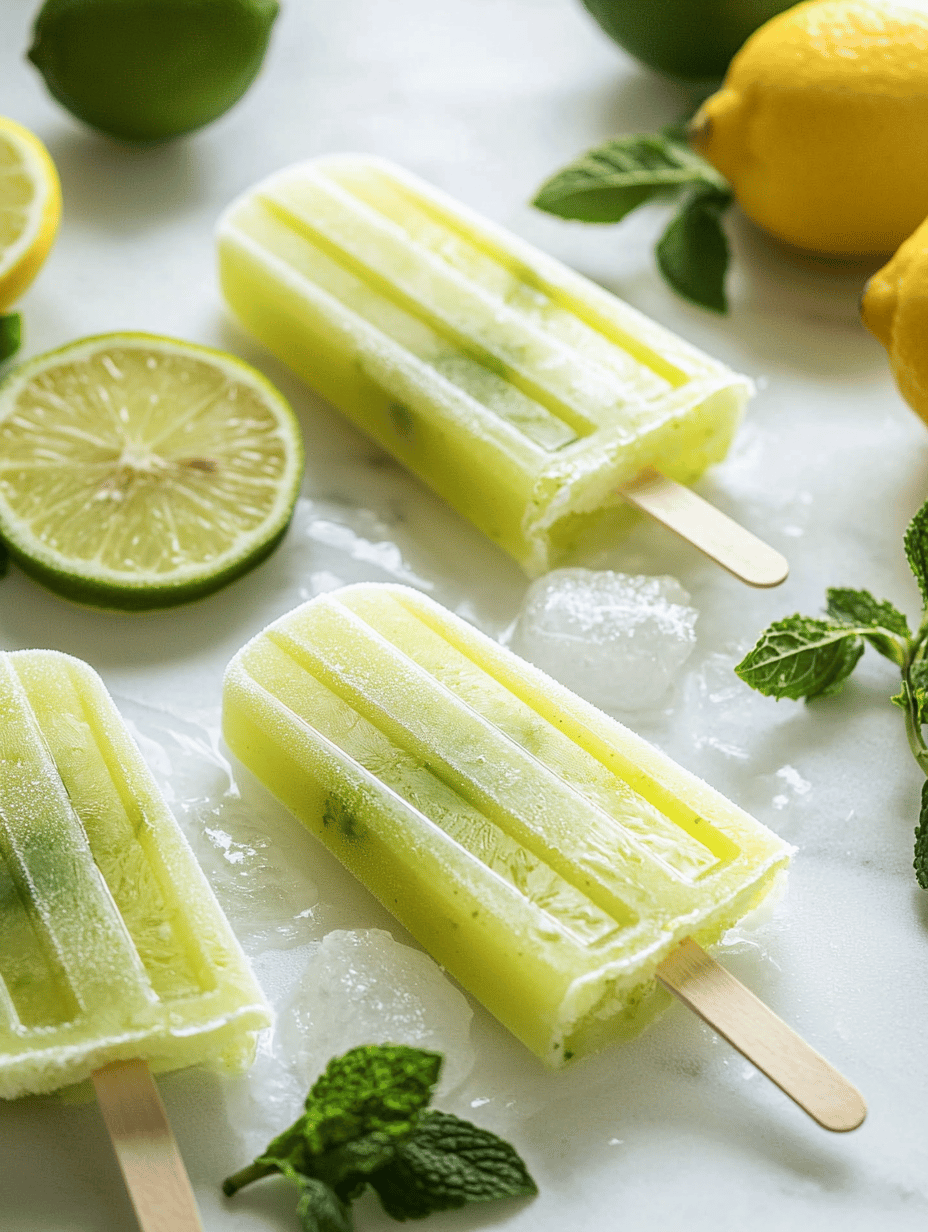
    These fizzy lemon-lime popsicles are made by combining lemon-lime soda with fruit juice and sweetener, then freezing the mixture until solid. The final treats have a smooth, icy texture with a hint of carbonation and tart citrus flavor, presenting as colorful, refreshing frozen bars.
    Prep Time 10 minutes
    Cook Time 4 hours
    Total Time 4 hours 10 minutes
    Servings: 8
    Course: Main Course
    Cuisine: fusion
    Calories: 100

    Ingredients
      

    • 2 cups lemon-lime soda
    • 1 cup fruit juice (e.g., lemon or lime) freshly squeezed for best flavor
    • 1/4 cup sugar or honey adjust to taste

    Equipment

    • Measuring cup
    • Popsicle molds
    • Pouring pitcher
    • Freezer

    Method
     

    1. Pour the lemon-lime soda into a measuring cup and stir in the fruit juice and sweetener until well combined.
    2. Mix gently to preserve some of the fizz, ensuring the sugar dissolves completely.
    3. Carefully pour the mixture into popsicle molds, filling each cavity nearly to the top.
    4. Insert popsicle sticks into each mold, making sure they stand upright in the center.
    5. Place the molds in the freezer and let them set for at least 4 hours or until completely frozen.
    6. Once frozen, run warm water briefly over the outside of each mold to loosen the popsicles.
    7. Gently pull out the popsicles from the molds and enjoy immediately, revealing icy, bubbling, citrus-flavored treats.

    Notes

    For extra fizz, re-insert popsicles into molds and briefly re-freeze if the mixture starts to lose carbonation during handling.

    Next time the heat hits hard, forget heavy desserts or boring drinks. The Sprite slushie is a little burst of joy that needs no fancy equipment or ingredients. Just freeze, blend, and sip your way through summer’s finest moments.

    Sometimes, the simplest solutions are the best. This icy sprint from pantry to mouth is proof that a little creativity can make the hottest days cooler and more playful. Here’s to many more chilled adventures in the fridge aisle—fizz guaranteed every time.

  • The Cold Buzz: Transforming Coke into a Summer Slushie

    The Cold Buzz: Transforming Coke into a Summer Slushie

    Imagine capturing the sharp, sweet aroma of freshly opened Coke, then freezing that magic into a slushie that crackles with every sip. This isn’t your usual icy drink—it’s a nostalgic explosion wrapped in a frosty shell, perfect for unexpected heat waves or when you crave a sweet escape. The beauty lies in its simplicity and a dash of chaos in the freezer.

    Recently, I stumbled upon a forgotten can lingering in my fridge, and a wild idea struck: what if I froze it? What followed was a messy, flavorful adventure, a reminder that sometimes, the best treats come from spontaneous experiments. This recipe invites a little rebellion, blending childhood joy with a dash of culinary daring.

    Frozen Coke Slushie

    This frozen Coke slushie is made by pouring Coke into a container and freezing it until solid. Once frozen, it’s scraped and stirred to create a crunchy, icy texture with a sparkly, sweet flavor profile. The result is a visually appealing, frosty treat with a chewy, slush-like consistency.
    Prep Time 5 minutes
    Cook Time 4 hours
    Total Time 4 hours 5 minutes
    Servings: 2
    Course: Main Course
    Cuisine: American
    Calories: 150

    Ingredients
      

    • 1 can Coke chilled

    Equipment

    • Freezer
    • Mixing Spoon
    • Fork or Spoon for scraping
    • Serving glasses

    Method
     

    1. Pour the cold Coke into a shallow container or loaf pan, spreading it out evenly.
    2. Place the container in the freezer and leave it untouched for about 4 hours, or until the Coke is completely frozen solid.
    3. Remove the frozen Coke from the freezer and let it sit at room temperature for a few minutes to soften slightly, making it easier to scrape.
    4. Use a fork or spoon to scrape the frozen Coke into small, uneven chunks, creating a slushy, crunchy texture.
    5. Transfer the scraped pieces into serving glasses, and give them a quick stir to loosen and enhance the icy consistency.
    6. Serve immediately with a straw or spoon, enjoying the sparkling, frosty treat that crackles with each bite.

    Notes

    For a smoother texture, you can blend the chunks briefly after scraping. Feel free to add a splash of lemon or lime juice for extra tang.

    There’s something satisfying about turning a common soda into a crunchy, refreshing treat. It’s perfect for backyard gatherings or a solo escape on a hot afternoon. Each bite delivers that unexpected tang, the satisfying crunch, and a burst of familiar sweetness.

    In a season overflowing with options, this Coke slushie stands out as a playful, easy invention that brightens moments. It’s a reminder that simple ingredients, when handled with a little chaos and curiosity, create delightful surprises. Keep the freezer ready for the next spontaneous snack craving—trust me, you’ll thank yourself.

  • Chill Out with an Unusual Lemonade Slushie Twist

    Chill Out with an Unusual Lemonade Slushie Twist

    Imagine turning a standard summer refreshment into an adventure for your taste buds. The lemonade slushie often gets overshadowed by its more exotic frozen cousins, but today I want to challenge that idea. Using a secret ingredient, this recipe elevates the humble lemonade into a frosty delight that sparks nostalgia and surprise.

    Crafting this slushie is about more than just freezing and blending. It’s about paying attention to textures and flavors that dance together in every sip, awakening your senses with a crisp, zesty punch. Perfect for those hot afternoons or when you crave a dessert that’s fresh, fun, and unexpectedly bold.

    Secret Ingredient Lemonade Slushie

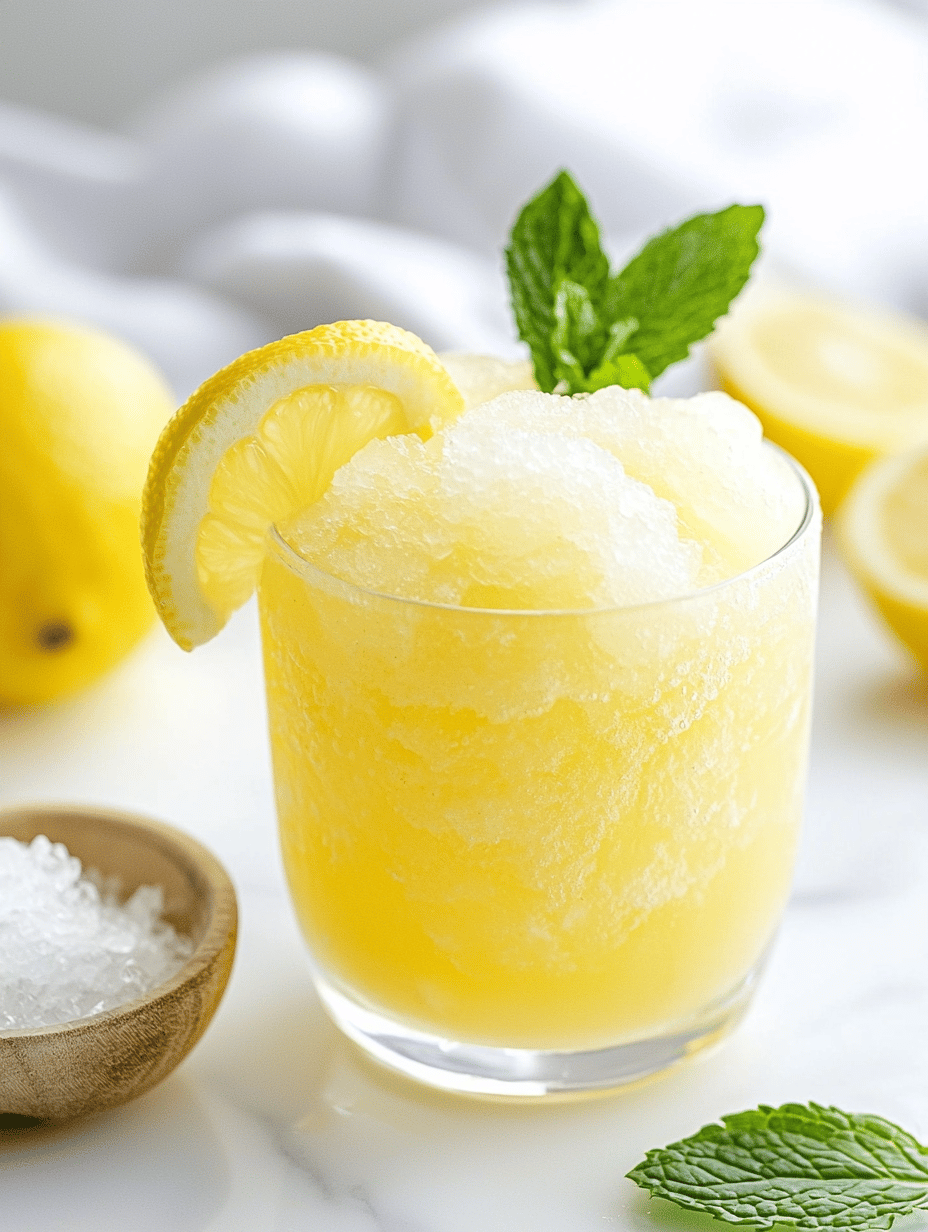
    This lemonade slushie combines fresh lemon juice, sugar, and a secret ingredient blended into a frosty, icy beverage. Its smooth texture and vibrant appearance make it a refreshing treat with a surprising flavor twist. Perfect for hot days or as a fun dessert, it balances tartness and sweetness in every sip.
    Prep Time 10 minutes
    Total Time 10 minutes
    Servings: 4
    Course: Main Course
    Cuisine: American
    Calories: 120

    Ingredients
      

    • 1 cup fresh lemon juice about 4-5 lemons
    • 1/2 cup granulated sugar adjust to taste
    • 2 cups water cold
    • 1 teaspoon secret ingredient (e.g., a splash of vanilla extract or a pinch of salt) adds a surprising depth of flavor
    • 2 cups ice cubes

    Equipment

    • Blender
    • Measuring cups and spoons

    Method
     

    1. Combine the fresh lemon juice and granulated sugar in a pitcher, stirring until the sugar dissolves completely and the mixture is well combined.
    2. Add cold water and the secret ingredient to the lemon mixture, stirring gently to blend all flavors evenly.
    3. Pour the lemon mixture into a blender, then add the ice cubes on top.
    4. Secure the lid and blend on high speed until the mixture is smooth, frosty, and somewhat thickened, about 30-45 seconds.
    5. Stop the blender and check the texture; if it’s too thick, add a splash of water and blend briefly again.
    6. Pour the chilled lemonade slushie into glasses, ensuring each gets plenty of icy goodness.

    Notes

    For an extra burst of flavor, garnish with lemon slices or mint leaves before serving.
    This lemonade slushie is more than a thirst quencher. It’s a small celebration in a glass, perfect for brightening even the dullest days. With its lively flavor and smooth texture, it’s sure to become a staple in your summer lineup.

    Enjoy experimenting with this twist on a classic. The simple act of blending icy lemon goodness can turn into a delightful ritual no matter the season or occasion.

  • Spooktacular Blood-Red Flaming Bloody Mary

    Spooktacular Blood-Red Flaming Bloody Mary

    Every October, the air feels heavier with anticipation and a dash of chaos—perfect for elevating the classic Bloody Mary. This year, I decided to transform my usual brunch cocktail into something eerily mesmerizing and totally fitting for Halloween. Think smoky spices, a splash of spice-fire, and a daring presentation that screams “Boo!” at your party.

    Instead of blending just tomato juice and vodka, I infuse this drink with smoky chipotle and a hint of black charcoal to deepen the crimson hue. Garnished with a flashing glow stick or a devilish pickle, this cocktail becomes part of the haunted scene that makes Halloween memorable. It’s a brew that invites awe, a little dread, and lots of admiration.

    Black Charcoal Halloween Bloody Mary

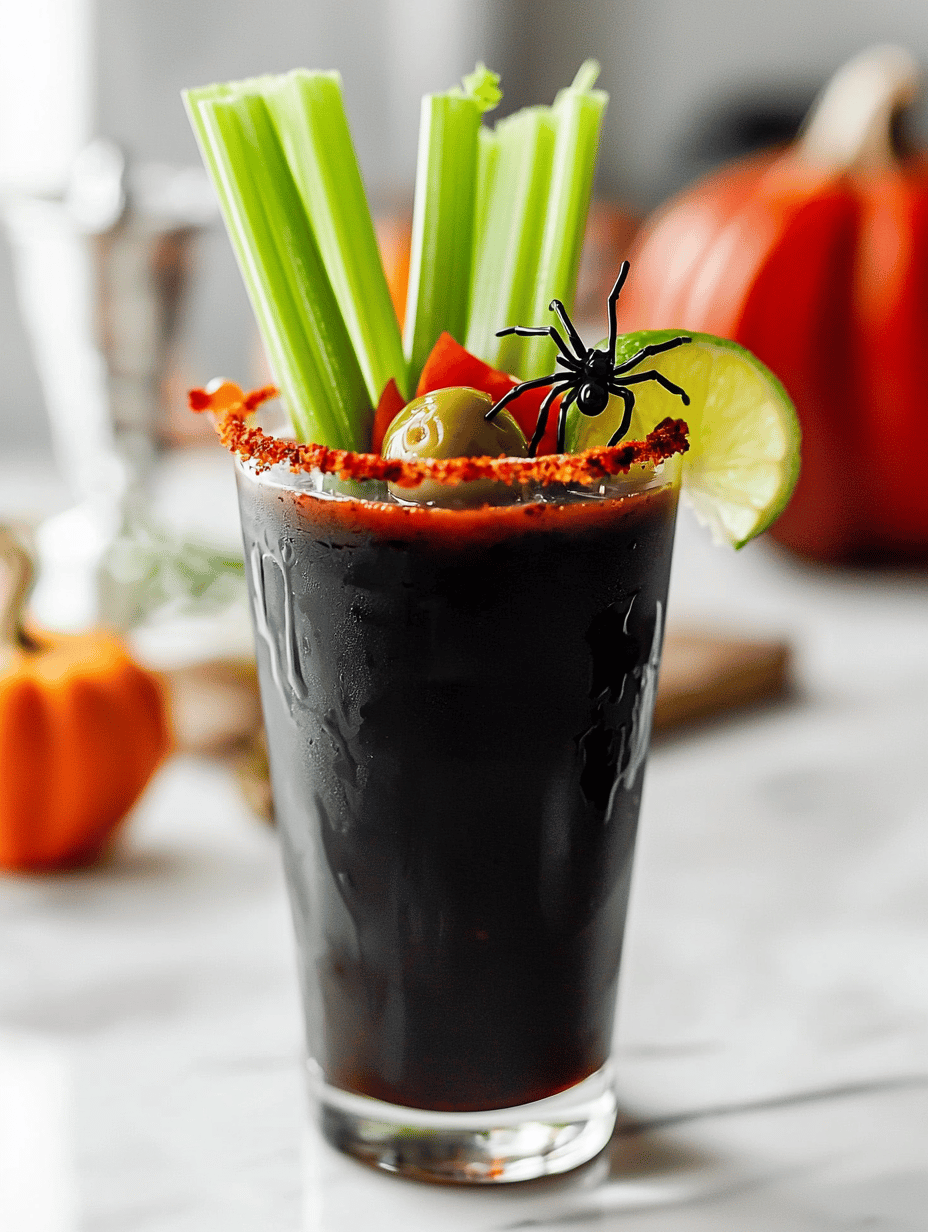
    This Bloody Mary features smoked chipotle and black charcoal infused tomato juice, creating a deep crimson hue with smoky, spicy flavors. The drink is garnished with glowing or spooky elements, making it visually striking and perfect for Halloween festivities. The final beverage has a rich, velvety texture with a smoky, spicy, and slightly charred aroma.
    Prep Time 10 minutes
    Cook Time 5 minutes
    Total Time 15 minutes
    Servings: 4
    Course: Main Course
    Cuisine: Halloween
    Calories: 85

    Ingredients
      

    • 4 cups tomato juice preferably low sodium
    • 2 tsp smoked chipotle powder adjust to taste
    • 1 pinch black activated charcoal food grade, for color and smoky effect
    • 1.5 oz vodka or more, to taste
    • 1 tbsp Worcestershire sauce for umami depth
    • 1 tsp hot sauce adjust for heat preference
    • 1 lemon lemon juice freshly squeezed
    • to taste salt and pepper for balancing flavors

    Equipment

    • Cocktail shaker
    • Glassware

    Method
     

    1. Begin by pouring the tomato juice into a mixing container, creating a vibrant crimson base for your drink.
    2. Add the smoked chipotle powder and a pinch of black activated charcoal to the tomato juice. Stir thoroughly until the mixture develops a deep, smoky, and slightly charcoal-darkened hue, and becomes smooth.
    3. Pour in the vodka, Worcestershire sauce, hot sauce, and freshly squeezed lemon juice. Mix well with a spoon or whisk to combine all the flavors uniformly.
    4. Season the mixture with salt and pepper to taste, then give it one last stir. The liquid should be rich, smoky, with a deep crimson color and a slightly velvety texture.
    5. Fill a glass with ice cubes and carefully strain the mixture into the glass to keep it cold and visually striking. The drink should retain its deep dark red appearance with a smoky finish.
    6. For a spooky presentation, garnish with a glowing pickle, a slice of lemon, or add a flashing glow stick for extra Halloween fun.

    Notes

    Adjust the spice level with more or less chipotle and hot sauce. Use food-grade charcoal carefully, and only in small amounts for color and smoky flavor. For a more dramatic look, serve with glowing or themed garnishes.

    In the end, this Bloody Mary isn’t just about the spooky visuals; it’s about shocking your senses and sparking conversation. Every sip is a smoky, spicy reminder that Halloween is about embracing the wild and whimsical side of life. Whether served at a mad costume party or a cozy night in, it promises a thrill that lingers longer than the sugar rush.

    So, keep your eyes peeled for those little tricks and treats—this cocktail might just become your new Halloween tradition. Its fiery charm and dark allure fit right into the season’s spirit of playful mischief and deliciously creepy fun. Cheers to making your Halloween a little more daring and a lot more memorable.

  • Chill Out with an Unusual Blueberry Slushie Twist

    Chill Out with an Unusual Blueberry Slushie Twist

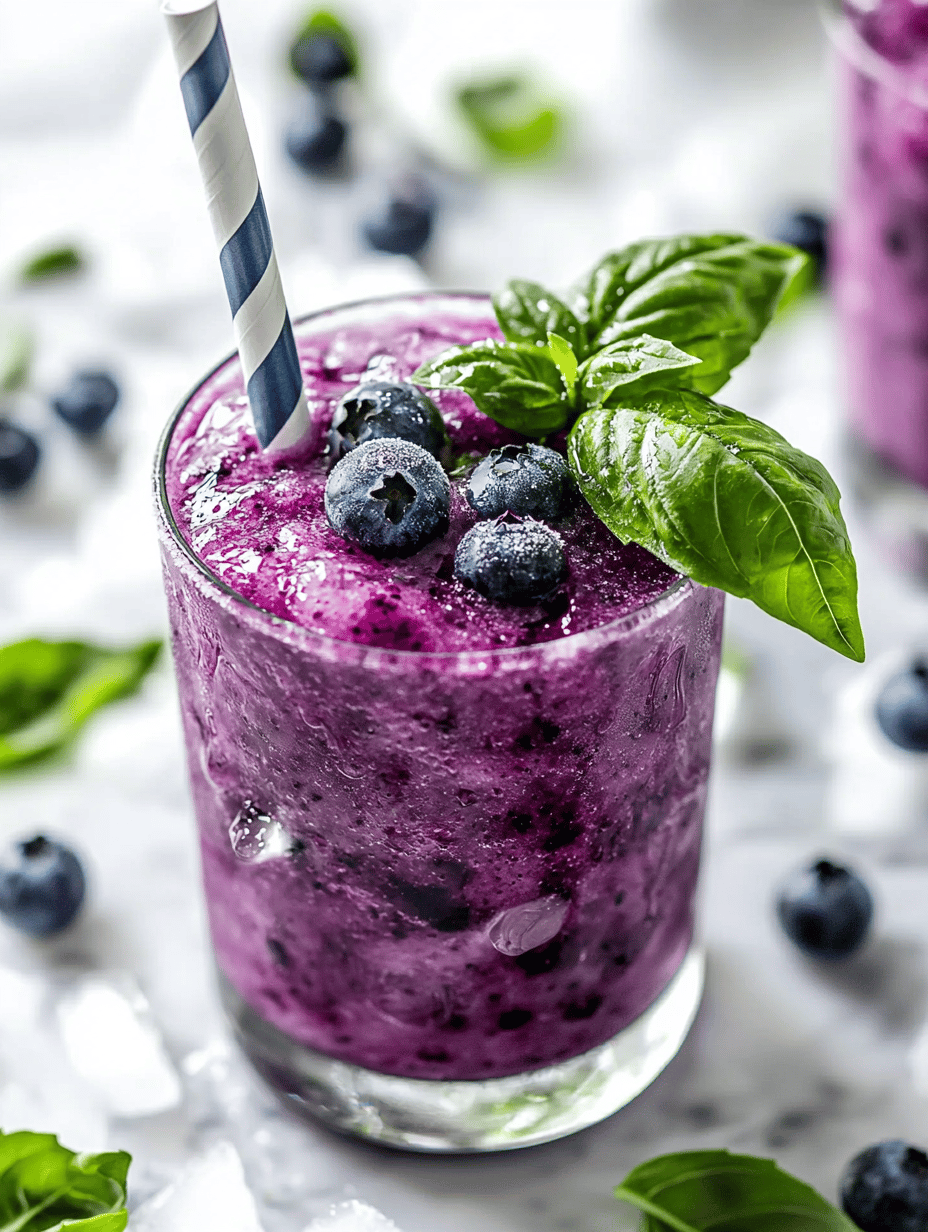
    Most blueberry recipes lean into warm crumbles or cozy jams, but I challenge you to think chilly and vibrant. Imagine a burst of icy, juicy blueberry flavor that awakens your senses in the heat of summer or a lazy afternoon. This blueberry slushie isn’t just a drink; it’s a cool rebellion against bland hydration.

    What makes this slushie special is its unexpected note of basil blended with ripe blueberries, creating a fresh herbal aroma that dances with sweetness. Plus, it’s insanely easy to whip up with just a few pantry staples—perfect for spontaneous refreshment. When the heat is on, this icy treat becomes my secret weapon for instant coolness.

    Blueberry Basil Slushie

    This blueberry basil slushie combines ripe blueberries blended with fresh basil to create a vibrant, icy beverage. The mixture is pureed until smooth and crushed with ice to achieve a refreshing, slushy texture with a bright, herbal aroma. Served cold, it displays a translucent purple hue with tiny basil flecks topping the surface.
    Prep Time 5 minutes
    Total Time 5 minutes
    Servings: 2
    Course: Main Course
    Cuisine: fusion
    Calories: 85

    Ingredients
      

    • 1 cup blueberries fresh or frozen
    • 4-5 leaves fresh basil roughly chopped
    • 1 cup ice cubes
    • 2 tablespoons honey or simple syrup adjust sweetness as desired
    • 1/2 cup water cold

    Equipment

    • Blender
    • Measuring cup
    • Ice crusher or resealable bag and mallet

    Method
     

    1. Place the blueberries, chopped basil, honey, and water into the blender.
    2. Blend on high until the mixture is smooth, with the blueberries broken down and basil fully incorporated, about 30 seconds.
    3. Add the ice cubes to the blender and pulse a few times to start crushing the ice.
    4. Continue blending until the mixture is thick, slushy, and evenly icy, about 20-30 seconds. Stop and check the texture.
    5. Taste the slushie and adjust sweetness if needed by adding a little more honey, then blend briefly again to combine.
    6. Scoop the blueberry basil slushie into glasses, garnish with a few basil leaves if desired, and serve immediately for the best icy freshness.

    Notes

    For a vegan version, substitute honey with agave syrup or maple syrup.

    Next time you crave a refreshing escape, reach for your blender rather than reaching for a store-bought icy drink. The homemade blueberry slushie offers a vibrant burst of flavor, with the added joy of customizing toppings or adding a splash of lemon for extra zing. It’s simple, satisfying, and just the thing to beat the summer heat.

    Remember, the best recipes come with a touch of chaos—maybe a splash of extra berries or a dash more honey. These little tweaks make the experience uniquely yours. So, whip it up, enjoy the sensory splash, and let the cold, sweet blueberry waves wash over you—effortlessly stylish and endlessly delicious.

  • Spooky Sips: Halloween Monster Mash Punch That Will Bewitch Your Party

    Spooky Sips: Halloween Monster Mash Punch That Will Bewitch Your Party

    Every October, I find myself craving a mix that’s more than just a beverage — it’s an experience. The Halloween Monster Mash Punch brings a chaotic splash of colors and flavors, transforming my kitchen into a haunted carnival. The scent of citrus and fizzy cola mingles with a hint of eerie green gumdrop eyes, setting the mood before the first sip.

    This recipe is my antidote to boring party drinks. It’s a chance to unleash your inner mad scientist, swirling together bright, bubbly ingredients that bubble and sparkle like a witch’s brew. It’s perfect for those who love a little chaos on their tables and a lot of fun in their cups.

    Halloween Monster Mash Punch

    A vibrant, fizzy punch featuring a colorful mix of citrus soda, fruit juices, and playful green gumdrop eyes. The drink combines bubbly carbonation with sweet and tart flavors, creating a lively, effervescent beverage with a fun, chaotic appearance. Final presentation includes garnishes that enhance its spooky carnival vibe.
    Prep Time 10 minutes
    Total Time 10 minutes
    Servings: 8
    Course: Main Course
    Cuisine: Halloween
    Calories: 150

    Ingredients
      

    • 3 cups fruit juice (such as orange or pineapple) for a sweet base
    • 2 cups cola soda for bubbles and flavor
    • 1 cup lemon-lime soda adds extra fizz
    • 1 green green gumdrops for eerie eyes and decoration
    • a handful ice cubes to chill and dilute slightly

    Equipment

    • Large mixing bowl
    • Measuring cups and spoons
    • Ladle or large spoon

    Method
     

    1. Pour the fruit juice into a large mixing bowl, creating a vibrant base for your punch.
    2. Add the lemon-lime soda to the fruit juice, gently pouring to preserve the bubbles and fizz, then stir carefully to combine.
    3. Sprinkle in the green gumdrops, pressing some into the surface for eerie, googly eyes that float and sparkle.
    4. Add a handful of ice cubes to chill the mixture and make the punch refreshingly cold.
    5. Pour the cola soda into the bowl slowly, watching it bubble up and create a lively, bubbly effect that resembles a bubbling cauldron.
    6. Gently stir all the ingredients together until the colors are bright and the mixture is well combined, with frothy bubbles on top.
    7. Serve the punch in clear cups or glasses, garnished with additional green gumdrops or spooky straws for extra fun.

    Notes

    For extra spooky flair, add small plastic spiders or glow-in-the-dark stir sticks. Adjust the amount of soda and juice for desired sweetness and fizz.

    As the last of the ice melts into this ghoulish concoction, the magic lingers in the air. The Monster Mash Punch not only refreshes but sparks giggles among friends as they marvel at its wild, colorful appearance. It’s a reminder that Halloween is less about fear and more about the joyful, spooky chaos we create together.

    Whether it’s a party centerpiece or a spontaneous spill of colors on a foggy night, this punch stands out. It’s a bubbling testament to the quirky spirit of Halloween, full of surprises and giggles all around.