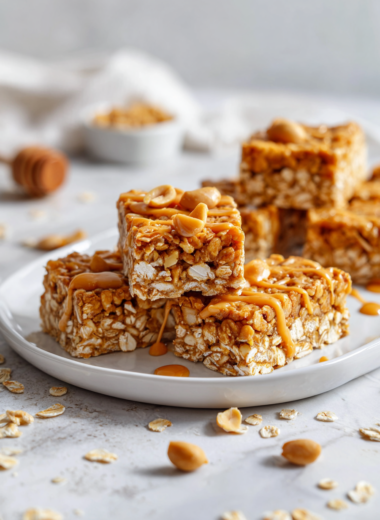
Author: GraceMorgan

  • Roasted Pumpkin Ravioli: A Cozy Fall Spin with Unexpected Depth

    Roasted Pumpkin Ravioli: A Cozy Fall Spin with Unexpected Depth

    There’s a certain magic in turning a humble vegetable into delicate, golden pillows. Roasting transforms pumpkin into a sweet, smoky essence that elevates simple pasta into something special. This dish is my go-to when I want comfort with a touch of elegance, especially as the leaves turn and the air gets crisper. It feels like a small, warm rebellion against the rush of everyday life.

    Why This Dish Calls Me Back Year After Year

    It’s the ritual of roasting, the warmth of the oven filling the kitchen with a sweet, caramel aroma. Every bite reminds me of cozy autumn weekends, family gatherings, and quiet evenings alone. The process is meditative, the flavors complex yet comforting. This dish is a gentle reminder to slow down and savor the season’s bounty.

    Inside the Pumpkin: What Goes Into the Filling

    • Roasted Pumpkin: Sweet, smoky, and silky. The star, bringing warmth and depth to every bite.
    • Ricotta cheese: Creamy and mild. Balances the sweetness with a gentle tang.
    • Parmesan: Sharp, salty, and nutty. Adds umami and a bit of bite.
    • Sage leaves: Earthy and fragrant. I love frying them crisp for garnish.
    • Nutmeg or cinnamon: A pinch adds warmth, but don’t overdo it. Just a whisper of spice.
    • Salt and pepper: Basic, essential, to make all flavors pop.
    • Egg yolk: Acts as a binder and adds richness, making filling stick together.

    Tools of the Trade for Perfectly Roasted Pumpkin Ravioli

    • Baking sheet: To hold the pumpkin halves for roasting evenly.
    • Food processor or masher: To puree roasted pumpkin into a smooth filling.
    • Rolling pin or pasta machine: To roll out the pasta dough to your desired thickness.
    • Piercing tool or fork: To seal the ravioli edges securely.
    • Large pot: To boil the ravioli gently.

    The Art of Crafting Pumpkin Ravioli from Scratch

    Step 1: Preheat your oven to 200°C (390°F).

    Step 2: Cut the pumpkin in half, scoop out seeds, and place cut-side down on a baking sheet lined with parchment.

    Step 3: Roast for 40-50 minutes, until the flesh is silky and caramelized.

    Step 4: While pumpkin cools, whip up your pasta dough or buy fresh sheets if in a rush.

    Cooking Checkpoints and Tips to Keep in Mind

    • The pumpkin should be deeply golden and soft enough to mash easily.
    • Pasta dough should be smooth and elastic, not sticky or dry.
    • Watch the edges of the ravioli while boiling; they should stay intact and not burst.

    Common Pitfalls and How to Avoid Them

    • Ravioli opening up in the boiling water.? If the ravioli bursts during cooking, ensure the edges are well sealed with water or egg wash.
    • Filling is too runny, making ravioli difficult to seal.? If the pumpkin is too watery, drain excess moisture before filling.
    • Ravioli tearing apart in boiling water.? Use a gentle simmer, not a rolling boil, to prevent delicate pasta from tearing.
    • Dough sticking to the work surface and rolling pin.? If the pasta is too sticky, dust with a little flour during rolling.

    Roasted Pumpkin Ravioli

    This dish features delicate ravioli filled with silky roasted pumpkin and creamy ricotta, wrapped in tender pasta dough. The ravioli are gently boiled until tender, then served with crispy sage and a sprinkle of Parmesan for a comforting, elegant fall-inspired meal. The golden pillows have a soft, luscious interior contrasted by a slightly chewy exterior.
    Prep Time 1 hour
    Cook Time 15 minutes
    Total Time 1 hour 15 minutes
    Servings: 4
    Course: Main Course
    Cuisine: Italian
    Calories: 350

    Ingredients
      

    • 1 small small sugar pumpkin halved and seeded
    • 2 cups all-purpose flour for pasta dough
    • 2 large eggs for pasta dough
    • 1 cup ricotta cheese creamy and mild
    • 1/2 cup Parmesan cheese grated
    • 8 leaves sage for frying and garnish
    • 1/4 teaspoon nutmeg or cinnamon a pinch
    • 1 large egg yolk acts as a binder
    • Salt and pepper to taste
    • 2 tablespoons olive oil for frying sage

    Equipment

    • Baking sheet
    • Food processor or masher
    • Rolling pin or pasta machine
    • Piercing tool or fork
    • Large pot

    Method
     

    1. Preheat your oven to 200°C (390°F). Place the pumpkin halves cut-side down on a parchment-lined baking sheet and roast for 40-50 minutes until the flesh is soft and caramelized. Let cool slightly.
    2. Scoop the roasted pumpkin flesh into a food processor or mash it thoroughly until smooth and silky, then transfer to a bowl. Stir in the ricotta, Parmesan, a pinch of nutmeg or cinnamon, salt, and pepper, adjusting seasoning to taste. Mix in the egg yolk to help the filling hold together.
    3. Make your pasta dough by placing the flour on a clean surface, creating a well in the center. Crack the eggs into the well and gently mix with a fork, gradually incorporating the flour until a dough forms. Knead until smooth and elastic, then cover and let rest for 30 minutes.
    4. Divide the dough into smaller portions and roll out each piece with a rolling pin or pasta machine until thin, about 1/16 inch thick. Lightly dust with flour if sticking occurs.
    5. Place small spoonfuls of pumpkin filling about 1 inch apart on one sheet of pasta. Brush around the filling with a little water or beaten egg to help seal.
    6. Carefully lay a second sheet of pasta over the filling, pressing gently around each mound to remove air and seal the edges. Use a piercing tool or fork to crimp the edges securely.
    7. Bring a large pot of salted water to a gentle boil. Carefully drop the ravioli into the water, cooking in batches if necessary. Boil for about 3-4 minutes until they float to the surface and are tender.
    8. Meanwhile, heat olive oil in a skillet over medium heat. Add sage leaves and fry until crispy and fragrant, about 1-2 minutes. Remove with a slotted spoon and set aside.
    9. Using a slotted spoon, lift the cooked ravioli out of the water and transfer to a serving plate. Top with the crispy sage leaves and a sprinkle of Parmesan cheese.
    10. Serve immediately, enjoying the warm, tender ravioli with fragrant fried sage and a touch of cheese. Savor the comforting flavors and the perfect balance of textures.

    Notes

    Ensure the edges are well sealed to prevent filling from leaking during boiling. If the pumpkin is watery, drain excess moisture before filling the ravioli. Use gentle heat when boiling to keep delicate pasta intact.
    Making pumpkin ravioli feels like a quiet rebellion against the busy season. The smoky sweetness of roasted pumpkin paired with tender pasta is a reminder that simple ingredients can surprise us. Don’t be afraid to tweak the filling with a pinch of sage or a splash of bourbon for a personal touch. Enjoy every bite, knowing this dish is a little labor of love.

  • Spooky-Sweet Halloween Brownies with a Twist of Black Sesame and Charcoal

    Spooky-Sweet Halloween Brownies with a Twist of Black Sesame and Charcoal

    Halloween isn’t just about costumes and candy anymore. It’s about transforming familiar treats into something a bit more mysterious and fun. These brownies, with their dark, smoky layers and hint of sesame, feel like an edible spell cast at your kitchen table. They’re a nod to the season’s darker side, with a little crunch and a lot of character.

    Why these brownies will haunt your kitchen again and again

    They’re a perfect mix of decadence and darkness, with unexpected crunch and smoky depth. Each bite is a little ritual, a break from ordinary sweets. The visual impact alone makes them worth revisiting, especially when you want to impress or surprise. They’re easy to customize, turning into a Halloween staple that’s both spooky and satisfying.

    Dark secrets: ingredients and their dark magic

    • Dark chocolate: Rich, bittersweet, with a deep cocoa flavor, essential for that intense brownie base.
    • Black sesame seeds: Adds crunch and a nutty, smoky flavor—think of it as the season’s secret weapon.
    • Activated charcoal powder: Gives that eerie black color and a subtle smoky undertone, just enough to unsettle the eye.
    • Butter: Creates richness and helps the brownies stay moist—use good quality for best flavor.
    • Eggs: Bind everything together, add structure, and a slight lift—fresh eggs are a must.
    • Sugar: Sweetens and balances the bitterness of dark chocolate—measure carefully.
    • Salt: Enhances all flavors and prevents the brownies from tasting flat.

    Tools of the dark arts: what you’ll need

    • Oven: To bake the brownies evenly.
    • 20cm (8-inch) square pan: Holds the batter and shapes the brownies.
    • Parchment paper: Prevents sticking and makes removal easy.
    • Spatula: To smooth the batter and fold ingredients.
    • Whisk: To beat eggs and sugar smoothly.
    • Cooling rack: To cool brownies evenly without sogginess.

    Step-by-step guide to making your Halloween brownies perfectly

    Step 1: Preheat your oven to 175°C (350°F). Line a 20cm (8-inch) square pan with parchment paper.

    Step 2: Melt 200g of dark chocolate and 100g of butter together, stirring until smooth and glossy.

    Step 3: In a bowl, whisk 3 eggs with 150g of sugar and a pinch of salt until pale and slightly fluffy.

    Step 4: Fold the melted chocolate into the egg mixture, then gently incorporate 100g of black sesame seeds.

    Step 5: Pour the batter into your prepared pan, smoothing the top with a spatula.

    Step 6: Bake for about 25-30 minutes. The edges should be set, but the center still slightly gooey.

    Step 7: Let the brownies cool in the pan for 15 minutes, then transfer to a wire rack to cool completely.

    Step 8: Once cooled, cut into squares. For extra spooky flair, dust with a thin layer of activated charcoal powder.

    Step 9: Serve with a drizzle of dark caramel or a smear of black berry jam for a hauntingly beautiful finish.

    Cooking checkpoints to keep your brownies hauntingly perfect

    • Chocolate should be melted smoothly, not grainy. If it’s thick, gently warm it again.
    • The batter is ready when it’s glossy and flows slowly from the spatula.
    • Brownies should be slightly cracked on top and still moist inside.
    • Avoid over-baking; the center should be slightly jiggly—carryover heat will finish the job.

    Common pitfalls and how to dodge them

    • Over-baking leading to dry, crumbly brownies.? If brownies are overbaked and dry, reduce baking time by 5 minutes.
    • The batter is too dense to pour smoothly.? If the batter is too thick, fold in a splash of warm milk.
    • Chocolate burning or seizing during melting.? If the chocolate seizes, gently reheat it over a double boiler.
    • Cracking and splitting on the surface.? If brownies crack too much on top, cover with foil halfway through baking.

    Black Sesame Charcoal Brownies

    These brownies feature a dark, smoky appearance thanks to activated charcoal, with a rich chocolate base complemented by crunchy black sesame seeds. The baking process creates a fudgy, slightly cracked top that reveals a moist, dense interior. A touch of sesame adds nuttiness and texture, making them both visually striking and indulgent.
    Prep Time 15 minutes
    Cook Time 30 minutes
    Total Time 45 minutes
    Servings: 9
    Course: Main Course
    Cuisine: Halloween
    Calories: 250

    Ingredients
      

    • 200 g dark chocolate bittersweet, high quality
    • 100 g butter unsalted
    • 3 eggs fresh
    • 150 g sugar caster or superfine
    • 100 g black sesame seeds lightly toasted for flavor
    • 1 tsp activated charcoal powder food grade, for color and smoky undertone
    • a pinch salt to balance flavors

    Equipment

    • Oven
    • 20cm (8-inch) square pan
    • Parchment paper
    • Spatula
    • Whisk
    • Cooling rack

    Method
     

    1. Preheat your oven to 175°C (350°F) and line your square pan with parchment paper, leaving some overhang for easy removal.
    2. Chop the dark chocolate and melt it together with the butter in a heatproof bowl over gentle simmering water, stirring until smooth and glossy, filling your kitchen with a rich chocolate aroma.
    3. In a separate bowl, whisk the eggs with sugar and a pinch of salt until the mixture turns pale, slightly fluffy, and fragrant, about 2-3 minutes.
    4. Gently fold the melted chocolate mixture into the egg mixture, combining until smooth and uniform.
    5. Stir in the toasted black sesame seeds, ensuring they are evenly distributed throughout the batter.
    6. Mix the activated charcoal powder into the batter, creating an eerie black color and smoky undertone, until fully incorporated.
    7. Pour the batter into your prepared pan, spreading it evenly with a spatula to fill all corners.
    8. Bake for about 25-30 minutes, until the edges are set and slightly cracked on top, while the center remains moist and gooey.
    9. Remove the pan from the oven and let the brownies cool in the pan for 15 minutes, then transfer them to a wire rack to cool completely, which helps develop their fudgy texture.
    10. Once cooled, lift the brownies out of the pan using the parchment paper overhang and cut into neat squares.
    11. For an extra spooky effect, dust the top lightly with additional activated charcoal powder or serve with dark caramel or black berry jam to enhance the haunting look and flavor.

    Notes

    Ensure to use food-grade activated charcoal to avoid any health risks. Toast the sesame seeds beforehand for a deeper flavor. Keep an eye on baking time to prevent over-drying the brownies.
    These brownies aren’t just a treat; they’re a conversation starter. The smoky aroma of burnt sugar and the crunch of black sesame create a complex bite that surprises every time. Personalize with your favorite spooky toppings or keep it simple—either way, they’re a hit. Enjoy baking these eerie treats, and don’t shy away from tweaking the flavors to make them uniquely yours.

  • Spooky-Sweet Halloween Brownies with a Twist of Black Sesame and Charcoal

    Spooky-Sweet Halloween Brownies with a Twist of Black Sesame and Charcoal

    Halloween isn’t just about costumes and candy anymore. It’s about transforming familiar treats into something a bit more mysterious and fun. These brownies, with their dark, smoky layers and hint of sesame, feel like an edible spell cast at your kitchen table. They’re a nod to the season’s darker side, with a little crunch and a lot of character.

    Why these brownies will haunt your kitchen again and again

    They’re a perfect mix of decadence and darkness, with unexpected crunch and smoky depth. Each bite is a little ritual, a break from ordinary sweets. The visual impact alone makes them worth revisiting, especially when you want to impress or surprise. They’re easy to customize, turning into a Halloween staple that’s both spooky and satisfying.

    Dark secrets: ingredients and their dark magic

    • Dark chocolate: Rich, bittersweet, with a deep cocoa flavor, essential for that intense brownie base.
    • Black sesame seeds: Adds crunch and a nutty, smoky flavor—think of it as the season’s secret weapon.
    • Activated charcoal powder: Gives that eerie black color and a subtle smoky undertone, just enough to unsettle the eye.
    • Butter: Creates richness and helps the brownies stay moist—use good quality for best flavor.
    • Eggs: Bind everything together, add structure, and a slight lift—fresh eggs are a must.
    • Sugar: Sweetens and balances the bitterness of dark chocolate—measure carefully.
    • Salt: Enhances all flavors and prevents the brownies from tasting flat.

    Tools of the dark arts: what you’ll need

    • Oven: To bake the brownies evenly.
    • 20cm (8-inch) square pan: Holds the batter and shapes the brownies.
    • Parchment paper: Prevents sticking and makes removal easy.
    • Spatula: To smooth the batter and fold ingredients.
    • Whisk: To beat eggs and sugar smoothly.
    • Cooling rack: To cool brownies evenly without sogginess.

    Step-by-step guide to making your Halloween brownies perfectly

    Step 1: Preheat your oven to 175°C (350°F). Line a 20cm (8-inch) square pan with parchment paper.

    Step 2: Melt 200g of dark chocolate and 100g of butter together, stirring until smooth and glossy.

    Step 3: In a bowl, whisk 3 eggs with 150g of sugar and a pinch of salt until pale and slightly fluffy.

    Step 4: Fold the melted chocolate into the egg mixture, then gently incorporate 100g of black sesame seeds.

    Step 5: Pour the batter into your prepared pan, smoothing the top with a spatula.

    Step 6: Bake for about 25-30 minutes. The edges should be set, but the center still slightly gooey.

    Step 7: Let the brownies cool in the pan for 15 minutes, then transfer to a wire rack to cool completely.

    Step 8: Once cooled, cut into squares. For extra spooky flair, dust with a thin layer of activated charcoal powder.

    Step 9: Serve with a drizzle of dark caramel or a smear of black berry jam for a hauntingly beautiful finish.

    Cooking checkpoints to keep your brownies hauntingly perfect

    • Chocolate should be melted smoothly, not grainy. If it’s thick, gently warm it again.
    • The batter is ready when it’s glossy and flows slowly from the spatula.
    • Brownies should be slightly cracked on top and still moist inside.
    • Avoid over-baking; the center should be slightly jiggly—carryover heat will finish the job.

    Common pitfalls and how to dodge them

    • Over-baking leading to dry, crumbly brownies.? If brownies are overbaked and dry, reduce baking time by 5 minutes.
    • The batter is too dense to pour smoothly.? If the batter is too thick, fold in a splash of warm milk.
    • Chocolate burning or seizing during melting.? If the chocolate seizes, gently reheat it over a double boiler.
    • Cracking and splitting on the surface.? If brownies crack too much on top, cover with foil halfway through baking.

    Dark Sesame Halloween Brownies

    These rich, fudgy brownies feature a deep cocoa flavor enhanced with smoky black sesame seeds and activated charcoal for an eerie black color. The batter’s glossy texture and the cracked top promise a moist, fudgy interior with a slight crunch, perfect for a spooky season treat. Finished with a dusting of charcoal powder and optional dark toppings, they’re as visually striking as they are delicious.
    Prep Time 15 minutes
    Cook Time 30 minutes
    Total Time 45 minutes
    Servings: 12
    Course: Main Course
    Cuisine: Halloween
    Calories: 250

    Ingredients
      

    • 200 g dark chocolate bittersweet, high-quality
    • 100 g butter unsalted
    • 3 eggs fresh
    • 150 g sugar granulated
    • 100 g black sesame seeds adds crunch and smoky flavor
    • 1 tsp activated charcoal powder for color and smoky undertone
    • 0.5 tsp salt

    Equipment

    • Oven
    • 20cm (8-inch) square pan
    • Parchment paper
    • Spatula
    • Whisk
    • Cooling rack

    Method
     

    1. Preheat your oven to 175°C (350°F) and line your square pan with parchment paper, leaving some overhang for easy removal.
    2. Chop the dark chocolate into small pieces and melt it together with the butter in a heatproof bowl set over a pot of simmering water, stirring until smooth and glossy.
    3. In a large bowl, whisk the eggs, sugar, and salt until the mixture is pale, slightly fluffy, and fragrant about 2-3 minutes.
    4. Gently fold the melted chocolate mixture into the egg mixture, combining until smooth and uniform.
    5. Sprinkle the black sesame seeds into the batter and fold them in carefully to distribute evenly.
    6. Pour the batter into your prepared pan, smoothing the top with a spatula for an even surface.
    7. Bake for 25 to 30 minutes, until the edges are set and a crack forms on top, but the center remains slightly gooey.
    8. Remove the brownies from the oven and let them cool in the pan for about 15 minutes, then transfer to a wire rack to cool completely.
    9. Once cooled, lift the brownies out of the pan using the parchment overhang and cut into squares.
    10. For a spooky touch, lightly dust the top with activated charcoal powder, creating an eerie black surface.
    11. Finish with a drizzle of dark caramel or a smear of black berry jam, if desired, for extra flavor and visual impact.
    12. Enjoy these decadent, smoky Halloween brownies — their dark, fudgy texture and striking appearance will make them a seasonal hit!
    These brownies aren’t just a treat; they’re a conversation starter. The smoky aroma of burnt sugar and the crunch of black sesame create a complex bite that surprises every time. Personalize with your favorite spooky toppings or keep it simple—either way, they’re a hit. Enjoy baking these eerie treats, and don’t shy away from tweaking the flavors to make them uniquely yours.

  • Halloween Quesadillas: A Spooky Snack with a Twist

    Halloween Quesadillas: A Spooky Snack with a Twist

    Halloween is my favorite time to cook because it’s all about playful chaos and bold flavors. These spooky quesadillas are a little project that turns a simple snack into something memorable. I love how a few shapes and colors can turn ordinary ingredients into a festive centerpiece. Plus, they’re quick enough to whip up last minute, which is often my style.

    Why I keep making these spooky quesadillas

    They’re endlessly adaptable, fun to decorate, and always bring a smile. I love how a simple tortilla transforms into a tiny work of art—perfect for kids or grown-ups who like a little chaos on their plate. Plus, they’re quick and forgiving, which makes them my go-to when time’s tight but I want something festive and satisfying.

    Breaking down the ingredients

    • Tortillas: The canvas for all your spooky shapes—opt for flour for flexibility or corn for crunch.
    • Cheese: Shredded cheddar or Monterey Jack melts well and adds gooey richness—swap for vegan cheese if needed.
    • Filling toppings: Black olives, cherry tomatoes, or bell peppers for shapes—think about smoky, bright, or earthy flavors.
    • Spread bases: Refried beans or mashed sweet potatoes give extra flavor and help hold toppings in place.
    • Seasonings: A pinch of chili powder or smoked paprika can add a subtle smoky kick, if you like.

    Tools and equipment to craft your spooky quesadillas

    • Skillet or frying pan: For cooking the quesadillas evenly and getting that perfect crispy crust.
    • Pizza cutter or sharp knife: To cut the quesadillas into fun, spooky shapes.
    • Spatula: To flip and handle hot quesadillas safely.
    • Measuring spoons: For portioning fillings and cheese.

    Step-by-step guide to creating spooky Halloween quesadillas

    Step 1: Preheat your skillet over medium heat, about 180°C/350°F. Prepare your fillings and get the tortillas ready.

    Step 2: Lay a tortilla flat in the skillet. Spread a thin layer of refried beans or mashed sweet potatoes as a base.

    Step 3: Add a handful of shredded cheese, then carefully arrange black olives, cherry tomato slices, or bell peppers into ghost or pumpkin shapes.

    Step 4: Top with another tortilla. Cook for about 2-3 minutes until the bottom is golden and crispy.

    Step 5: Carefully flip the quesadilla, cook for another 2-3 minutes until the other side is golden and cheese is melted.

    Step 6: Remove from heat and let rest for a minute. Slice into spooky shapes with a pizza cutter.

    Step 7: Serve warm, with sides like sour cream or salsa for dipping.

    Cooking checkpoints and tips for Halloween quesadillas

    • Ensure the skillet is evenly heated before adding the quesadillas to avoid uneven cooking.
    • Watch for a golden-brown crust; it’s your cue to flip and cook the other side.
    • Check for melted cheese and that shapes are nicely toasted and crispy.
    • If the cheese isn’t melting, cover the skillet briefly to trap heat and assist melting.

    Common mistakes and how to fix them

    • Cooking on high heat, quesadillas burn quickly.? Use medium heat to prevent burning before cheese melts.
    • Cheese remains unmelted after cooking time.? Cover with a lid or foil if cheese isn’t melting fast enough.
    • Quesadilla falling apart during flipping.? Flip carefully to prevent fillings from spilling out.
    • Overly crispy or burnt edges.? Reduce heat if edges turn dark too fast.

    Spooky Halloween Quesadillas

    These playful quesadillas are a fun and festive snack that come together quickly. Filled with melted cheese and decorated with shapes like ghosts or pumpkins using colorful toppings, they boast a crispy exterior and gooey interior—perfect for Halloween celebrations or anyone craving a little chaos on their plate.
    Prep Time 10 minutes
    Cook Time 8 minutes
    Total Time 18 minutes
    Servings: 4
    Course: Main Course
    Cuisine: American
    Calories: 350

    Ingredients
      

    • 4 pieces flour tortillas opt for flexibility, but corn works too
    • 1 cup shredded cheese cheddar or Monterey Jack
    • 1/2 cup refried beans or mashed sweet potatoes for spreading base
    • 1 small black olives sliced into shapes
    • 1 small cherry tomatoes sliced into shapes
    • 1 small bell peppers sliced into shapes
    • 1 teaspoon chili powder or smoked paprika optional for flavor

    Equipment

    • Skillet or frying pan
    • Pizza cutter or sharp knife
    • Spatula
    • Measuring spoons

    Method
     

    1. Preheat your skillet over medium heat until it’s warm and slightly shimmering, ready for your quesadillas.
    2. Lay a tortilla flat in the skillet and spread a thin layer of refried beans or mashed sweet potatoes evenly over half of it. This helps hold your toppings in place and adds flavor.
    3. Sprinkle a generous handful of shredded cheese over the bean spread, covering the surface evenly for gooey richness.
    4. Decorate the cheese with sliced black olives, cherry tomatoes, or bell peppers into spooky shapes like ghosts or pumpkins for a festive look.
    5. Top with another tortilla to create a sandwich-style quesadilla, pressing down gently to help everything stick together.
    6. Cook for about 2-3 minutes until the bottom turns golden brown and crispy, and you hear a gentle sizzling sound.
    7. Carefully flip the quesadilla using a spatula, and cook for another 2-3 minutes until the other side is also golden and cheese is melted inside.
    8. Remove the quesadilla from the skillet and let it rest for a minute; this helps the cheese set slightly for easier slicing.
    9. Using a pizza cutter or sharp knife, cut the quesadilla into fun shapes like ghosts, pumpkins, or bats to add to the spooky vibe.
    10. Serve your spooky quesadillas warm with sides like sour cream or salsa for dipping, and enjoy the festive chaos on your plate!
    These quesadillas are a fun way to bring a little creepy charm to the dinner table. They’re quick, customizable, and perfect for little hands or a quick spooky snack. Plus, the crispy edges and gooey cheese make every bite satisfyingly messy. No matter how many times I make them, I find new ways to decorate and surprise my guests. Enjoy experimenting—this is a recipe that welcomes chaos and creativity.

  • Bat-Shaped Calzones: A Spooky Twist on Comfort Food

    Bat-Shaped Calzones: A Spooky Twist on Comfort Food

    I’ve always loved turning something familiar into a spooky surprise—calzones that look like bats just feel right for autumn. It’s a chance to get a little messy, playful, and creative with dough and fillings. Plus, they’re just fun to make and even more fun to eat, especially with kids or friends around.

    Why I Keep Baking These Bat-Calzones

    They’re a playful way to bring joy and chaos to the dinner table. The aroma of baking dough and melting cheese is addictive. Plus, shaping bats sparks childhood memories and creative chaos alike.

    Ingredients and Why They Matter

    • Pizza dough: The base—stretchy, forgiving, and crisp when baked. You can swap in puff pastry for a flakier bite.
    • Mozzarella cheese: Melts beautifully, oozy and stringy. For a sharper flavor, add a sprinkle of Parmesan.
    • Spicy sausage: Adds heat and richness. Replace with sautéed mushrooms for a vegetarian twist.
    • Herbs (oregano, basil): Fresh or dried, they brighten the filling. Use lemon zest for a zesty lift.
    • Egg wash: Gives the crust a glossy, golden finish. A splash of milk can work in a pinch.

    Tools for Shaping and Baking Your Spooky Bites

    • Rolling pin: To roll out the dough evenly.
    • Sharp knife or cookie cutters: To cut out bat wings and body shapes.
    • Baking sheet: To hold the calzones during baking.
    • Pastry brush: To apply egg wash for shine.

    Crafting the Bat-Shaped Calzones: From Dough to Spooky Delight

    Step 1: Preheat your oven to 220°C (430°F). Line a baking sheet with parchment paper.

    Step 2: Roll out the dough into a rectangle about 30×20 cm (12×8 inches). Cut out bat wings and body shapes.

    Step 3: Fill the calzones with cheese, meats, and herbs. Fold and seal edges firmly, crimping with a fork.

    Step 4: Arrange on the baking sheet. Brush with egg wash for a shiny finish.

    Step 5: Bake for 15-20 minutes until golden and crispy. Let cool slightly before serving.

    Key Moments to Watch While Baking Your Bat-Calzones

    • Dough edges: Should be slightly puffed and golden brown.
    • Filling: Hot, bubbly, and slightly oozing at the edges.
    • Crust color: Deep golden but not burnt, around 15 minutes in.

    Common Pitfalls and How to Fix Them

    • Filling leaks during baking.? Seal edges well to prevent filling from escaping.
    • Dough becomes too soft and difficult to shape.? Chill dough for 15 minutes if sticky.
    • Burnt or undercooked crust.? Bake at consistent 220°C (430°F).
    • Jagged or uneven shapes.? Use a sharp knife for clean cuts.

    Bat-Shaped Calzones

    These playful bat-shaped calzones are made with stretchy pizza dough filled with gooey mozzarella, savory sausage, and herbs. Baked until golden and crispy, they resemble little bats with wings, making them perfect for autumn gatherings or fun family dinners. The result is a charming, crispy treat with bubbling cheese and a satisfying fold-over shape.
    Prep Time 30 minutes
    Cook Time 20 minutes
    Total Time 50 minutes
    Servings: 4
    Course: Main Course
    Cuisine: American
    Calories: 350

    Ingredients
      

    • 1 package store-bought pizza dough or homemade dough
    • 1 cup mozzarella cheese shredded
    • 1/2 cup spicy sausage cooked and crumbled
    • 1 tablespoon fresh herbs oregano and basil, chopped
    • 1 egg egg beaten for egg wash

    Equipment

    • Rolling pin
    • Sharp knife or cookie cutters
    • Baking sheet
    • Pastry brush

    Method
     

    1. Preheat your oven to 220°C (430°F) and line a baking sheet with parchment paper.
    2. Roll out the dough into a large rectangle about 30×20 cm (12×8 inches); this helps it relax and becomes easy to shape.
    3. Use a sharp knife or cookie cutters to cut out bat wing shapes and a central body shape from the dough.
    4. Mix the shredded mozzarella, cooked sausage, and chopped herbs in a bowl to create the filling.
    5. Place a spoonful of the filling onto the center of each bat body shape, leaving space around the edges.
    6. Fold each shape over to enclose the filling, then pinch or crimp the edges with a fork to seal completely.
    7. Arrange the calzones on the prepared baking sheet with the wings extended outward. Brush the tops with beaten egg for a shiny, golden finish.
    8. Bake in the oven for 15-20 minutes, until the crust is deep golden brown and crispy, and the cheese is bubbling at the edges.
    9. Remove from the oven and let cool slightly before serving. These bat calzones are best enjoyed warm with their gooey cheese and crispy crust.

    Notes

    For extra flair, use black olives or pepperoni to add eyes or other details to your bats before baking.
    These calzones are more than just food; they’re a little bit of playful chaos on a plate. Perfect for Halloween or a themed dinner, they bring a grin with every bite. Feel free to customize fillings—spicy sausage, roasted vegetables, or a splash of hot sauce. Enjoy the process and make it your own, even if the shapes get a little wonky.

  • Eyeball Meatballs: An Unusual Twist on Comfort Food

    Eyeball Meatballs: An Unusual Twist on Comfort Food

    Eyeball meatballs are not your average comfort food. This recipe taps into a nostalgic yet daring culinary adventure, blending familiar flavors with an unusual texture twist. It’s a dish that sparks conversation and curiosity, perfect for a gathering with friends who like to push boundaries.

    The idea came from a craving for something chewy and savory, but with a fun, grotesque visual impact. It’s messy, it’s playful, and it’s undeniably satisfying. Plus, it’s a great way to use up that odd cut of meat or leftover ground beef lurking in your fridge.

    Why I keep making these eyeball meatballs

    They’re weird, yes, but also oddly satisfying. The chewy center offers a playful texture, and the glaze makes every bite sticky and sweet. Plus, they turn a simple dinner into a conversation starter. They remind me of childhood experiments but with a grown-up twist that keeps me coming back for more.

    Inside the ingredients—what makes eyeball meatballs special

    • Ground beef or pork: The base of the meatballs—juicy, rich, and perfect for shaping into odd shapes.
    • Onion and garlic: Provide aromatic depth—smell that fills your kitchen as they cook.
    • Soy sauce: Adds a salty, umami punch—swap with tamari for gluten-free.
    • Honey: Sweetness that balances the savory—use agave if you prefer a vegan option.
    • Sesame oil: Gives a nutty aroma—try toasted for extra depth.
    • Bread crumbs: Help hold everything together—panko gives a crunch, regular works too.
    • Egg: Acts as a binder—skip if you want a lighter version.

    Tools and equipment you’ll need

    • Mixing bowl: To combine all your ingredients thoroughly.
    • Skillet: For browning the meatballs and making the glaze.
    • Baking sheet: To finish cooking the meatballs evenly in the oven.
    • Cooking thermometer: To check that the meatballs are cooked through.
    • Silicone spatula: For stirring the glaze and turning meatballs.

    Step-by-step guide to eyeball meatballs

    Step 1: Start by gathering your ingredients and preheating your oven to 200°C (390°F).

    Step 2: In a large bowl, combine ground meat, finely chopped onion, garlic, and a splash of soy sauce for umami.

    Step 3: Shape the mixture into small balls, about the size of a golf ball.

    Step 4: Heat a skillet over medium-high heat and add a thin layer of oil. brown the meatballs until they develop a deep, caramelized crust, about 4-5 minutes.

    Step 5: Transfer the browned meatballs to a baking sheet and bake in the oven for 10-12 minutes, until cooked through.

    Step 6: Meanwhile, prepare a quick glaze with soy, honey, and a splash of sesame oil in the same skillet.

    Step 7: Once the meatballs are cooked, toss them in the glaze until shiny and sticky.

    Step 8: Serve hot, garnished with chopped scallions and sesame seeds for extra flavor.

    Cooking checkpoints and tips to keep you on track

    • Ensure the meat mixture is well combined but not overmixed to keep the meatballs tender.
    • Brown the meatballs until they have a deep, even caramel color for flavor development.
    • Bake until the internal temperature reaches 70°C (160°F) to ensure they’re fully cooked.
    • Look for a shiny, sticky glaze coating the meatballs for that perfect finish.

    Common mistakes and how to fix them

    • Using too much liquid in the mixture.? If meatballs are falling apart, add a bit more bread crumbs or egg to bind better.
    • Glaze thickening too much before coating the meatballs.? If the glaze is too thick, splash in a little water or broth to loosen it up.
    • High heat causing burning or uneven browning.? If meatballs are over-browned, reduce heat or move to a lower oven rack.
    • Overworking the meat mixture.? If meatballs are chewy or rubbery, avoid overmixing the meat.

    Eyeball Meatballs

    Eyeball meatballs are playful, chewy meat-based bites with a sticky, sweet glaze that resemble grotesque orbs. They are pan-fried to develop a rich crust before being baked to perfection, resulting in a juicy interior with an eye-catching glossy exterior. Perfect for adventurous eaters and conversation starters alike.
    Prep Time 15 minutes
    Cook Time 20 minutes
    Total Time 35 minutes
    Servings: 4
    Course: Main Course
    Cuisine: fusion
    Calories: 250

    Ingredients
      

    • 1 lb ground beef or pork juicy and rich for shaping into spheres
    • 1/2 cup bread crumbs panko preferred for crunch
    • 1/4 cup finely chopped onion for aromatic flavor
    • 2 cloves garlic minced
    • 1 tablespoon soy sauce adds umami
    • 1 teaspoon sesame oil for nutty aroma
    • 1 large egg acts as binder
    • 3 tablespoons honey balances savory flavors
    • 2 tablespoons soy sauce for glaze
    • 1 teaspoon sesame oil for glaze

    Equipment

    • Mixing bowl
    • Skillet
    • Baking sheet
    • Cooking thermometer
    • Silicone spatula

    Method
     

    1. Preheat your oven to 200°C (390°F) and gather all your ingredients.
    2. In a large mixing bowl, combine ground meat, finely chopped onion, minced garlic, soy sauce, sesame oil, and the egg. Mix everything together gently until just combined, avoiding overmixing for tender meatballs.
    3. Shape the mixture into small spheres about the size of a golf ball, making sure they are compact but not too tight to keep them juicy.
    4. Heat a skillet over medium-high heat and add a thin layer of oil. Carefully place the meatballs in the skillet, giving them enough space. Sear the meatballs until they develop a deep, caramelized crust, about 4-5 minutes, turning occasionally to brown all sides.
    5. Transfer the browned meatballs to a baking sheet and bake in the preheated oven for 10-12 minutes, or until cooked through and internal temperature reaches 70°C (160°F).
    6. While the meatballs bake, prepare the glaze by mixing soy sauce, honey, and sesame oil in the same skillet used for browning. Bring the mixture to a gentle simmer while stirring until it thickens slightly and becomes sticky.
    7. Remove the cooked meatballs from the oven and carefully toss them in the glaze, turning to coat each one evenly until they have a shiny, sticky exterior.
    8. Garnish the eyeball meatballs with chopped scallions and sesame seeds for added flavor and visual appeal.
    9. Serve the meatballs hot, with plenty of napkins and a fun, playful attitude. Enjoy the chewy texture and sweet glaze that make these a memorable dish!

    Notes

    Ensure not to overmix the meat mixture to keep the meatballs tender. Browning thoroughly before baking adds depth of flavor. Adjust the glaze thickness with a splash of water if needed for easy coating.
    This recipe is a wild card, perfect for those who love a bit of the unexpected at dinner. The eyeball meatballs, with their chewy, slightly gelatinous center, offer a texture contrast that keeps you guessing. Feel free to tweak the seasonings—maybe add a splash of hot sauce or a dash of smoked paprika—to make it your own. Enjoy experimenting with these quirky, satisfying bites—perfect for a casual night or a curious dinner guest.

  • Spooky Fun: Homemade Halloween Pizza with a Creepy Twist

    Spooky Fun: Homemade Halloween Pizza with a Creepy Twist

    Halloween is a perfect excuse to get a little playful in the kitchen. Instead of just decorating cookies, I like to make a pizza that doubles as a spooky centerpiece. It’s simple, fun, and a little chaotic—just how the best holiday moments often are.

    This dish is about combining familiar flavors with a creepy aesthetic. The best part? It’s forgiving. Even if your faces aren’t perfect, the kids will love the look, and the flavors will keep everyone coming back for more.

    Why I Keep Coming Back to This Halloween Pizza

    It’s a rare mix of chaos and comfort, with a touch of creative rebellion. The smell of baking dough and melting cheese triggers childhood memories of holidays, but the spooky design keeps it fresh. Plus, it’s endlessly customizable—no two pizzas need to look the same, which keeps me experimenting year after year.

    Spooky Ingredient Breakdown: What’s in Your Halloween Pizza?

    • Pizza dough: Foundation of your spooky creation, should be thin and crispy once baked.
    • Tomato sauce: Brings richness and a tangy base—use your favorite jarred or homemade.
    • Mozzarella cheese: Oozes beautifully, melts evenly, and provides that gooey texture.
    • Black olives: Perfect for creepy eyes or accents—smoky and briny.
    • Pepperoni slices: Adds a spicy, crispy touch—great for mouths or scars.
    • Fresh basil or herbs: Brightens the look and flavor—adds a fresh pop.
    • Red pepper flakes: For a fiery kick and a splash of color.

    Tools and Equipment for a Spooky Good Pizza

    • Rolling pin: To evenly flatten the dough.
    • Baking sheet or pizza stone: To bake the pizza evenly and get a crispy crust.
    • Sharp knife or pizza cutter: To cut the pizza into slices and create detailed shapes.
    • Spoon or ladle: To spread the tomato sauce evenly.
    • Oven thermometer (optional): To ensure accurate oven temperature for perfect baking.

    Step-by-Step for a Spooktacular Halloween Pizza

    Step 1: Preheat your oven to 220°C (430°F).

    Step 2: Roll out your pizza dough on a floured surface to about 0.5 cm thick.

    Step 3: Spread a thin layer of tomato sauce over the dough, leaving a 2 cm border.

    Step 4: Arrange slices of mozzarella in a jagged, spooky pattern, like ghostly figures.

    Step 5: Use black olives and pepperoni to create creepy eyes and mouths.

    Step 6: Bake the pizza on a preheated baking stone or baking sheet for 12-15 minutes.

    Step 7: Look for bubbly, golden edges and slightly charred spots—these are signs of a perfect bake.

    Step 8: Remove from oven, let cool slightly, then add finishing touches like fresh basil or red pepper flakes.

    Creepy Cooking Checkpoints & Tips

    • Dough should be thin but not tearing; if it’s too thick, it won’t crisp properly.
    • Cheese should be bubbly and slightly browned around the edges.
    • Toppings should be placed with enough space to prevent overloading, which can soggify the crust.
    • Oven should be fully preheated for even cooking and crispiness.

    Common Halloween Pizza Mistakes & How to Fix Them

    • Cheese spilling over and burning on the edges.? Use too much cheese?
    • Toppings are too wet or piled high.? Your toppings look soggy?
    • Oven too hot or baking too long.? Crust burns?
    • Toppings not placed with enough detail.? Faces don’t come out as spooky?

    Halloween Spooky Pizza

    This Halloween-themed pizza features a thin, crispy crust topped with rich tomato sauce, gooey mozzarella, and creatively placed toppings like black olives and pepperoni to create spooky faces. The dish is baked until bubbly and golden, with a playful, slightly chaotic appearance that’s perfect for holiday fun. Its textures combine a crunchy base with melty, flavorful toppings that make it both eye-catching and delicious.
    Prep Time 20 minutes
    Cook Time 15 minutes
    Total Time 35 minutes
    Servings: 4
    Course: Main Course
    Cuisine: American
    Calories: 350

    Ingredients
      

    • 1 roll pizza dough preferably thin and evenly rolled
    • 1/2 cup tomato sauce your favorite jarred or homemade
    • 1 1/2 cups mozzarella cheese shredded
    • 1/4 cup black olives sliced for eyes and accents
    • 12 slices pepperoni slices for mouths and scars
    • a few leaves fresh basil or herbs for garnish
    • to taste red pepper flakes for a spicy kick

    Equipment

    • Rolling pin
    • Baking sheet or pizza stone
    • Sharp knife or pizza cutter
    • Spoon or ladle
    • Oven thermometer (optional)

    Method
     

    1. Preheat your oven to 220°C (430°F) and position a baking sheet or pizza stone inside to heat up.
    2. On a floured surface, use a rolling pin to gently flatten your pizza dough into a thin, even circle about 0.5 cm thick. This helps the crust crisp up nicely.
    3. Carefully remove the hot baking sheet or pizza stone from the oven and place it on a heat-safe surface. Transfer the rolled dough onto it.
    4. Spread a thin layer of tomato sauce evenly over the dough, leaving about a 2 cm border around the edges for the crust. Use the back of a spoon or ladle to spread—it should look smooth and vibrant red.
    5. Sprinkle shredded mozzarella cheese over the sauce, creating a jagged, spooky pattern that resembles ghostly figures or creepy faces. Cover the sauce evenly but don’t overload to keep the crust crisp.
    6. Use black olive slices to create spooky eyes and small accents like scars or pupils, placing them where they’ll look most expressive once baked.
    7. Place pepperoni slices to form mouths, scars, or other facial features, experimenting with different expressions to make each pizza unique and playful.
    8. Carefully slide the baking sheet or pizza stone into the oven. Bake for about 12-15 minutes, until the cheese is bubbly and golden, and the crust is crispy and slightly charred in spots.
    9. Once baked, use oven mitts to carefully remove the pizza. Let it cool for a few minutes until the bubbling subsides and the toppings set slightly.
    10. Finish by garnishing with fresh basil or herbs for a burst of color and flavor. Sprinkle red pepper flakes for an extra spicy kick if desired.
    11. Slice the spooky pizza into pieces, marvel at your creepy creation, and enjoy the crisp, cheesy, playful flavors that make Halloween special!

    Notes

    Feel free to get creative with your toppings! The messier and more playful, the better for a spooky effect. Just keep the toppings balanced so the crust stays crispy.
    This Halloween pizza is more than just a snack; it’s a chance to get a little creative and have fun with flavors and looks. The crispy crust, gooey cheese, and playful toppings make it a hit whether you’re sneaking it onto a spooky party table or enjoying it quiet at home with a good horror flick. Don’t worry if your faces aren’t perfect—these tiny imperfections add character.

    As you slice into it, the aroma of baked dough and melted cheese fills the room, boosting that festive cheer. Keep it simple or go wild with toppings—what matters most is that you enjoy the process and the mess. This is the kind of dish that invites everyone to join in, making the holiday a little more memorable.

  • Pumpkin Alfredo Pasta: A Cozy Fall Twist You Didn’t See Coming

    Pumpkin Alfredo Pasta: A Cozy Fall Twist You Didn’t See Coming

    I stumbled on this idea one rainy afternoon, craving something warm but not heavy. The pumpkin adds a natural sweetness that balances the richness of the cream and cheese. It’s like a whisper of fall in every bite, even if it’s not quite the season outside.

    Why I Keep Coming Back to This Pumpkin Pasta

    The balance of sweetness and savory, the cozy aroma, and the simple elegance make it a go-to. It’s forgiving, hearty, and feels like a warm hug in a bowl—perfect for those chilly nights when comfort is king.

    What’s in This Pumpkin Alfredo? An Ingredient Breakdown

    • Pumpkin: Sweet, earthy, and silky when pureed. Use canned for convenience or roast your own squash.
    • Heavy Cream: Creates that luscious, velvety sauce. Substitute with coconut cream for a dairy-free version.
    • Garlic: Adds a fragrant punch. Roast it alongside pumpkin for a deeper flavor.
    • Parmesan Cheese: Sharp, salty, and melts into the sauce beautifully. Pecorino works well if you prefer a sharper note.
    • Nutmeg: A tiny pinch brings warmth and depth. Freshly grated is best.
    • Pasta: Fettuccine or pappardelle are ideal; their wide ribbons hold the sauce well.
    • Olive Oil: A splash can brighten the final dish. Use a good extra virgin for flavor.

    Tools of the Trade for Pumpkin Alfredo Pasta

    • Blender or Immersion Blender: Purees the pumpkin into a smooth, velvety sauce.
    • Large Pot: Boils the pasta evenly and quickly.
    • Skillet or Wide Saucepan: Simmer the sauce and toss the pasta.
    • Measuring Cups & Spoons: Ensures perfect seasoning and ingredient ratios.
    • Grater: Freshly grate Parmesan cheese for maximum flavor.

    How to Make Pumpkin Alfredo Pasta the Right Way

    Step 1: Start by roasting your pumpkin until it’s super tender—about 45 minutes at 200°C/400°F. Let it cool a bit.

    Step 2: Puree the pumpkin until smooth, using a blender or a sturdy whisk if you’re feeling rustic.

    Step 3: Cook your pasta in salted boiling water until just al dente—about 8-10 minutes, depending on the shape.

    Step 4: While the pasta cooks, melt butter in a large skillet over medium heat, then add garlic and cook until fragrant, about 30 seconds.

    Step 5: Stir in heavy cream, pumpkin puree, and a pinch of nutmeg. Let it simmer gently for 5 minutes, stirring often.

    Step 6: Once the pasta is done, drain it, reserving a cup of pasta water. Toss the pasta into the pumpkin sauce, adding reserved water if needed to loosen it.

    Step 7: Finish with grated Parmesan, a crack of black pepper, and maybe a drizzle of good olive oil. Serve hot.

    Cooking Checkpoints and Tips for Success

    • Pumpkin should be soft enough to mash easily. If not, roast longer.
    • Cream should be simmering gently, not boiling vigorously, to avoid curdling.
    • Pasta water helps adjust sauce consistency; add slowly and taste.
    • Look for a velvety texture with no oil separation or clumps.

    Common Pitfalls and How to Avoid Them

    • Sauce is too thick or pasty.? Use too much pumpkin? Thin the sauce with pasta water or a splash of milk.
    • Cream separates or burns.? Cream curdling? Keep the heat gentle and add cream last, stirring constantly.
    • Pasta is too soft or mushy.? Undercooked pasta? Test a piece before draining, it should be just firm.
    • Overly salty sauce.? Over-salted water? Use less salt initially and adjust with cheese and seasoning.

    Pumpkin Alfredo Pasta

    This comforting pumpkin Alfredo pasta features a velvety sauce made from roasted pumpkin, heavy cream, and Parmesan cheese, tossed with wide pasta ribbons like fettuccine. The dish offers a perfect balance of sweetness and savory richness, with a smooth, creamy texture and an inviting fall-inspired aroma. It’s a cozy, elegant meal ideal for chilly evenings.
    Prep Time 15 minutes
    Cook Time 55 minutes
    Total Time 1 hour 10 minutes
    Servings: 4
    Course: Main Course
    Cuisine: American
    Calories: 520

    Ingredients
      

    • 1 medium pumpkin preferably sugar pumpkin or butternut squash
    • 1 cup heavy cream or coconut cream for dairy-free
    • 3 cloves garlic minced or sliced
    • 1/2 cup Parmesan cheese freshly grated
    • 1 pinch nutmeg freshly grated if possible
    • 12 oz pasta fettuccine or pappardelle
    • 1 tablespoon olive oil good quality extra virgin

    Equipment

    • Blender or Immersion Blender
    • Large pot
    • Skillet or Wide Saucepan
    • Measuring Cups & Spoons
    • Grater

    Method
     

    1. Preheat your oven to 200°C/400°F, then roast the pumpkin until it’s super tender, about 45 minutes. Let it cool slightly before handling.
    2. Once cooled, scoop the pumpkin flesh into a blender or use an immersion blender to puree it until silky smooth. Set aside.
    3. Bring a large pot of salted water to a boil and cook your pasta until just al dente, about 8-10 minutes. Drain and set aside, reserving a cup of pasta water.
    4. In a large skillet or wide saucepan, heat a tablespoon of olive oil over medium heat. Add the minced garlic and cook for about 30 seconds until fragrant, with a gentle sizzling sound.
    5. Pour in the heavy cream and stir, bringing it to a gentle simmer. Add the pumpkin puree and a pinch of freshly grated nutmeg, stirring to combine. Let it simmer gently for 5 minutes, until it thickens slightly and smells warm and inviting.
    6. Gradually add the cooked pasta into the sauce, tossing gently to coat each ribbon evenly. If the sauce feels too thick, add a splash of reserved pasta water to loosen it to your desired consistency.
    7. Sprinkle the grated Parmesan cheese over the pasta and stir until melted and creamy. Taste and adjust seasoning if needed, adding more cheese or a pinch of salt.
    8. Finish with a crack of black pepper and a drizzle of good olive oil for extra flavor. Serve hot, garnished with additional cheese if desired.

    Notes

    For a dairy-free version, substitute coconut cream and omit Parmesan. Roasting the pumpkin enhances sweetness and flavor. Be careful not to over-salt the pasta water to control overall saltiness.
    This dish is a reminder that comfort food can be unexpected and still feel special. The sweet earthiness of pumpkin paired with creamy richness makes it perfect for chilly nights or when you want something familiar yet new. Feel free to toss in sage or crispy pancetta for extra layers of flavor, but honestly, it’s good straight from the pot. Enjoy experimenting and making this your own.

  • Unconventional Halloween Bark: A Spiced Pumpkin & Peppermint Twist

    Unconventional Halloween Bark: A Spiced Pumpkin & Peppermint Twist

    This Halloween bark isn’t your average sweet treat. I love how it balances the cozy warmth of spices with the bright, sharp punch of peppermint. It’s a bit chaotic to assemble, but that’s part of the charm—each piece is uniquely imperfect. Plus, it’s a great way to use up those Halloween candy extras without feeling guilty.

    Why I Keep Coming Back to This Bark

    It’s imperfect, chaotic, and endlessly customizable. The combination of spicy warmth and cooling mint keeps surprising me. Plus, it’s quick to throw together when friends drop by or I need a last-minute gift.

    Breaking Down the Key Ingredients

    • Dark chocolate: My go-to for richness, melts smoothly, and has a deep cocoa aroma. Swap with milk chocolate for sweetness.: Provides a glossy, firm base, with a bittersweet edge that balances spices.
    • Peppermint candies: Crushed for a cool, refreshing crunch. Use candy canes for more flavor punch.: Adds a bright, minty pop that shatters with each bite, contrasting the warm spices.
    • Toasted pumpkin seeds: Nutty, crispy, and slightly smoky. Skip if nut allergies.: Gives texture and a subtle earthy flavor that complements the chocolate.
    • Spiced pumpkin puree: Adds moisture and a hint of seasonal warmth. Use canned or homemade.: Infuses a gentle, cozy spice profile that doesn’t overpower.
    • Sea salt flakes: A pinch enhances all flavors, balancing sweetness.: A finishing touch that amplifies the richness and adds a subtle crunch.

    Tools of the Trade for Halloween Bark

    • Double boiler or microwave: Melts chocolate smoothly without burning.
    • Spatula or offset knife: Spreads chocolate thin and even.
    • Baking sheet with parchment or silicone mat: Provides a non-stick surface for cooling and setting.
    • Knife or hand crusher: Breaks the bark into rustic pieces.
    • Measuring cups and spoons: Ensures accurate portioning of toppings.

    Crafting the Perfect Spiced Pumpkin & Peppermint Halloween Bark

    Step 1: Line a baking sheet with parchment paper or a silicone mat.

    Step 2: Melt your chocolate (dark, milk, or white) in a double boiler or microwave, stirring often.

    Step 3: Pour melted chocolate onto the prepared sheet, spreading it thin with a spatula.

    Step 4: Sprinkle a mix of crushed peppermint candies and toasted pumpkin seeds evenly over the chocolate.

    Step 5: Gently press toppings into the melted chocolate, then refrigerate for at least 2 hours until firm.

    Step 6: Break into irregular pieces, revealing a glossy, crackly surface with pops of color and texture.

    Key Checks for That Perfect Holiday Bark

    • Chocolate appears glossy and smooth, not streaky or dull.
    • Toppings are firmly pressed into the chocolate, not sliding off.
    • Bark snaps cleanly when broken, not crumbly or rubbery.
    • Surface is evenly coated with toppings, no bald spots or clumps.

    Common Mistakes and How to Fix Them

    • Chocolate melting unevenly.? Use high-quality chocolate to avoid dull, streaky coating.
    • Chocolate is too thick to spread smoothly.? Add a teaspoon of coconut oil if chocolate is too thick.
    • Toppings sliding off or sinking in.? Don’t overload toppings, press gently instead.
    • Bark remains soft or sticky.? Refrigerate at least 2 hours for proper setting.

    Spiced Pumpkin & Peppermint Halloween Bark

    This festive Halloween bark combines rich dark chocolate with seasonal spices, crunchy toasted pumpkin seeds, and cool peppermint candies. The process involves melting chocolate, spreading it thin, and topping it with colorful candies and seeds before chilling until firm. The final result is a glossy, crackly bark with a delightful mix of textures and flavors, perfect for sharing or gifting.
    Prep Time 15 minutes
    Cook Time 5 minutes
    Total Time 2 hours
    Servings: 8
    Course: Main Course
    Cuisine: Festive
    Calories: 180

    Ingredients
      

    • 10 oz dark chocolate or milk/white chocolate
    • 1 cup peppermint candies crushed
    • 1/2 cup toasted pumpkin seeds slightly smoky flavor
    • 2 tbsp spiced pumpkin puree adds warmth and moisture
    • 1/2 tsp sea salt flakes for finishing

    Equipment

    • Double boiler or microwave
    • Spatula or offset knife
    • Baking sheet with parchment or silicone mat
    • Knife or hand crusher
    • Measuring cups and spoons

    Method
     

    1. Line a baking sheet with parchment paper or a silicone mat to prepare for spreading the chocolate.
    2. Chop the peppermint candies into small shards or use a hand crusher to crush them into fine pieces, creating a colorful, crunchy topping.
    3. Place your dark chocolate in a double boiler or microwave-safe bowl and melt, stirring frequently until smooth and glossy, with an inviting cocoa aroma.
    4. Pour the melted chocolate onto the prepared sheet and use a spatula or offset knife to spread it into a thin, even layer, about 1/4 inch thick.
    5. Sprinkle the crushed peppermint candies and toasted pumpkin seeds evenly over the surface of the chocolate, pressing them lightly into the melt to help them stick.
    6. Gently press the toppings into the chocolate with your fingers or a spatula to ensure they adhere well, then sprinkle a pinch of sea salt flakes over the top for a finishing touch.
    7. Refrigerate the bark for at least 2 hours until fully set and firm to the touch, with a shiny, crackly surface.
    8. Once chilled, break the bark into rustic, irregular pieces using your hands or a knife, revealing the contrasting textures and vibrant toppings.
    9. Enjoy your beautifully textured, festive Halloween bark—perfect for sharing, gifting, or indulging yourself!

    Notes

    For extra flavor, consider adding a dash of cinnamon or a swirl of white chocolate on top before chilling.
    Once broken into jagged shards, this bark offers a surprising mix of spicy warmth and cool minty crunch. It’s a chaotic, joyful assembly that feels like a celebration in every bite. Feel free to customize with different nuts, dried fruits, or even a drizzle of caramel for extra flair. Enjoy the process and let it be as playful as the holiday itself.

  • Unconventional Charm: Halloween Sugar Cookies with a Twist

    Unconventional Charm: Halloween Sugar Cookies with a Twist

    Halloween sugar cookies are more than just a seasonal treat—they’re a chance to embrace your inner kid and unleash some creativity. I love the chaos of mixing colors and shapes, turning simple ingredients into playful art. Plus, baking these with a little twist makes the tradition feel fresh, even if you’ve made them a dozen times before.

    Why I Keep Making These Cookies

    They’re a blank canvas for my creativity, and I love seeing how each batch turns out differently. Plus, baking with kids or friends transforms the kitchen into a lively workshop. The crispy edges and chewy centers are endlessly satisfying, especially when decorated with a flicker of imagination.

    What’s in These Spooky Bites?

    • Butter: Rich and creamy, I use unsalted for control, but salted works if you like a savory hint.
    • Sugar: Granulated sugar adds sweetness; brown sugar gives a deeper, caramel flavor.
    • Eggs: Bind everything together, keep the dough cohesive.
    • Vanilla Extract: A splash brightens the dough, makes flavors pop.
    • Flour: All-purpose, but pastry flour gives a tender crumb.
    • Baking Soda: Leavening that helps cookies rise just a bit.
    • Food Coloring & Icing: Vivid, fun, brings the cookies to life for Halloween.

    Tools of the Trade for Spooky Sweetness

    • Rolling Pin: To flatten dough evenly for uniform cookies.
    • Halloween Cookie Cutters: To shape dough into spooky, fun forms.
    • Baking Sheets: To hold cookies during baking for even heat distribution.
    • Cooling Racks: To cool cookies and prevent sogginess.
    • Decorating Brushes: For applying icing or edible paints.

    Crafting the Perfect Halloween Sugar Cookies

    Step 1: Preheat your oven to 180°C (350°F).

    Step 2: Mix butter, sugar, and a pinch of salt until creamy and pale.

    Step 3: Add egg and vanilla; stir until smooth.

    Step 4: Gradually add flour and baking soda, mixing just until combined.

    Step 5: Roll out dough on floured surface to about 0.5 cm thick.

    Step 6: Cut into fun Halloween shapes with cookie cutters.

    Step 7: Bake on lined baking sheets for 8-10 minutes, until edges are golden.

    Step 8: Let cookies cool on racks before decorating.

    Cooking Tips to Nail the Perfect Cookies

    • Cookies should be golden around the edges but soft in the center.
    • Dough should be firm enough to roll without sticking.
    • If cookies spread too much, chill the dough for 15 minutes before baking.
    • Decorate once cookies are completely cooled to prevent smudging.

    Avoid These Common Cookie Crashes

    • Overbaking makes cookies tough and crumbly.? IF COOKIES ARE TOO HARD, reduce baking time or lower oven temperature slightly.
    • Uneven baking.? IF EDGES ARE DARK BUT CENTERS ARE UNDERDONE, rotate sheets halfway through baking.
    • Dough too warm or greasy.? IF COOKIE SPREADS TOO MUCH, chill dough for 15 minutes before baking.
    • Decorating on warm cookies.? IF DECORATION SMUDGES, wait until cookies are fully cooled.

    Halloween Sugar Cookies

    Halloween sugar cookies are crisp-edged, chewy-centered treats shaped into spooky forms and decorated with vibrant icing. The dough comes together with butter, sugar, eggs, and vanilla, then rolled out and cut into fun shapes before baking to a golden perfection. Once cooled, they become a colorful canvas for creative decorating, making them a perfect seasonal activity.
    Prep Time 20 minutes
    Cook Time 10 minutes
    Total Time 30 minutes
    Servings: 24
    Course: Main Course
    Cuisine: American
    Calories: 150

    Ingredients
      

    • 1 cup unsalted butter softened
    • 1 cup granulated sugar
    • 1 large egg at room temperature
    • 1 teaspoon vanilla extract
    • 2 1/2 cups all-purpose flour sifted
    • 1/2 teaspoon baking soda

    Equipment

    • Rolling pin
    • Halloween Cookie Cutters
    • Baking sheets
    • Cooling Racks
    • Decorating Brushes

    Method
     

    1. Preheat your oven to 180°C (350°F) and line baking sheets with parchment paper.
    2. In a large mixing bowl, combine softened butter and granulated sugar. Beat with a hand or stand mixer until the mixture is light, fluffy, and pale, filling your kitchen with a sweet, creamy aroma.
    3. Add the egg and vanilla extract to the butter mixture. Mix until well incorporated and smooth, with a slight sheen.
    4. Gradually add the sifted flour and baking soda to the wet ingredients. Mix on low speed until just combined; the dough should come together and be soft but manageable.
    5. Lightly flour your work surface and roll out the dough to about 0.5 cm thickness. Keep the dough cool and firm for easier handling.
    6. Use Halloween-shaped cookie cutters to cut out fun shapes from the dough. Gather the scraps, re-roll, and cut until all dough is used.
    7. Transfer the cut-out cookies to the prepared baking sheets, spacing them evenly to allow for expansion.
    8. Bake the cookies in the preheated oven for 8-10 minutes, or until the edges turn a light golden brown and the cookies feel firm to the touch.
    9. Remove the cookies from the oven and let them cool on the baking sheet for a few minutes before transferring to cooling racks. Allow them to cool completely.
    10. Once cooled, decorate the cookies with vibrant icing, edible paints, or other fun toppings to bring your spooky creations to life.
    11. Enjoy your colorful, crispy-edged, chewy-centered Halloween sugar cookies with friends and family for a festive treat.
    These cookies aren’t just treats; they’re little canvases for chaos and creativity. Enjoy decorating with friends or family, letting everyone add their own spooky touches. Remember, the best part is the messy, joyful process and the sweet, crispy bites afterward.