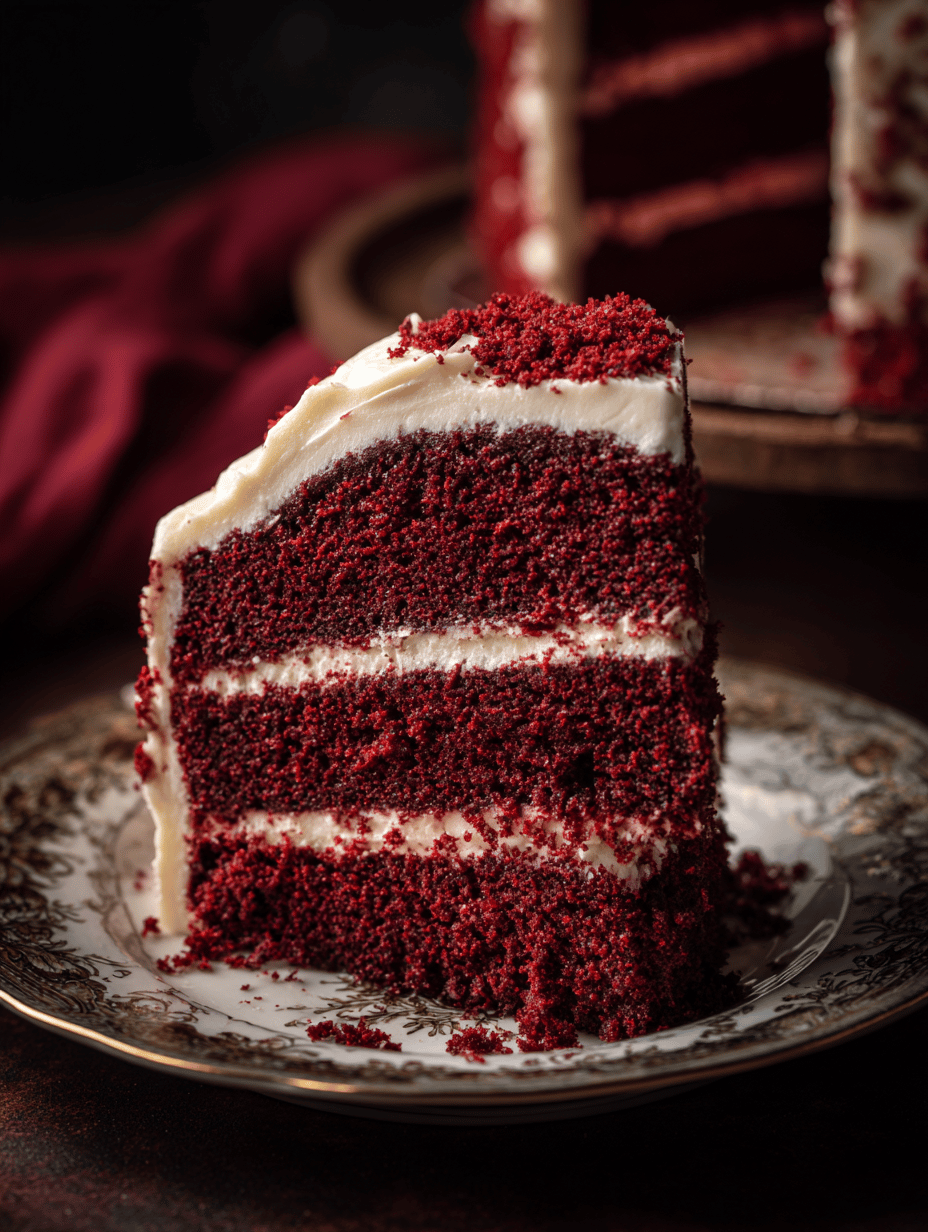
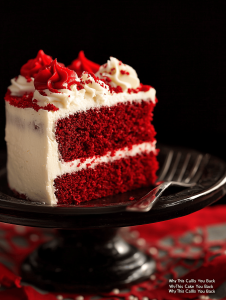
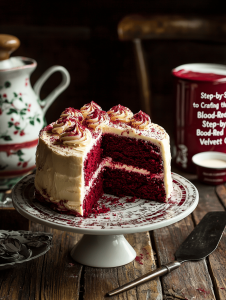
Blood-red velvet cake is not your average dessert. It’s rooted in a history of daring color and subtle cocoa, a bit theatrical, a little nostalgic. This version is a little rough around the edges, but deeply satisfying, especially when you’re craving something bold and a little rebellious. It’s about embracing the imperfect beauty of a homemade cake that’s as striking as it is comforting.
Why This Cake Calls You Back
Its deep red hue and complex cocoa flavor evoke childhood memories of mischievous baking sessions. The process is simple enough to repeat, yet each bake feels like a small triumph. Plus, the frosting’s tang and the moist crumb make every slice a lingering, satisfying moment. It’s a cake you want to share, to show off, or just keep in the fridge for sneaky bites—whenever the mood strikes.
Inside the Red Velvet: Ingredient Secrets
- All-purpose flour: Foundation of the cake—gives structure without weight.
- Cocoa powder: Adds a subtle richness; use natural for authenticity, Dutch-processed for smoother flavor.
- Red food coloring: Vivid, almost luminous—use gel for intensity without excess liquid.
- Buttermilk: Tenderizes and adds a slight tang—swap with milk + lemon if needed.
- Vinegar: Activates baking soda; gives lift and helps with the velvety crumb.
- Vegetable oil: Keeps the cake moist and tender—can substitute with melted butter for richer flavor.
- Cream cheese frosting: Creamy, tangy, and balances the sweetness—go full-fat for best texture.
Tools of the Trade for a Velvet Masterpiece
- Mixing bowls: For combining dry and wet ingredients separately.
- Electric mixer or whisk: To cream butter and sugar thoroughly.
- Rubber spatula: To fold ingredients gently and scrape down bowls.
- Cake pan (23cm/9-inch round): The vessel for your cake, shape, and bake.
- Cooling rack: To cool the cake evenly without sogginess.
- Toothpick or cake tester: To check doneness in the oven.
Step-by-Step Guide to Crafting the Perfect Blood-Red Velvet Cake
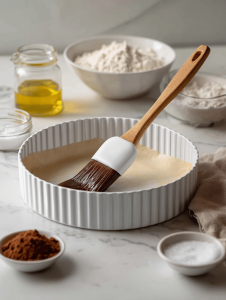
Step 1: Preheat your oven to 180°C (350°F). Grease and line a 23cm (9-inch) round cake pan with parchment paper.
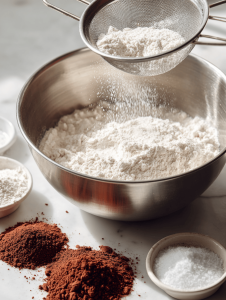
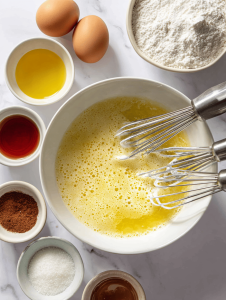
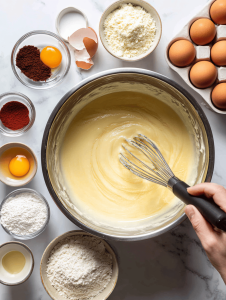
Step 2: In a large bowl, sift together 2 ½ cups (310g) all-purpose flour, 1 teaspoon baking soda, 1 teaspoon cocoa powder, and a pinch of salt.
Step 3: In another bowl, cream 1 cup (200g) sugar with ½ cup (120ml) vegetable oil until light and fluffy, about 3-4 minutes.
Step 4: Add 2 large eggs one at a time, beating well after each addition. Mix in 1 teaspoon vanilla extract.
Step 5: In a small bowl, combine 1 cup (240ml) buttermilk with 2 tablespoons (30ml) white vinegar. Add to creamed mixture alternately with dry ingredients, starting and ending with dry.
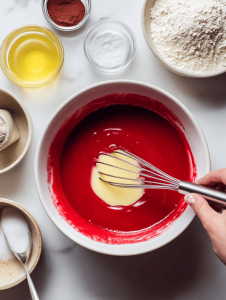
Step 6: Stir in 2 tablespoons (30ml) red food coloring until fully integrated and vivid.
Step 7: Pour the batter into the prepared pan, smoothing the top.
Step 8: Bake for 25-30 minutes, or until a toothpick inserted into the center comes out clean.
Step 9: Let the cake cool in the pan for 10 minutes, then transfer to a wire rack to cool completely.
Cooking Checks and Tips for the Blood-Red Velvet Cake
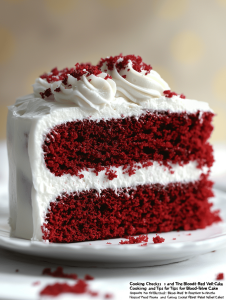
- The cake’s surface should be firm, not cracked, with a deep, even red hue.
- A toothpick inserted in the center should come out clean—no wet batter.
- The edges will slightly pull away from the pan when done—look for that visual cue.
- Ensure the cake is fully cooled before frosting to prevent melting and sliding.
Common Pitfalls and How to Fix Them
- Tough, dense crumb.? OVER-MIXING BATTER → Mix just until ingredients are combined to keep the cake tender.
- Cake sinking or cracking.? BAKING AT WRONG TEMP → Always double-check your oven’s calibration.
- Frosting melting or sliding.? NOT COOLING CAKE COMPLETELY → Let the cake cool fully to avoid frosting sliding off.
- Runny or uneven frosting.? FROSTING TOO THIN → Chill the frosting slightly before applying for better texture.
Blood-Red Velvet Cake
Ingredients
Equipment
Method
- Preheat your oven to 180°C (350°F). Grease your cake pan and line it with parchment paper for easy removal.
- In a large bowl, sift together the flour, baking soda, cocoa powder, and a pinch of salt. This ensures even distribution and a light batter.
- In a separate bowl, combine sugar and vegetable oil, then beat with an electric mixer until the mixture is light and fluffy, about 3-4 minutes. You’ll notice it becomes pale and slightly thickened.
- Add eggs one at a time, beating well after each addition. Mix in vanilla extract. The batter should become smooth and slightly glossy.
- In a small bowl, whisk together buttermilk and vinegar. Gradually add this to the wet mixture, alternating with the dry ingredients, starting and ending with dry. Mix gently after each addition until just combined.
- Stir in the red food coloring until the batter is vividly red and uniform in color. This gives the cake its signature hue.
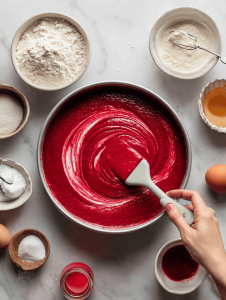
- Pour the batter into the prepared pan, smoothing the top with a spatula. Tap the pan gently on the counter to remove air bubbles.
- Bake the cake for 25-30 minutes, or until a toothpick inserted into the center comes out clean. The edges should slightly pull away from the pan, and the surface will be firm to the touch.
- Allow the cake to cool in the pan for about 10 minutes, then transfer it to a wire rack to cool completely. Cooling fully prevents frosting from melting.
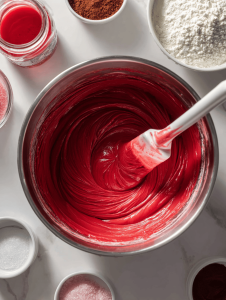
- While the cake cools, beat the softened cream cheese and butter together until creamy and smooth. Gradually add powdered sugar and vanilla, beating until fluffy and spreadable.
- Once the cake is completely cooled, spread the cream cheese frosting evenly over the top and sides, creating a smooth or decorative finish as desired.
Notes

Hi, I’m Grace Morgan, and welcome to my kitchen. This is a space shaped by family meals, curious hands reaching for snacks, paws under the table, and recipes that come together in the middle of real life. I’m a food blogger, a mother, and a passionate pet keeper. Most days, I’m cooking with one eye on the stove and the other on someone who needs me, whether that’s a child asking for a taste or a dog hoping something might fall.


