Halloween is the one night I let my creativity run wild in the kitchen, and this trifle is my favorite project. It’s a little chaotic, a lot fun, and always surprisingly delicious. The idea is to combine familiar flavors with a spooky aesthetic, so every spoonful feels like a mini Halloween celebration.
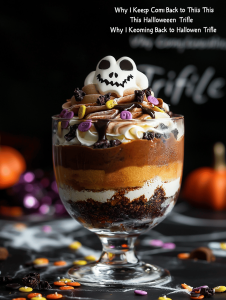
Why I Keep Coming Back to This Halloween Trifle
The playful chaos of assembling it, the vivid colors, and the instant nostalgia make me crave this every October. It’s forgiving, fun, and always a little messy — just like Halloween itself. Plus, it’s a no-fuss way to bring a little spooky magic to the table without a ton of effort.
Halloween Trifle: Ingredient Breakdown
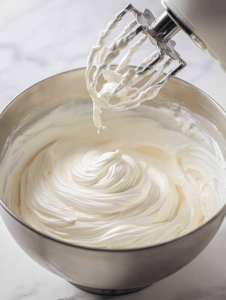
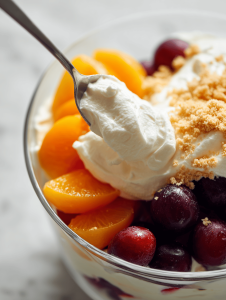
- Heavy cream: Whipped until fluffy, it forms a rich, creamy layer. Skip if dairy-free.
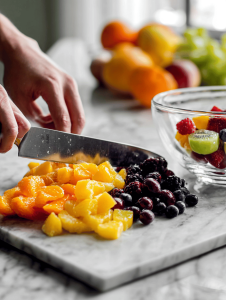
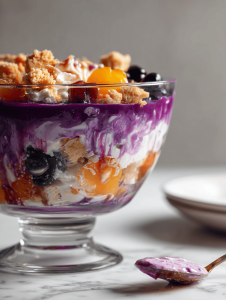
- Halloween-colored fruit (oranges, berries, purple grapes): Adds vibrant color and fresh sweetness; a visual punch.
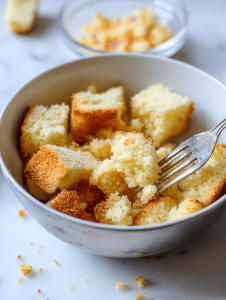
- Crumbled cookies or sponge cake: Provides crunch and structure; use ginger snaps for spice.
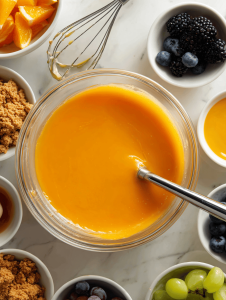
- Pumpkin or sweet potato puree: Adds a smooth, earthy sweetness; swap with mashed banana if needed.
- Edible glitter or black sprinkles: For that spooky shimmer; use sparingly for effect.
- Caramel or chocolate syrup: Drizzle for extra richness; opt for sugar-free if preferred.
- Gelatin or pudding layers: Create jiggly, creepy layers; can substitute with agar-agar for vegan.
Tools of the Spooky Trade
- Large mixing bowls: Mix and layer ingredients smoothly.
- Sharp knife: Cut fruit and layer components precisely.
- Whisk or electric mixer: Whip creams and set smooth layers.
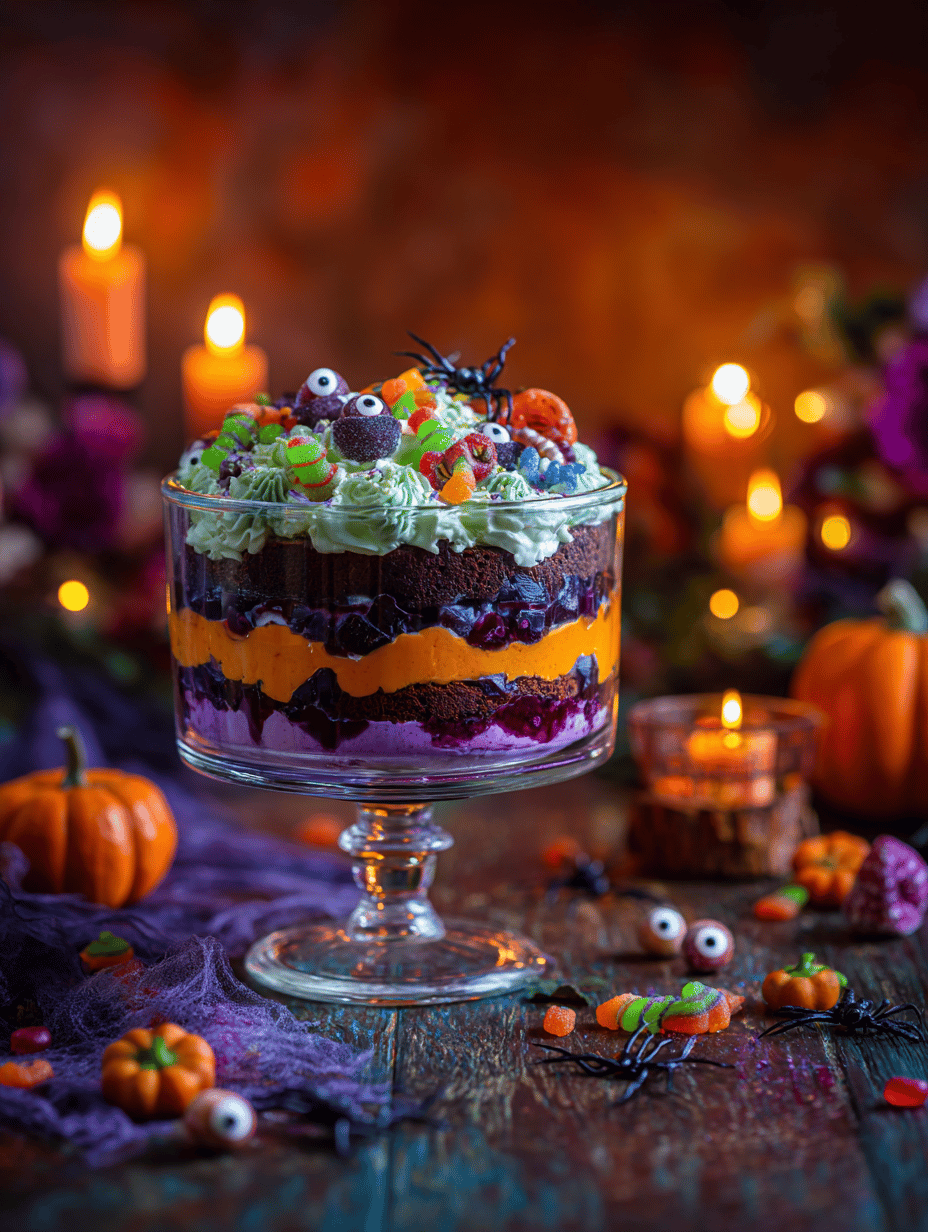
- Glass trifle dish or large clear bowl: Show off the colorful layers.
- Spatula or large spoon: Spread and layer ingredients neatly.
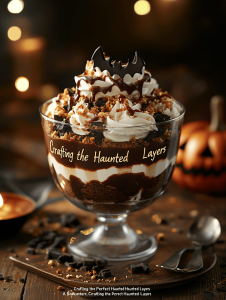
Crafting the Perfect Haunted Layers
Step 1: Gather your ingredients and equipment before starting. It’s easier to stay organized when everything’s at hand.
Step 2: Layer the spooky elements carefully; each one adds to the creepy, festive vibe.
Step 3: Chill the assembled trifle for at least 2 hours. It helps the flavors meld and the layers set perfectly.
Step 4: Serve with a drizzle of caramel or a sprinkle of edible glitter for that extra haunting glow.
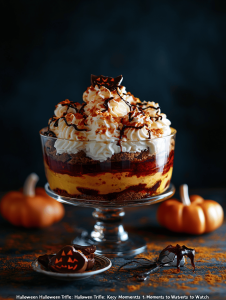
Halloween Trifle: Key Moments to Watch
- Ensure each layer is even and visible for a striking visual effect.
- Check the fridge after 2 hours; the layers should be firm but not frozen.
- Watch the color of fruit toppings; they should look vibrant and fresh, not dull or soggy.
Halloween Trifle: Common Pitfalls and Fixes
- Layers become mixed and muddy.? Use a gentle hand when layering; pressing too hard can squish delicate layers.
- Layers slide or collapse.? Chill the fruit and cream before assembling; warm ingredients melt layers.
- Layers become cloying.? Watch the sugar content in syrups; too sweet can overpower.
- Cream doesn’t hold its shape.? If the cream is too runny, whip it longer or add a touch of mascarpone.
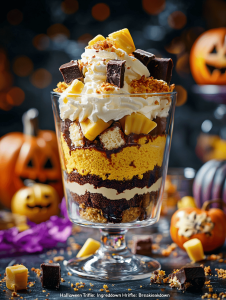
Halloween Trifle
Ingredients
Equipment
Method
- Begin by whipping the chilled heavy cream in a large bowl using a whisk or electric mixer until soft peaks form, creating a fluffy, creamy layer.
- Chop the Halloween-colored fruit into bite-sized pieces, ensuring vibrant colors are visible for a festive look.
- Crumble the cookies or sponge cake into small, crunchy pieces, ready to add texture to the layers.
- In a large mixing bowl, gently fold together the whipped cream, fruit, crumbled cookies, and pumpkin or sweet potato puree, creating a colorful, marbled mixture.
- Pour a layer of the mixture into the bottom of your glass trifle dish, spreading it evenly with a spatula.
- Prepare the gelatin or pudding layer according to package instructions, then pour it over the first layer, ensuring it spreads evenly and begins to set.
- Add another layer of the fruit and cookie mixture on top of the set gelatin, pressing lightly to create distinct layers.
- Repeat pouring the gelatin layer and then adding the remaining fruit mixture, creating multiple colorful layers.
- Finish by smoothing the top layer and drizzling with caramel or chocolate syrup for extra richness and visual appeal.
- Sprinkle a light dusting of edible glitter or black sprinkles over the top for a spooky shimmer.
- Chill the assembled trifle in the refrigerator for at least 2 hours, allowing the layers to set and flavors to meld.
- Once chilled, serve your spooky Halloween trifle in clear bowls, reveling in its vibrant colors and fun, jiggly texture.

Notes

Hi, I’m Grace Morgan, and welcome to my kitchen. This is a space shaped by family meals, curious hands reaching for snacks, paws under the table, and recipes that come together in the middle of real life. I’m a food blogger, a mother, and a passionate pet keeper. Most days, I’m cooking with one eye on the stove and the other on someone who needs me, whether that’s a child asking for a taste or a dog hoping something might fall.


