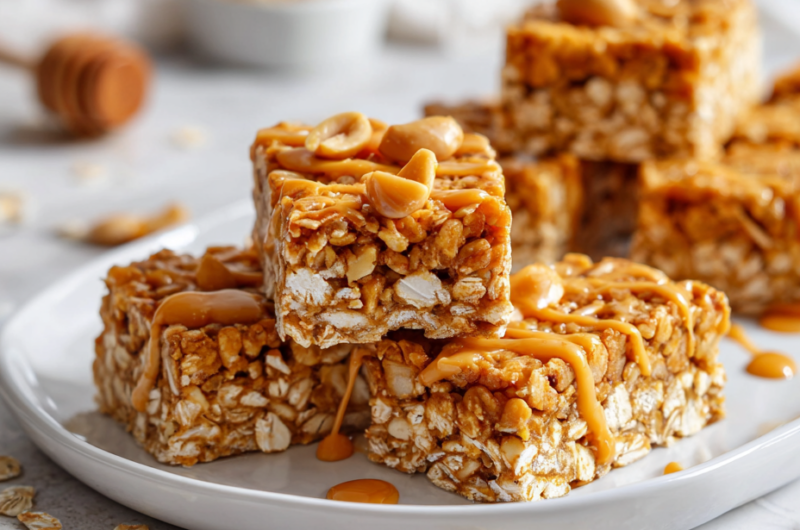
Mornings can be chaos, right? That’s why I love these no-bake peanut oat bars—they come together in minutes, no oven needed, and still hit that sweet, crunchy spot I crave after a busy start. It’s like having a homemade treat ready in the fridge, perfect for grabbing on the go or sneaking a snack during a hectic day.
What I appreciate most is how flexible this recipe is. You can swap out ingredients or add a handful of chocolate chips if you’re feeling indulgent. It’s honest, practical cooking—no fuss, no waiting, just a simple, satisfying snack that makes mornings a little less frantic and a lot more manageable.
Focusing on how this no-bake method makes snack prep quick and accessible for busy mornings, while still satisfying that craving for something crunchy and sweet.
The story behind this recipe
- This recipe was born out of late-night fridge raids and a craving for something crunchy and salty. I wanted a snack that I could throw together without turning on the oven, especially when energy is running low but I still need a quick fix. Over the years, I kept tweaking it, trying to get that perfect balance of nutty, sweet, and just enough crunch to satisfy without overdoing it.
- One evening, I realized I had a jar of peanut butter, some oats, and a handful of honey—perfect ingredients for a no-fuss treat. That night, I threw everything into a pan, pressed it into a pan, and the next morning, I had bars that tasted like childhood but with a grown-up twist. Now, they’re my go-to for mornings that need a quick win or afternoon energy boosts.
- heading
- story_type
Key ingredients and tips
- Peanut butter: I prefer a creamy, slightly salty variety—adds richness and helps bind everything together. If you want less salt, go for a natural, unsalted one.
- Old-fashioned oats: They give the bars that hearty chew and subtle nutty flavor. Steel-cut oats are too firm—stick with classic rolled oats for the right texture.
- Honey: It’s the glue that holds these bars together and adds a sweet, floral note. For a more neutral taste, maple syrup works but makes it a tad softer.
- Dark chocolate chips: I love the contrast of bitter-sweet melty pockets—use semisweet or bittersweet for depth. For a nutty twist, toss in some chopped nuts instead.
- Salt: Just a pinch enhances everything—trust me, don’t skip it. If you’re watching sodium, use sea salt flakes for more flavor punch.
- Vanilla extract: A splash adds warmth and depth—don’t skip this. If you’re out, a tiny dash of almond extract can be a nice substitute.
- Coconut oil (optional): I add a teaspoon for shine and a slight melt-in-your-mouth finish—skip if you prefer a firmer bar, but it prevents dryness.
Spotlight on key ingredients
Peanut butter:
- I prefer a creamy, slightly salty variety—adds richness and helps bind everything together. If you want less salt, go for a natural, unsalted one.
- Old-fashioned oats: They give the bars that hearty chew and subtle nutty flavor. Steel-cut oats are too firm—stick with classic rolled oats for the right texture.
- Honey: It’s the glue that holds these bars together and adds a sweet, floral note. For a more neutral taste, maple syrup works but makes it a tad softer.
Dark chocolate chips and salt:
- Dark chocolate chips: I love the contrast of bitter-sweet melty pockets—use semisweet or bittersweet for depth. For a nutty twist, toss in some chopped nuts instead.
- Salt: Just a pinch enhances everything—trust me, don’t skip it. If you’re watching sodium, use sea salt flakes for more flavor punch.
Notes for ingredient swaps
- Dairy-Free: Nut or seed butters like tahini or sunflower seed butter work well, but note they can introduce a slightly different flavor and may affect the binding.
- Sweeteners: Maple syrup or agave nectar can replace honey, offering a different depth of sweetness; expect a softer, less chewy texture.
- Oats: Steel-cut oats can be too tough—stick with rolled oats for a balanced chew and easier binding.
- Chocolate Chips: Carob chips or chopped dried fruits can be swapped for a dairy-free, fruity burst—watch for moisture changes.
- Add-ins: Chopped nuts, coconut flakes, or dried berries can be mixed in for extra texture—consider their moisture content to avoid sogginess.
- Oil: Coconut oil or light vegetable oil can replace or supplement for extra shine and mouthfeel—use sparingly to avoid making the bars greasy.
- Salt: Sea salt flakes or Himalayan pink salt can boost flavor without overly increasing sodium—adjust to taste.
Equipment & Tools
- 20×20 cm (8×8 inch) baking pan: To shape and hold the mixture as it sets.
- Rubber spatula: For mixing and pressing the mixture evenly.
- Small saucepan: To melt the peanut butter and honey gently.
- Parchment paper: To prevent sticking and make removal easier.
Step-by-step guide to no bake bars
- Gather your equipment: a 20×20 cm (8×8 inch) baking pan, a rubber spatula, a small saucepan, and parchment paper. Line the pan with parchment for easy removal.
- In the saucepan over low heat (about 60°C/140°F), melt 1 cup (250 g) peanut butter and 1/4 cup (60 ml) honey, stirring constantly until smooth and fragrant, about 2-3 minutes. Be careful not to overheat or burn the mixture.
- Remove from heat. Stir in 1 teaspoon (5 ml) vanilla extract and a pinch of salt. Mix well to combine all flavors evenly.
- Add 2 cups (180 g) old-fashioned oats and 1/2 cup (90 g) dark chocolate chips. Fold everything together with a spatula until the oats are coated and the chips are evenly distributed. If the mixture feels too dry, add a tiny splash of water or more honey.
- Transfer the mixture to your prepared pan. Use the spatula to press it evenly into the corners and smooth the top. Apply gentle pressure to compact the mixture—this helps keep the bars together.
- Refrigerate uncovered for at least 2 hours, or until firm. If in a hurry, freeze for 45 minutes. The bars should feel solid and hold their shape when pressed lightly.
- Once set, lift the whole block out of the pan using the parchment edges. Place on a cutting board and slice into 8-10 bars, depending on your preferred size. Use a sharp knife and wipe it clean between cuts for neat edges.
- For a glossy finish, you can briefly warm a little extra peanut butter and brush it over the top. Let it set for another 10 minutes in the fridge before serving.
Refrigerate the bars uncovered for at least 2 hours until firm. Slice into bars and optionally brush with warm peanut butter for extra shine. Store in an airtight container in the fridge for up to a week.
How to Know It’s Done
- Mixture is smooth and glossy after melting.
- Bars are firm and hold shape when pressed.
- Chocolate chips are slightly melted but not burnt.
No-Bake Peanut Oat Bars
Ingredients
Equipment
Method
- Line your baking pan with parchment paper to prevent sticking and set aside.
- In a small saucepan over low heat, combine the peanut butter and honey. Stir constantly until the mixture is smooth, warm, and fragrant, about 2-3 minutes.
- Remove the saucepan from the heat and stir in the vanilla extract and a pinch of salt, mixing until evenly incorporated.
- Pour the warm mixture over the oats and chocolate chips. Use a spatula to fold everything together until the oats are coated and the chocolate chips are evenly distributed.
- Transfer the mixture into your prepared pan. Press it down firmly with the back of a spatula or your fingers to create an even layer and compact the mixture.
- Refrigerate the pan uncovered for at least 2 hours, or until the mixture is firm and slices cleanly. For quicker setting, freeze for about 45 minutes.
- Once set, lift the entire block out of the pan using the parchment paper and place on a cutting board.
- Use a sharp knife to cut the block into bars or squares of your preferred size, wiping the knife clean between cuts for neat edges.
- If desired, warm a small amount of peanut butter and gently brush it over the tops of the bars for a glossy finish. Let sit in the fridge for another 10 minutes to set.
- Enjoy these chewy, crunchy bars immediately or store them in an airtight container in the fridge for up to a week.
Pro tips for perfect bars
- Use a silicone spatula to fold ingredients gently—keeps everything from breaking apart.
- Chill the mixture briefly before pressing—makes it easier to compact and prevents sticking.
- Slightly warm the peanut butter mixture if it’s too stiff—helps achieve a smooth, even press.
- Use parchment paper to lift out the set mixture—avoids sticking and keeps edges tidy.
- Press down firmly and evenly—this prevents crumbling and ensures clean bars.
- Chill uncovered for at least 2 hours—maximizes firmness and easy slicing.
- Wipe your knife clean between cuts—gets neat, straight edges without squishing.
Common mistakes and how to fix them
- FORGOT to measure ingredients precisely → Use a scale for accuracy.
- DUMPED mixture into pan without pressing → Press firmly for even bars.
- OVER-TORCHED chocolate chips → Stir constantly and remove from heat early.
- MISSED refrigerating time → Chill at least 2 hours for proper firmness.
Quick fixes and pantry swaps
- When mixture is too stiff, splash in a tiny bit of hot water and stir well.
- When bars crumble, patch with a thin layer of warm peanut butter before chilling.
- Splash cold water on your knife if it sticks too much for clean cuts.
- Shield delicate chocolate chips from direct heat to prevent over-melting.
- If mixture feels dry, add a small drizzle of honey to help it stick together.
Prep, store, and reheat tips
- Prepare the mixture and press into the pan up to a day in advance; keep covered in the fridge to maintain freshness and prevent drying out, with the oats retaining a chewy texture.
- Store the finished bars in an airtight container in the fridge for up to a week; the cool environment keeps the peanut butter vibrant and prevents melting.
- For longer storage, freeze the bars for up to a month; wrap individually in plastic wrap, and thaw at room temperature for 10-15 minutes before cutting.
- Reheat only if you want to soften the bars slightly—briefly warm in the microwave for 10-15 seconds, just until the edges shimmer and smell toasted.
Common Questions About No Bake Peanut Oat Bars
1. Can I use crunchy peanut butter?
Yes, you can swap crunchy peanut butter for smooth, but the texture will be less chewy and more uniform.
2. Can I use a different sweetener?
Absolutely, honey helps the bars hold together and adds sweetness. Maple syrup or agave can work as substitutes.
3. Can I add chocolate?
Yes, melted chocolate can be added on top or mixed in for extra richness and a glossy finish.
4. How long do I need to chill the bars?
Refrigerate for at least 2 hours until the bars are firm. They should feel solid and snap when cut.
5. How should I store these bars?
Store in an airtight container in the fridge for up to a week or freeze for longer storage.
6. Can I use different oats?
Use rolled oats for a chewy, hearty texture. Steel-cut oats are too tough and won’t bind well.
7. Can I use other nut butters?
Yes, you can substitute almond or cashew butter, but the flavor will be different and might affect binding.
8. My mixture is too dry, what do I do?
If mixture is too dry, stir in a tiny splash of hot water or honey to loosen it up.
9. Are these bars dairy-free?
To make these bars dairy-free, use seed butters like tahini or sunflower seed butter, which add a different flavor but work well.
10. How can I make the bars softer?
If you want a softer bar, add a little more honey or a dash of coconut oil before mixing.
These no-bake peanut oat bars are a reminder that simple ingredients can come together for something unexpectedly satisfying. They’re perfect for when time is tight but you need a treat that’s both comforting and practical. Plus, they carry a little piece of nostalgic crunch that’s hard to beat.
Whenever I make a batch, I’m reminded how flexible and forgiving this recipe really is—no oven, no fuss, just good, honest snack food. It’s a small, easy way to keep a little homemade comfort in the fridge, ready whenever hunger or craving hits.

Hi, I’m Grace Morgan, and welcome to my kitchen. This is a space shaped by family meals, curious hands reaching for snacks, paws under the table, and recipes that come together in the middle of real life. I’m a food blogger, a mother, and a passionate pet keeper. Most days, I’m cooking with one eye on the stove and the other on someone who needs me, whether that’s a child asking for a taste or a dog hoping something might fall.


