This no-bake ricotta cheesecake is the kind of dessert that feels like a warm hug after a long day. It’s imperfect, a little rustic, and totally forgiving — perfect for when you want sweet relief without turning on the oven. I love how it lets the creamy ricotta shine, with just a hint of lemon and a gentle sweetness that’s not overpowering.
Honestly, I stumbled on this recipe during a chaotic weekend when I needed something quick but special. No fuss, no baking, just a few simple ingredients coming together in the fridge while I half-watched my kiddo build a fortress out of couch cushions. It’s a reminder that sometimes, the best things happen without a lot of fuss, just honest, straightforward flavor.
This recipe is all about embracing the imperfect, unpolished moments in the kitchen—like a cheesecake that’s a little rustic, a little free-form, but still stunning and satisfying. It’s perfect for those who want a sweet treat without fuss, and who find joy in the process of making something beautiful with their hands, even if it’s not picture-perfect.
Embracing Imperfection in Every Slice
- This recipe came together on a whim after a long week, proving that simple can be stunning.
- I love how the ricotta’s mild tang reminds me of lazy Sunday mornings with coffee and croissants.
- There’s a nostalgic comfort in the creamy texture, like childhood desserts but with a grown-up twist.
- Sometimes I get impatient waiting for it to set, but the first slice always makes me smile.
- Making this cheesecake feels like a quiet act of self-care, no oven needed, just a little patience and love.
The story behind this recipe
- This recipe was born out of a lazy weekend experiment. I wanted something sweet, creamy, and easy—no oven, no fuss. One afternoon, I grabbed some ricotta, a lemon, and a graham cracker crust, and just went for it. The result was unexpectedly light, tangy, and satisfying, perfect for those times when you need a quick dessert that still feels special.
- What really made me fall for this cheesecake was how forgiving it is. Sometimes, the best desserts are the ones you throw together without overthinking. Plus, it’s a good reminder that simplicity often tastes the best—no fancy ingredients, just honest, everyday stuff turned into something delicious.
- heading: The story behind this recipe
Historical & Cultural Tidbits
- This recipe likely has roots in Italian countryside traditions where fresh ricotta was a staple, turned into simple, no-bake desserts for summer heat.
- The idea of skipping the oven might have gained popularity during times of rationing or in warm climates where baking was less practical.
- Ricotta-based desserts have been enjoyed across Europe for centuries, but the modern no-bake version became a hit with the rise of quick, fresh treats in the 20th century.
Key Ingredients
- Ricotta: I love how it’s creamy and mild, providing a soft, almost velvety texture. Use fresh if you can; it makes all the difference in flavor.
- Lemon zest: Brightens the whole dish with a zing that cuts through the richness. Don’t skip it, even if you’re tempted to go easier on the zest.
- Graham cracker crust: I prefer a slightly thicker crust for more crunch, but if you’re in a rush, a thinner layer still works just fine.
- Honey or maple syrup: Adds a subtle sweetness and helps smooth out the ricotta. Adjust based on your sweetness preference—less if you want more tang.
- Vanilla extract: Just a splash enhances the overall flavor without overpowering. Use real vanilla if you’ve got it, the aroma is worth it.
- Heavy cream (optional): I sometimes fold it in for extra lightness, but it’s perfectly creamy without it. Whip it until soft peaks for best fluff.
- Lemon juice: Use fresh for that zesty punch—store-bought can be a little dull and lacks the zing I crave in every bite.
Spotlight on Key Ingredients
Ricotta:
- I love how it’s creamy and mild, providing a soft, almost velvety texture. Use fresh if you can; it makes all the difference in flavor.
- Lemon zest: Brightens the whole dish with a zing that cuts through the richness. Don’t skip it, even if you’re tempted to go easier on the zest.
Crust ingredients:
- Graham cracker crust: I prefer a slightly thicker crust for more crunch, but if you’re in a rush, a thinner layer still works just fine.
- Honey or maple syrup: Adds a subtle sweetness and helps smooth out the ricotta. Adjust based on your sweetness preference—less if you want more tang.
Notes for ingredient swaps
- Dairy-Free: Swap ricotta for blended silken tofu—smooth but less tangy, with a softer texture.
- Gluten-Free: Use crushed gluten-free graham crackers or digestive biscuits—crisp and nutty, just like the original.
- Sweetener: Maple syrup or agave nectar can replace honey—slightly different flavor, but equally luscious.
- Lemon Zest: Lime zest adds a slightly different citrus punch—more floral and less bright, but still lovely.
- Cream Alternative: Coconut cream folded in offers a subtle coconut flavor—rich and fragrant, with a tropical twist.
- Crust Base: Oats or almond meal can replace graham crackers—grainier texture, more rustic feel.
- Flavor Boost: Add a splash of orange liqueur or vanilla bean seeds—enhances depth, keeps it interesting.
Equipment & Tools
- Springform pan: To hold the cheesecake and allow easy removal of the sides.
- Mixing bowls: For blending the filling ingredients.
- Spatula and rubber scraper: To fold ingredients and smooth the top.
- Measuring spoons and cups: For accurate ingredient measurement.
- Crushing tool or plastic bag and rolling pin: To crush the graham crackers into fine crumbs.
Step-by-step guide to no-bake ricotta cheesecake
- Gather your equipment: a 20cm (8-inch) springform pan, mixing bowls, a spatula, and a rubber scraper.
- In a mixing bowl, combine 2 cups (480g) of ricotta cheese with 1/2 cup (120ml) of honey or maple syrup. Mix until smooth and creamy, about 2-3 minutes.
- Add the zest of one lemon and 1 teaspoon of vanilla extract. Mix again to incorporate the bright flavors.
- Gently fold in 1 cup (240ml) of heavy cream if using, until just combined. The mixture should be fluffy and light.
- Prepare the crust: crush 150g of graham crackers or digestive biscuits into fine crumbs. Mix with 4 tablespoons of melted butter and a pinch of salt.
- Press the crumb mixture evenly into the bottom of your springform pan. Use the back of a spoon to pack it firmly. Chill in the fridge for 10 minutes to set.
- Pour the ricotta mixture over the chilled crust. Smooth the top with a spatula or an offset knife.
- Cover the pan with plastic wrap and refrigerate for at least 4 hours, preferably overnight, until set and firm.
- Once chilled and set, run a knife around the edge of the pan before unsealing the springform. Carefully remove the sides.
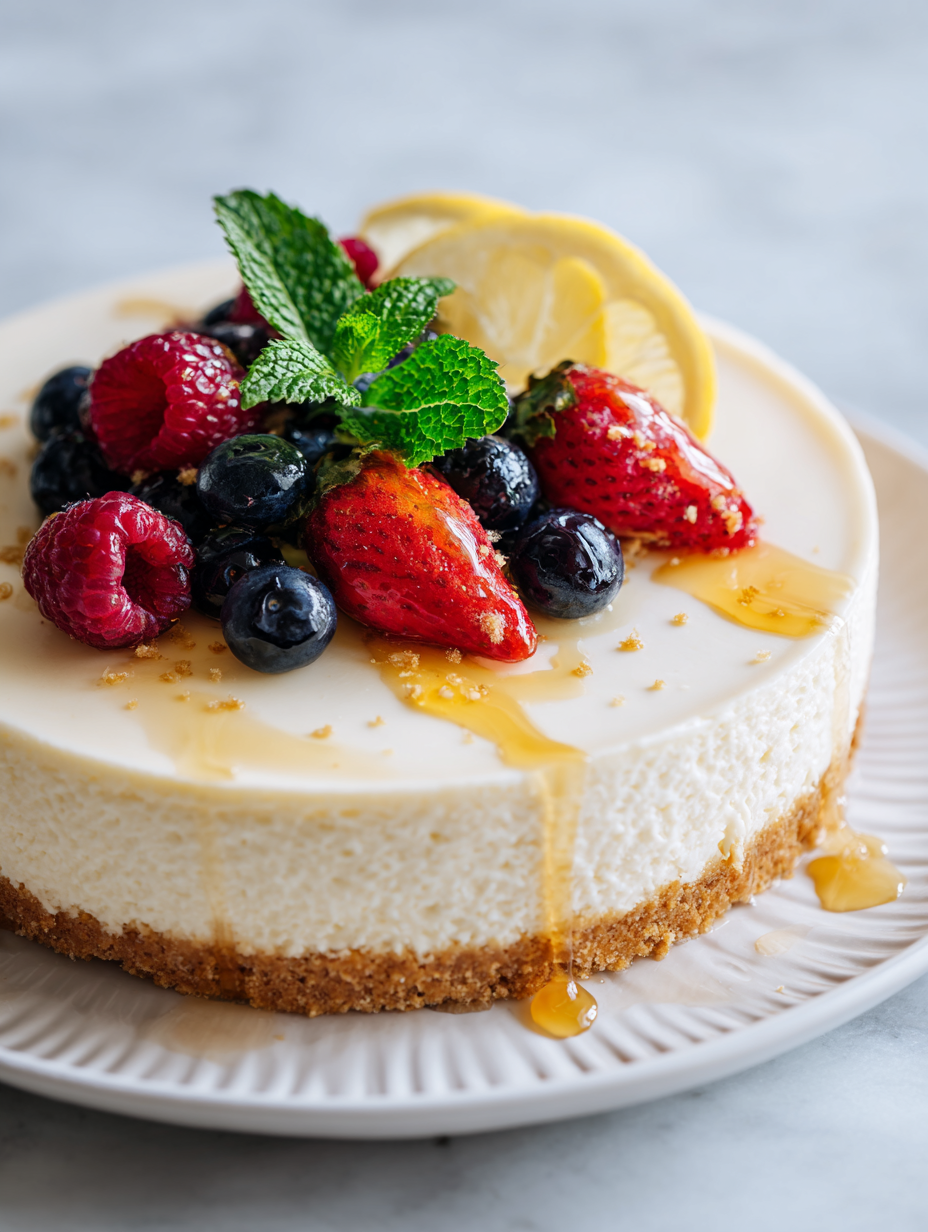
- Finish with a dusting of powdered sugar or a few lemon zest shavings. Slice and serve chilled.
Chill the cheesecake in the fridge for at least 4 hours, preferably overnight. Once set, carefully remove the sides of the springform pan. Serve cold, garnished with a dusting of powdered sugar or lemon zest for extra flair.
How to Know It’s Done
- The surface should be smooth and slightly firm to the touch.
- The edges will be pulling away slightly from the sides of the pan.
- When gently shaken, the center should jiggle just a little, indicating it’s properly set.
No-Bake Ricotta Cheesecake
Ingredients
Equipment
Method
- Crush the graham crackers into fine crumbs using a crushing tool or place them in a plastic bag and roll over with a rolling pin until finely ground.
- Mix the crushed graham cracker crumbs with melted butter until evenly coated and resembles wet sand.
- Press the crumb mixture firmly into the bottom of your springform pan, creating an even crust. Chill in the fridge for 10 minutes to firm up.
- In a mixing bowl, combine the ricotta cheese with honey or maple syrup. Mix with a spatula or spoon until smooth and creamy, about 2-3 minutes, and the mixture looks slightly fluffy.
- Add the lemon zest and vanilla extract to the ricotta mixture, stirring gently to incorporate the bright, fragrant flavors.
- If using whipped cream, gently fold it into the ricotta mixture using a spatula until just combined, keeping it light and airy.
- Pour the creamy ricotta filling over the chilled crust, smoothing the top with a spatula or rubber scraper for an even surface.
- Cover the springform pan with plastic wrap and refrigerate for at least 4 hours, ideally overnight, until the filling is firm and set.
- Once set, run a hot, damp knife around the edges of the springform pan to loosen the cheesecake, then carefully remove the sides.
- Garnish with a dusting of powdered sugar or extra lemon zest if desired. Slice and serve chilled for a creamy, rustic dessert.
Tips for a perfect cheesecake
- Bolded mini-head: Chill the crust thoroughly before filling—this prevents slipping and keeps the structure firm.
- Bolded mini-head: Use room temperature ricotta for a smoother, creamier filling—cold ricotta can make lumps.
- Bolded mini-head: Fold in whipped cream gently—preserves the airy texture and prevents deflation.
- Bolded mini-head: Add lemon zest gradually—stop when the aroma is bright and fragrant, not overpowering.
- Bolded mini-head: Tap the pan on the counter after pouring—releases air bubbles for a smoother top.
- Bolded mini-head: Let the cheesecake set in the fridge overnight—this develops flavor and perfects the texture.
- Bolded mini-head: Use a hot, damp knife to slice—clears through the creamy filling for a clean cut.
Common mistakes and how to fix them
- FORGOT to chill crust; fix by pressing and refrigerating for at least 10 minutes.
- DUMPED too much lemon zest; reduce or taste-test before adding more.
- OVER-TORCHED the crust; keep an eye to prevent burning, bake at 180°C (350°F) only if toasted.
- MISSED the setting time; let the cheesecake rest overnight for best firmness and flavor melding.
Quick Fixes and Pantry Swaps
- When the crust crumbles, patch with a thin layer of melted butter and press firmly.
- If the filling is too runny, chill for 30 minutes and fold in extra whipped cream to stabilize.
- Splash a little lemon juice on cracks to brighten and hide imperfections.
- Patch a cracked top with a thin layer of additional ricotta mixture and smooth gently.
- Shield the edges with foil if they brown too quickly during brief chillings.
Prep, store, and reheat tips
- You can prepare the cheesecake filling a day in advance; keep it covered in the fridge, where it develops a richer, slightly tangy flavor.
- The assembled cheesecake can be made up to 24 hours ahead; keep it chilled and covered tightly to prevent it from absorbing fridge odors.
- For optimal texture, serve the cheesecake straight from the fridge—allow it to sit at room temperature for 10 minutes to soften slightly before slicing.
- Shelf life is about 2-3 days in the fridge; after that, the ricotta may start to break down, and textures can change subtly.
- Reheating isn’t necessary—just slice and serve chilled. If you prefer it a little softer, let slices sit at room temp for 5-10 minutes, watching for a slight aroma of cream and lemon.
Top questions about no bake ricotta cheesecake
1. Can I use pre-packaged ricotta?
Yes, you can use store-bought ricotta, but fresh makes it creamier and tangier.
2. How long should I chill it?
Chill the cheesecake for at least 4 hours, ideally overnight, until it’s firm and slightly jiggles in the center.
3. Can I skip the lemon zest?
Use fresh lemon zest for brightness; bottled lemon juice won’t give the same zing and freshness.
4. Is this recipe dairy-free?
Yes, switch to coconut cream or almond milk-based creams for dairy-free options, but expect a subtler flavor.
5. Can I make it gluten-free?
Yes, the crust can be made gluten-free by swapping graham crackers for gluten-free biscuits or oats.
6. My filling is too liquid, what now?
If the filling is too runny, refrigerate it for 30 minutes or fold in extra whipped cream for stability.
7. How do I get neat slices?
Use a hot, damp knife to cut through the cheesecake for clean slices with minimal cracking.
8. Why does my cheesecake crack?
To prevent cracking, don’t overmix the filling and avoid opening the fridge door during setting.
9. Can I make it ahead?
You can prepare the crust and filling a day ahead, then assemble and chill overnight for best results.
10. The crust is crumbly, what do I do?
If the crust crumbles, press it back together with a little melted butter and chill briefly to set.
This cheesecake isn’t about perfection; it’s about the feeling of a simple, creamy treat that you can whip up in no time. The gentle tang of ricotta and the bright lemon zest make every bite a little moment of joy, especially when shared with someone you love or even just yourself. Sometimes, the best desserts are the ones that come together with honest effort and a little bit of patience.
In a world that’s often rushing past, this no-bake ricotta cheesecake offers a pause—a quiet, satisfying moment that’s easy to pull off, yet feels special. It’s a reminder that good things don’t always need to be complicated; they just need a little love, a few good ingredients, and time in the fridge.

Hi, I’m Grace Morgan, and welcome to my kitchen. This is a space shaped by family meals, curious hands reaching for snacks, paws under the table, and recipes that come together in the middle of real life. I’m a food blogger, a mother, and a passionate pet keeper. Most days, I’m cooking with one eye on the stove and the other on someone who needs me, whether that’s a child asking for a taste or a dog hoping something might fall.


