Getting that perfect sear on scallops is all about timing and temperature. It’s a small dance — heat the pan just right, wait for that first crackle, and flip at the exact moment when the surface is golden and crusty but the inside remains tender. It’s honestly kind of addictive, chasing that balance of crispy exterior and juicy interior.
I’ve learned that the tiniest adjustments — whether it’s the heat level or how long you let them sit before flipping — make all the difference. It’s not about rushing but paying close attention to texture and smell. When it all comes together, those scallops are buttery, with a smoky edge, and they practically melt on your tongue. That’s when I know I’ve nailed it.
Focusing on the importance of timing and temperature control to achieve the perfect sear and tender interior, highlighting how small adjustments can transform the dish from average to exceptional.
The subtle art of timing and temperature
- Seared scallops remind me of summer evenings by the coast, where everything feels just a little more vibrant.
- Getting that perfect crust used to feel like a gamble, but now it’s just about patience and a hot pan.
- There’s a quiet pride in flipping scallops with confidence, knowing I’ve nailed that golden, crispy surface.
- The aroma of caramelized scallops always pulls me back to family dinners around the table, full of laughter.
- Nothing beats the moment when the scallops are tender inside, with a smoky, buttery crust—pure joy in each bite.
The story behind this recipe
- Seared scallops have always felt like a small miracle in the kitchen—transforming simple seafood into something special with just heat and patience. I remember the first time I managed that perfect crust; it was like discovering a secret handshake with the pan. Since then, I’ve been chasing that crispy, caramelized surface while keeping the inside tender and juicy, almost like a little culinary magic trick.
- This recipe came from countless experiments in my tiny apartment kitchen, trying to capture that elusive balance. It’s not just about technique but about respecting the scallops’ delicate nature and knowing when to step back and let the heat do its work. Every time I get it right, I feel a small thrill—like I’ve cracked a code that’s both simple and deeply satisfying.
- heading: ‘The story behind this recipe’
Contextual origin, trivia, or history
- Pan searing scallops became popular in French cuisine in the 20th century as a quick, elegant way to prepare fresh seafood.
- Scallops have been harvested for thousands of years, but their preparation as a seared delicacy gained momentum in coastal regions of Europe and North America.
- The technique of searing seafood to develop a caramelized crust was historically used to preserve freshness and add flavor before refrigeration.
- In some cultures, scallops symbolize good fortune and are often featured in celebratory dishes, highlighting their luxurious status.
- The term ‘scallop’ comes from the Old French ‘escalope,’ referring to thin slices, but searing transforms their shape into a crispy, golden crust.
Ingredient breakdown
- Scallops: I look for those firm, slightly translucent centers—anything milky or soft means they’re overdone. You want a firm texture, but tender inside, with that irresistible sweet ocean smell.
- Salt: I prefer kosher salt for a clean, mild seasoning that won’t overpower the delicate scallops. Sprinkle just before cooking to help form a crust without drawing out too much moisture.
- Black pepper: Freshly cracked pepper adds a spicy kick and smoky aroma. I like to add it after searing for maximum flavor impact.
- Oil: I reach for a high-smoke-point oil like grapeseed or canola—look for that shimmering, almost smoky smell when it’s hot enough. No butter in the initial sear; it burns easily and can make the scallops greasy.
- Butter: I add a small knob at the end—sizzle and foam, then tilt the pan to baste. It brings richness and a nutty aroma that balances the ocean sweetness.
- Lemon: A squeeze right after plating brightens everything up. The citrus cuts through the richness and adds a fresh, zesty note that wakes up the palate.
- Parsley or herbs: A quick chop for garnish adds color and a hint of herbal freshness. I keep it simple—sometimes just a sprinkle over the top for visual pop.
Spotlight on key ingredients
Scallops:
- I look for those firm, slightly translucent centers—anything milky or soft means they’re overdone. You want a firm texture, but tender inside, with that irresistible sweet ocean smell.
- Salt: I prefer kosher salt for a clean, mild seasoning that won’t overpower the delicate scallops. Sprinkle just before cooking to help form a crust without drawing out too much moisture.
Oil and Butter:
- Oil: I reach for a high-smoke-point oil like grapeseed or canola—look for that shimmering, almost smoky smell when it’s hot enough. No butter in the initial sear; it burns easily and can make the scallops greasy.
- Butter: I add a small knob at the end—sizzle and foam, then tilt the pan to baste. It brings richness and a nutty aroma that balances the ocean sweetness.
Notes for ingredient swaps
- Seafood-Free: Substitute with firm tofu slices—crisp on the outside, tender inside, with a nutty aroma. Keep the pan hot and sear until golden.
- Dairy-Free: Skip butter at the end and use a splash of olive oil—still rich, but a bit more grassy and less nutty in aroma.
- Vegan: Use coconut oil for a mild sweetness and tropical scent, but watch the heat to prevent burning.
- Low-Sodium: Use less salt or a salt substitute—scallops will be less salty, so consider adding a squeeze of lemon for brightness.
- Herb Variations: Swap parsley for thyme or chives—different aromatic profiles, but equally fresh and vibrant.
- Acid Adjustments: Lemon is classic, but lime or white wine vinegar can add a different tang—use sparingly to avoid overpowering.
- Oil Choices: Grapeseed or canola are neutral, but a splash of sesame oil at the end adds a toasted, nutty note—use sparingly.
Equipment & Tools
- Heavy skillet (preferably cast iron): Ensures even heat and good sear
- Tongs or spatula: For flipping the scallops gently
- Paper towels: Dry scallops thoroughly before cooking
- Lemon: Finish and brighten the dish
Step-by-step guide to pan searing
- Equipment & Tools: Gather a heavy-bottomed skillet (preferably cast iron) for even heat and a spatula or tongs for flipping.
- Ensure scallops are patted dry with paper towels to remove excess moisture, which helps achieve a good sear.
- Heat the skillet over medium-high heat until shimmering—about 2-3 minutes. Add a small splash of high-smoke-point oil and let it heat until it just starts to smoke slightly.
- Place scallops in the hot pan, spaced apart—don’t overcrowd. Sear without moving for 1.5-2 minutes until the edges turn golden and crispy.
- Flip the scallops carefully using tongs or a spatula. Sear the other side for another 1.5-2 minutes. You want a deep golden crust, and the scallops should feel firm but still slightly springy.
- If you see any sticking, give the pan a moment longer or gently loosen with the spatula; don’t force them, or they’ll tear.
- Add a small knob of butter during the last 30 seconds, tilting the pan and spooning the melted butter over the scallops for extra richness and flavor.
- Remove scallops from the pan immediately and transfer to a plate. Let rest for 1 minute to allow juices to settle.
- Finish with a squeeze of lemon and a sprinkle of herbs. Serve hot, with a side that complements the crispy crust and tender inside.
Transfer scallops to a plate and let rest for 1 minute. Finish with lemon juice and herbs, then serve immediately.
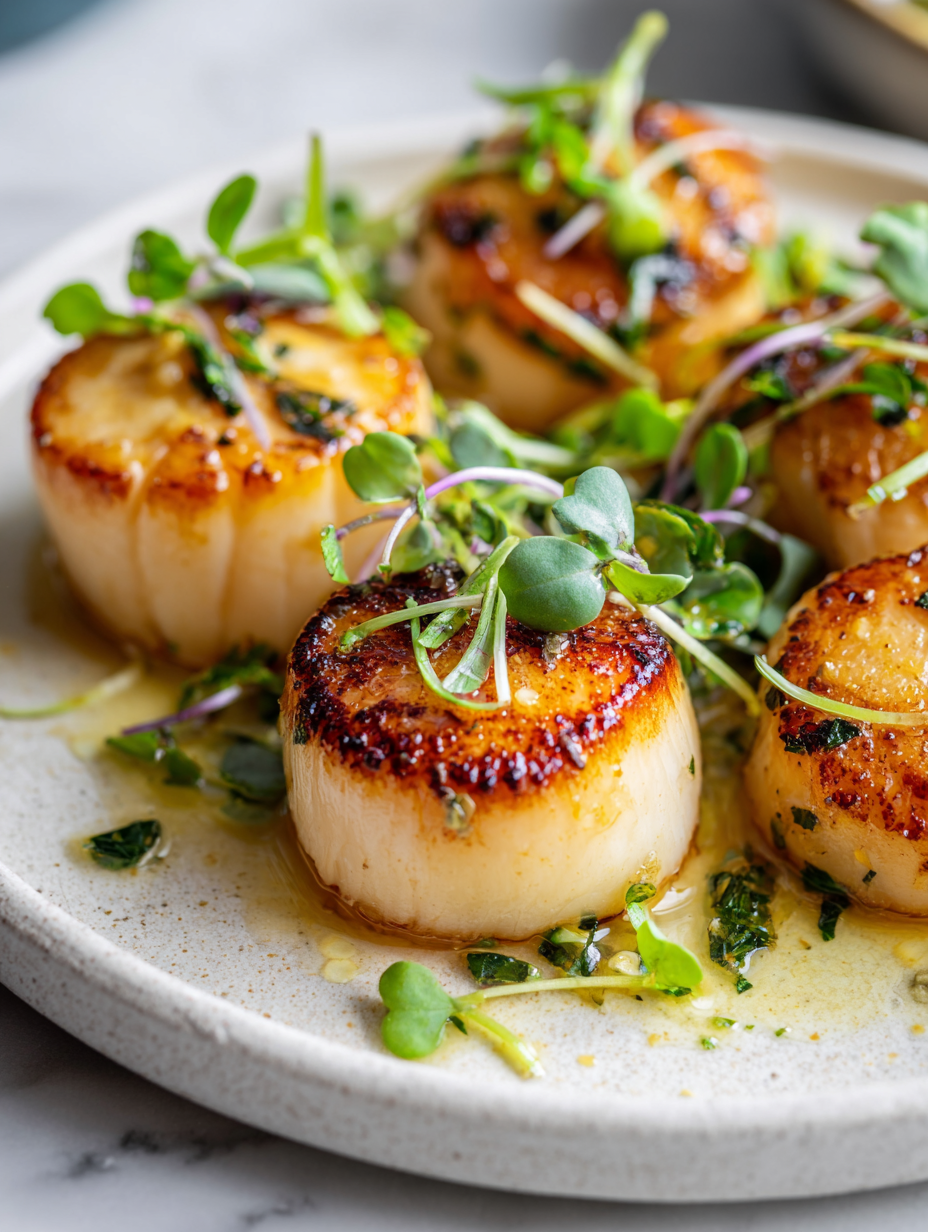
How to Know It’s Done
- Crust: Deep golden, crispy exterior with slight caramelization.
- Texture: Firm but tender, with a slight bounce when pressed.
- Appearance: Edges crispy and slightly caramelized, center opaque but moist.
Perfect Pan-Seared Scallops
Ingredients
Equipment
Method
- Pat the scallops dry thoroughly with paper towels to remove excess moisture, which helps achieve a crisp sear.
- Season the scallops lightly with kosher salt on all sides to enhance flavor and promote crust formation.
- Heat your heavy skillet over medium-high heat until it’s hot and shimmering, about 2-3 minutes, and add the oil. Let it heat until it just starts to shimmer and smoke slightly.
- Place the scallops in the hot pan, spacing them apart to prevent overcrowding. Sear without moving for 1.5-2 minutes until the edges are deep golden and crispy.
- Flip the scallops carefully using tongs or a spatula, and sear the other side for another 1.5-2 minutes until equally golden and crusty.
- Add the butter to the pan during the last 30 seconds, tilting the pan and spooning the melted butter over the scallops to baste them with richness and aroma.
- Remove the scallops from the pan and transfer them to a plate. Let them rest for about 1 minute to allow juices to redistribute.
- Squeeze fresh lemon juice over the scallops and sprinkle with chopped herbs or parsley for a bright finishing touch.
- Serve immediately while the crust is crispy and the interior remains juicy and tender.
Pro tips for perfect scallops
- Dry scallops thoroughly: Use paper towels to remove moisture, ensuring a crisp, golden crust without steaming.
- Preheat the pan: Wait until the oil shimmers and just begins to smoke—this helps develop that perfect sear.
- Don’t overcrowd: Leave space between scallops; crowding causes steaming, not searing, and ruins the texture.
- Flip at the right moment: When edges turn deep golden and release easily, it’s time to flip—timing is everything.
- Finish with butter: Add a small knob at the end, tilt the pan, and spoon over for rich, toasted aroma and flavor.
- Rest briefly: Let scallops sit for a minute after cooking—this helps juices redistribute and keeps them tender.
Common mistakes and how to fix them
- FORGOT to dry scallops thoroughly → They won’t sear properly; pat dry with paper towels.
- DUMPED oil into cold pan → Always heat oil until shimmering before adding scallops.
- OVER-TORCHED the pan → Keep heat at medium-high; avoid burning the oil or scallops.
- MISSED flipping timing → Flip when edges are golden and bottom releases easily.
Quick fixes and pantry swaps
- If scallops stick, splash a little water to loosen and prevent tearing.
- When oil shimmers, add scallops quickly—rescue a smoky scent with a splash of broth.
- Dumped scallops in cold pan? Remove and heat pan first for even searing.
- Over-torched pan? Reduce heat immediately and add a splash of oil to cool down.
- Shield from smoke by opening a window or turning on the exhaust fan for a quick escape.
Prep, store, and reheat tips
- Dry scallops thoroughly with paper towels before storing to prevent moisture buildup, which can make searing tricky.
- Store unseared scallops in an airtight container in the fridge for up to 1-2 days; keep cold and dry for best freshness.
- For longer storage, freeze scallops in a single layer wrapped tightly in plastic wrap and then in foil—best used within 3 months.
- Reheat cooked scallops gently in a warm pan over low heat for a minute or two, just until warmed through—avoid overcooking to keep them tender.
- Fresh scallops are best enjoyed immediately, but properly stored, they retain their delicate sweetness and firm texture for a day or two.
Top questions about pan seared scallops
1. How do I pick the best scallops?
Look for scallops that feel firm and have a slight translucence. They should smell fresh, like the ocean, not fishy or sour.
2. Should I dry the scallops before searing?
Dry the scallops thoroughly with paper towels before cooking. Excess moisture prevents a good sear and leads to steaming.
3. What oil is best for searing scallops?
Use a high-smoke-point oil like grapeseed or canola. It should shimmer and just start to smoke before adding scallops.
4. How hot should the pan be?
Heat the pan until the oil shimmers and just begins to smoke. This ensures a hot surface for a perfect crust.
5. How long do I sear each side?
Sear the scallops for about 1.5-2 minutes per side, until edges are deep golden and crispy. Don’t move them too early.
6. When should I flip the scallops?
Flip when the edges turn deep golden and the scallop releases easily from the pan. Use tongs or a spatula gently.
7. Should I add butter during searing?
Add a small knob of butter during the last 30 seconds, tilt the pan, and spoon the melted butter over the scallops.
8. How long should I rest scallops after cooking?
Let the scallops rest for about 1 minute after cooking. This helps juices redistribute and keeps them tender.
9. What are signs my scallops are cooked perfectly?
Look for a deep golden, crispy crust, firm but tender texture, and a juicy, opaque center to know they’re done.
10. Can I prepare scallops ahead of time?
Store scallops in an airtight container in the fridge for up to 2 days. For longer, freeze properly wrapped in plastic.
Mastering pan-seared scallops is a small thrill that sticks with you. It’s about understanding heat, patience, and that perfect moment when everything clicks into place. Once you get it right, those tender, crispy bites become a go-to for impressing yourself and others alike.
In a time when quick, satisfying dishes matter more than ever, this recipe offers a straightforward way to elevate seafood at home. It’s simple, honest, and a reminder that sometimes, the best things happen when you keep it just a little bit raw and real.

Hi, I’m Grace Morgan, and welcome to my kitchen. This is a space shaped by family meals, curious hands reaching for snacks, paws under the table, and recipes that come together in the middle of real life. I’m a food blogger, a mother, and a passionate pet keeper. Most days, I’m cooking with one eye on the stove and the other on someone who needs me, whether that’s a child asking for a taste or a dog hoping something might fall.


